The Mighty Potato | Hasselbacka

Muutama viikko sitten aloitin oodin perunalle, tuolle mukuloista monipuolisimmalle. Viimeksi peruna raastettiin kokonaan uuteen muotoon, mutta nyt pidetään potut pottuina. Tällä kertaa vuorossa ovat suomenruotsalaiselta kalskahtavat Hasselbackan perunat.

wp-1487342865143.jpg

Tukholman Drurgårdenin Hasselbacken-kokkikoulusta ja ravintolasta peräisin oleva valmistustapa on yksi eleganteimpia keinoja kypsentää peruna. Tarkat viillot mahdollistavat voin, suolan ja lämmön valumisen perunan sisään, jolloin kuorrutettu pinta on upean rapea ja peruna taas sisältä kiinteän mehevä. Hasselbackan perunat ovat tyylikäs juhlaruoan lisuke, mutta jo itsessään nostavat arkiruoan tasoa melkein juhlasapuskaksi. Eikä niiden tekeminen ole edes hidasta tai vaikeaa!

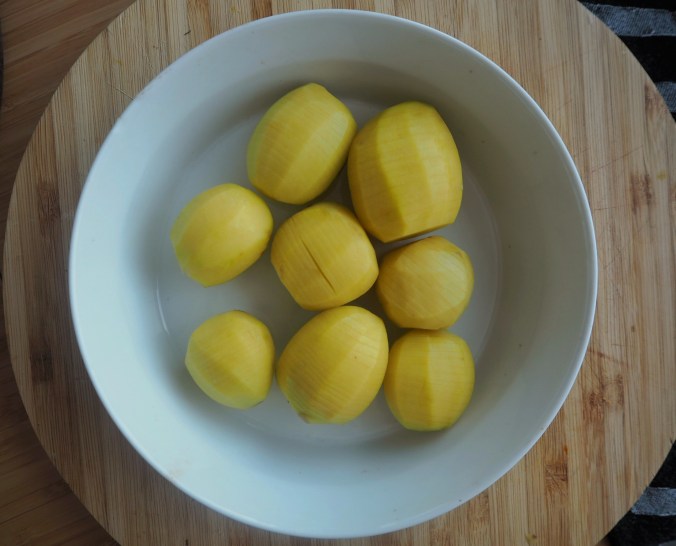
Jos haluaa välttää pitkän uunikypsennyksen, kannatta valita pienehköjä perunoita. Niitä on myös kivempi siivuttaa ja ne näyttävät pienenä rykelmänä lautasella suloisilta. Oman kokemukseni mukaan monet valmiissa pussissa myytävät luomuperunat ovat tavallisia siskojaan pienempiä, mutta se on tietenkin merkki- ja vuodenaikakohtaista.

wp-1487342818827.jpg

wp-1487342815798.jpg

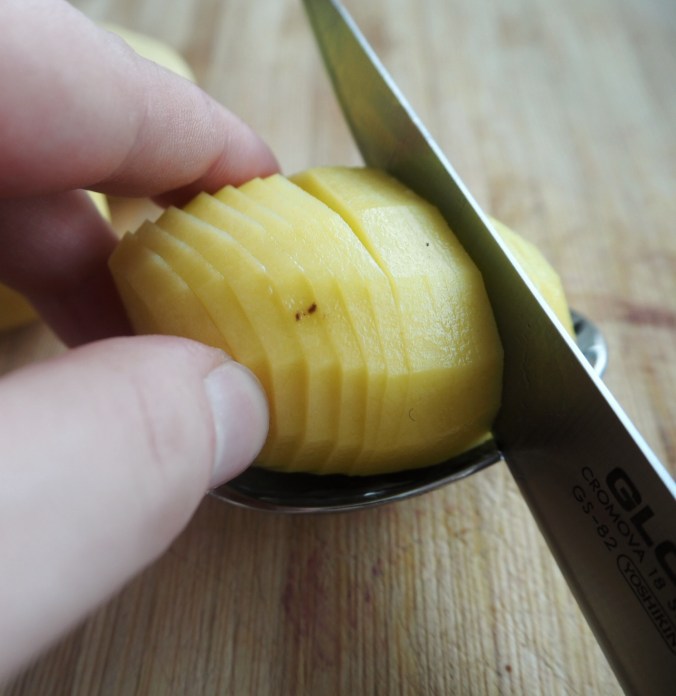
Tässä ”älä tee näin”-esimerkki metallilusikalla. Suosittelen puu-tai muovilusikkaa veitsen säästämiseksi | I suggest using wooden or plastic spoon for cutting the potatoes, metal (like pictured) might damage your knife

Perusresepti ei vaadi perunoiden lisäksi kuin öljyä tai voita sekä suolaa ja pippuria. Lisäksi perunoiden päälle voi rapeuden maksimoimiseksi ripotella korppujauhoja (aasialaiset panko-korppujauhot loistavat tässäkin) sekä raastaa parmesaania tai pecorinoa. Joku kypsentää samassa vuoassa pekonitkin, mutta itse annan perunan loistaa perunana.

wp-1487342813011.jpgwp-1487342810490.jpg

wp-1487342807957.jpg

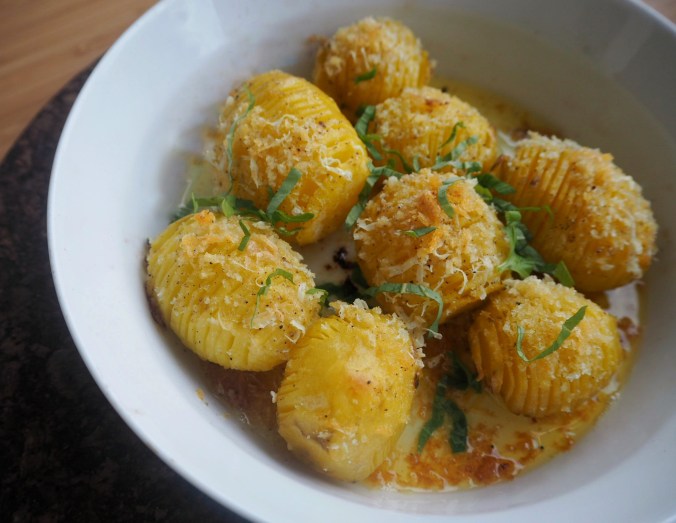
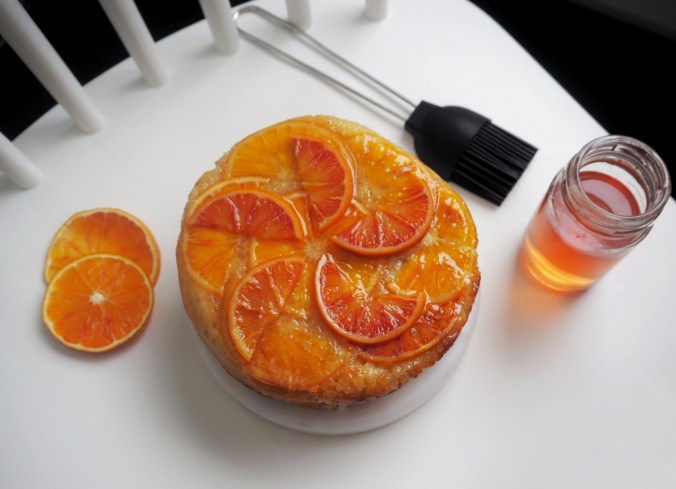
Rapea päältä, mehevä sisältä | Crispy on the outside, mellow on the inside

Hasselbackan perunat
Kahdelle, valmistusaika 45-60min

Ainesosat
6-8 kpl pienehköjä perunoita (tai muutama vähemmän isompia)
oliiviöljyä
voita
suolaa
pippuria
panko-korppujauhoja
pecorinoa tai parmesaania

  • Laita uuni lämpimään 175-asteiseksi.
  • Kuori perunat. Aseta kuorittu peruna sopivankokoiseen muovi- tai puulusikkaan (metallinen lusikka saattaa vahingoittaa veitsen terää). Leikkaa terävällä ja ohuella veitsellä, esimerkiksi vihannes- tai fileointiveitsellä, perunaan pystysuoria viiltoja. Lusikan reuna pysäyttää veitsen, jotta peruna ei halkea. Leikkaa viiltoja koko perunan leveydeltä niin tiheään kuin osaat.
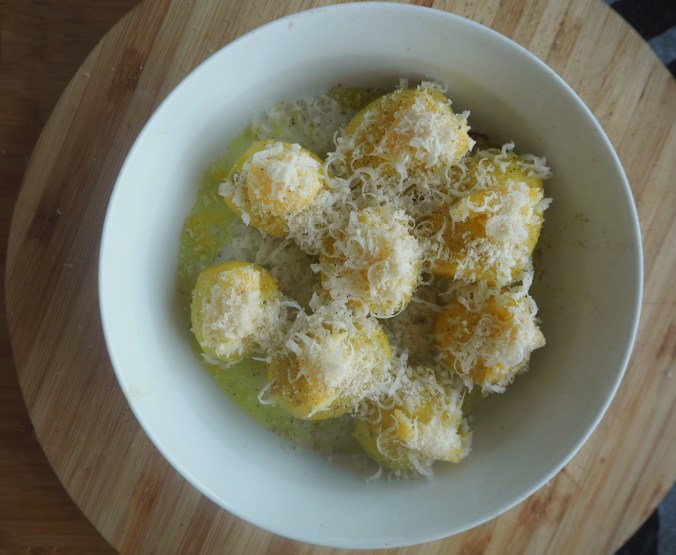
  • Aseta perunat pienen uunivuokaan. Valuta perunoiden päälle oliiviöljyä ja rouhi suolaa pippuria. Aseta kunkin perunan päälle nokare voita. Ripottele perunoiden päälle vielä korppujauhoja sekä pecorinoa tai parmesaania niin halutessasi. Laita vuoka varovasti uusiin keskitasolle.
  • Perunoiden kypsyminen vie niiden koosta riippuen 30-60 minuuttia. Kokeile kypsyyttä vaikka puutikulla. Kypsään perunaan puutikku uppoaa helposti. Ota vuoka ulos uunista kypsentämisen puolivälissä ja valele lusikalla vuoan pohjalle valunutta rasvaa perunoiden päälle, ja laita vuoka takaisin uuniin. Valelu auttaa rapean pinnan aikaansaamisessa.
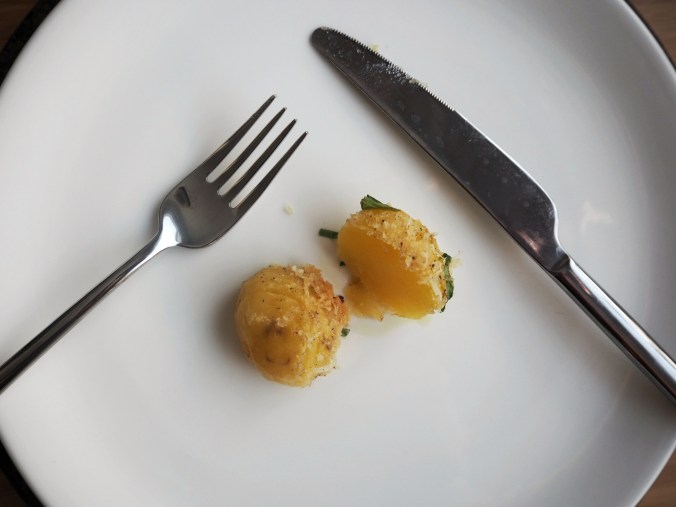
  • Tarjoile kypsät perunat lisäkkeenä juhla- tai arkipöydässä.

Ovatko Hasselbackat jo perusrepertuaariasi vai uusi tuttavuus?

Tällaista perunasta tällä kertaa, ensi kerralla onkin leipähommia luvassa. Stay tuned!

-Toni

wp-1487342805280.jpg

A couple of weeks ago I started The Mighty Potato series, highlighting the potato as a versatile king of tubers on our tables. Last time the potatoes were shredded into a completely different form, but this time the ‘tators will be ‘tators. Intoducing The Hasselbacka Potato, an elegant and sophisticated tuber from Stockholm.

This method of cooking potatoes originates in the Hasselbacken restaurant school and restaurant in the royal Djurgården area of Stockholm, Sweden.  It is by far one the most elegant ways of cooking potatoes: the precise vertical cuts allow the potato to remain in its original form, but also let the heat, butter and salt penetrate the inner spheres of the tuber. This makes a wonderful potato that is crispy on the outside but wonderfully juicy on the inside. The Hasselbacka potatoes are a sure crowd pleaser on feast banquets, but they also elevate any weekday meal to new heights. And they don’t even require hours of cooking or insane skills.

To avoid long baking time, choose small potatoes. Smaller potatoes are also easier to slice and they look awfully cute in a little bunch. I have often found that organic potatoes are small than their regular counterparts, but that is a completely regional and seasonal variable. Choose the ones that look the best for you.

The basic recipe calls for only potatoes, olive oil or butter, and salt and pepper. You add crispy breadcrumbs (the Asian panko works best) and pecorino or parmesan cheese if you want to get more crisp. I’ve heard someone cooking bacon in the same oven dish as well, but I’m sticking to the potatoes.

Hasselbacka Potatoes
For two, cooking time 45-60min

Ingredients
6-8 small potatoes (or fewer big ones)
Olive oil
Butter
Salt
Pepper
Panko bread crumbs
Pecorino or Parmesan

  • Pre-heat the oven to 175 degrees Celsius.
  • Peel the potatoes. Place a peeled potato in a wooden or plastic spoon (metallic spoon might damage your knife). Make vertical cuts to the potato with a thin and sharp knife, like a vegetable or fillet knife. The rim of the spoon will stop the knife before it cuts the potato in half. Make as many cuts to the whole length of the potato as you can.
  • Place the cut potatoes in an over dish. Pour olive oil on them and sprinkle salt and pepper. Place some butter on each potato. Add the breadcrumbs and grated cheese too, if using. Put the dish into the oven.
  • The potatoes bake between anywhere 30 to 60 minutes, depending on their size. You can check if they are done by sticking a toothpick into the largest potato: if the toothpick sinks in easily, the potatoes are done. About halfway through the cooking, take the dish out of the oven and ladle the oil and melted on the bottom of the dish onto the potatoes with a spoon. This helps to attain the crisp top on the potatoes.
  • Serve the potatoes as a side dish as a part of a feast or as everyday luxury meal.

There you go! Have you already tried Hasselbacka potatoes, or is the method new for you?

Next time there will be some bready things, stay tuned!

-Toni

Blood Orange Upside Down Cake

Runebergin päivänä lienisi asianmukaista kirjoittaa Fredrikan tortuista, mutta omaan repertuaariini ne eivät tällä haavaa kuulu. Olen joskus kokeillut niiden leipomista, mutta jotenkin ne ovat jääneet vaillinaisiksi. Lisäksi oikeaoppisten torttujen tekemiseen tarvitsisi erikoismuotin, mikä tuntuu hieman turhalta. Pidän Runebergin tortuista kyllä, mutta tyydyn toistaiseksi laadukkaisiin valmistuotteisiin.

wp-1486304209170.jpg

Jotain saman tyyppistä teki kuitenkin mieli tehdä sunnuntaikahveille. Päätin yhdistää tällä hetkellä sesongissa olevat veriappelsiinit ja runebergintorttumaisen murean rakenteen. Kokeilin joskus tehdä appelsiinikeikauskakkua, ja muistelin sen olleen varsin pätevä leivos, joten kaivoin esiin aiemmin käyttämäni reseptin Not Quite Nigella -blogista. Säädin hieman reseptiä korvaamalla vehnäjauhot kaurajauholla, jotta kakku olisi varmasti murea. Lopputuloksena syntyi oikein mukava kakku, jossa todellakin on hyvin samanlainen murea rakenne, kuin Runebergin tortuissa. Veriappelsiinin kuoresta tulee myös tortuista tuttua pientä katkeruutta, joka taittaa runsasta sokerisuutta mukavasti.

wp-1486304217391.jpg

Veriappelsiinit ovat ehdottomasti yksiä lempihedelmistäni. Ne ovat makeita, hapokkaita ja parhaimmillaan todella kauniita punaisine hedelmälihoineen. Tällä kertaa tosin punaista oli kovin vähän, sen määrä kun vaihtelee hyvin paljon. Veriappelsiineihin liittyy tiettyä salaperäisyyttä, joka varmaankin juontaa juurensa nimeen sekä lyhyeen satokauteen. Veriappelsiinit nimittäin ovat yksiä niistä harvoista kasviksista, joita ei yksinkertaisesti ole saatavilla kuin tammikuun loppupuolelta maaliskuulle. Veriappelsiinien punainen väri on peräisin muun muassa lykopeenista ja antosyaanista, joiden syntymiseen tarvitaan kylmiä öitä ja lämpimämpiä päiviä. Tällaiset olosuhteet ovat alkuvuodesta veriappelsiinien kotiseudulla Etnan rinteillä Sisiliassa. Lämpötilavaihteluvaatimuksen vuoksi veriappelsiineja ei voi kasvattaa lämpimillä alueilla, kuten Brasiliassa ja Lähi-Idässä. Tämän vuoksi niiden sesonkikin on aidosti rajallinen. Lisää veriappelsiineista (ja kaikista muistakin olemassa olevista sitruksista) voi lukea loputtoman kiinnostavilta Sitrussivuilta.

wp-1486304203554.jpg

Veriappelsiinit kannattaa pestä huolella, koska ne käytetään kuorineen. Lisäksi tarvitset hyvin terävän veitsen, jolla saa leikattua mahdollisimman ohuita viipaleita appelsiineista. Yritin käyttää mandoliinia tähän, mutta omani oli auttamattomasti liian tylsä. Ohut ja terävä fileointiveitsi toimi sen sijaan kiitettävästi. Appelsiinien maustamaa siirappia jää muuten yli, sitä voi käyttää vaikka juomien maustamiseen tai salaatinkastikkeen pohjana. Säilytä siirappia suljetussa purkissa jääkaapissa.

Tein oman kakkuni tuttuun tapaan 16 cm vuokaa. Tuplaa resepti, jos käytät suurempaa vuokaa.

wp-1486304213044.jpg

Veriappelsiinikeikauskakku

Appelsiinit
1-2 veriappelsiinia
1 dl sokeria
1 dl vettä

Kakkutaikina
100 voita
100 g sokeria
2 munaa
2 dl mantelijauhoa (1 pussi)
1 dl kaurajauhoa (voi korvata vehnäjauhoilla)
1 dl maustamatonta jogurttia
1 tl leivinjauhetta
½ tl suolaa

  • Pese veriappelsiinit huolella. Leikkaa ne kuorineen mahdollisimman ohuiksi viipaleiksi esimerkiksi fileointiveitsellä. Sekoita pienessä kattilassa vesi ja sokeri. Kiehauta siirappia ja lisää veriappelsiiniviipaleet kiehuvaan siirappiin. Laske lämpötila matalaksi ja anna appelsiinien kypsyä muutama minuutti. Kun appelsiinien kuoret alkavat muuttua läpinäkyviksi, nosta ne reikäkauhalla lautaselle. Keitä siirappia vielä viidestä kymmeneen minuuttia, jotta se tiivistyy. Anna sekä appelsiinien että siirapin viilentyä.
  • Laita uuni lämpiämään 175-asteiseksi. Rutista arkki leivinpaperia tolloksi ja avaa tollo varovasti. Vuoraa kakkuvuoka (esim. irtopohjavuoka) rutistetulla paperilla.
  • Vatkaa kulhossa voi ja sokeri vaahdoksi. Lisää munat yksitellen sekoittaen kummankin munan jälkeen. Lisää seokseen mantelijauho, kaurajauho, leivinjauhe, suola ja jogurtti. Sekoita nopeasti tasaiseksi.
  • Voitele kakkuvuokaan asetettu leivinpaperi appelsiinisiirapilla. Asettele appelsiiniviipaleita vuoan pohjalle haluamallasi tavalla. Myös vuoan reunat voi vuorata appelsiineilla. Lusikoi taikina varovasti vuokaan ja tasoita pinta. Laita vuoka uuniin keskitasolle ja paista noin 45 minuuttia, tai kunnes kakun keskelle pistetty puutikku tulee ulos puhtaana. Anna kakun jäähtyä kokonaan vuoassa.
  • Kumoa jäähtynyt kakku lautaselle. Poista leivinpaperi varovasti ja voitele kakku vielä appelsiinisiirapilla. Voit halutessasi koristella kakkua vielä, mutta vuoan pohjalle asetellut appelsiiniviipaleet ovat jo itsessään näyttäviä.

Hyvää Runebergin päivää, miten sitten ikinä sitä vietätkään!

-T

wp-1486304206481.jpg

Today in Finland we celebrate Johan Ludwig Runeberg, the national poet of Finland. Runeberg was one of the most important figures in Finnish literary history, and the Finnish national anthem was written by him, but most of all he is known for the little cakes his wife, Fredrika, used to bake. These Runeberg tortes are available everywhere for a few weeks around this time in Finland. They are made of a crumbly dough with flavours of bitter almond and rum. I have tried making these pastries in the past, unsuccessfully, so nowadays I just buy them from a bakery. Still, I wanted to make something reminiscent of them on this day. I decided to combine their crumbly texture with the fruit of the season, the blood orange. I once made an upside-down cake with Not Quite Nigellas recipe, but this time I tuned it a bit to make sure the texture is moist and crumbly. I used oat flour instead of wheat. The result was a wonderful cake that really has a similar texture to the Runeberg tortes. The orange peel and pith give the cake some much needed bitterness, which is also reminiscent of the bitter almond aroma of the tortes.

Blood oranges are one of my favourite fruits. They combine the sweetness and acidity in an exhilarating way, and they are really beautiful with their red tinted flesh. This time my blood oranges had only little ’blood’ in them, which perfectly normal since the amount of red varies a lot. Furthermore, blood oranges have some mystery to their aura, which probably has much to do with their ominous name and their seasonal existence. The blood orange is one of the last fruits that are truly seasonal: they are available only from the end of January until March. This is due to the method their colour appears: the lycopene and anthocyanin compounds that tint the flesh of the oranges red require cool night and warmer days to develop. The conditions on the slopes of Etna in Sicily, from where blood oranges originate, in this time of the year are perfect for blood oranges. These temperature requirements mean that blood oranges cannot be grown in warmer areas, like Brazil or the Middle-East, that produce other kinds of citrus fruits. The geographical restrictions create a tight schedule for blood orange connoisseurs, so we must eat as much of them as possible during these months. You can read more on blood oranges and all other kinds of citruses on the ever-so-inspiring Citrus Pages.

I recommend washing the blood oranges well since you’ll be using them peel and all. You’ll also need a very sharp knife to cut the oranges into thin slices. I tried  using my mandolin, but it was nowhere as sharp as it would have needed to be to cut the oranges nicely. My fillet knife, however, was perfect for the job. There will be surplus of the orange syrup from the recipe. You can use the syrup to flavour drinks or as a base for salad dressings, or whatever to want to do with it. It keeps in a tight container in the fridge at least a week.

I made my cake in the 16 cm spring form, as usual. Double the recipe, if using bigger pan.

Blood Orange Upside Down Cake

Orange slices
1-2 blood oranges
1 dl sugar
1 dl water

Cake
100 butter
100 g sugar
2 eggs
2 dl ground almonds
1 dl oat flour (can be replaced with wheat flour)
1 dl natural yoghurt
1 tsp. baking powder
½ tsp. salt

  • Wash and dry the blood oranges well. Cut them into thin slices with a sharp knife. Mix the water and sugar in a small kettle. Bring the mixture to a boil and add the orange slices. Turn the heat down and let the oranges simmer for a couple of minutes until their peel turns a bit translucent. Remove them from the syrup with a slotted spoon. Turn the heat up the syrup and boil for a few minutes more to condense. Let the orange slices and the syrup to cool.
  • Heat the oven to 175 degrees Celsius. Crumble a sheet of parchment paper into a ball and open carefully. Line a can tin with the crumbled parchment paper.
  • In a bowl, beat the sugar and butter until light and fluffy. Add eggs one at a time and mix in between. Add the ground almonds, oat flour, baking powder, salt, and yogurt and mix quickly.
  • Brush the parchment paper in the cake thin with the orange syrup. Place the orange slices on bottom of the tin on a design of your choosing. You can also but slices on the sides, if you can make them stick. Spoon the cake dough carefully on the slices and even the surface. Put the tin in the oven and bake for about 45 minutes, or until a wooden skewer stuck in the middle of the cake comes out clean. Take the cake out of the oven and let cool completely.
  • Turn the cake upside down on a plate. Remove the paper carefully. Brush some orange syrup on the cake to make it glisten. You can add some decorations, but the blood orange slices on top of the cake are quite nice on their own, too.

Happy Runeberg day to you, however you celebrate it, or don’t!

-T