The Mighty Potato | Shepherd’s Pie

Kun kehittelin ideaa The Mighty Potato -sarjasta, yksi pohdittava asia oli perunamuusi: miten siitä kirjoittaisi, koska ei sitä voi sivuuttaakaan, mutta jokainen tekee muusinsa omalla tavallaan. Erityylisille muuseille kun on omat käyttötarkoituksensa ja hetkensä: muhevan pataruoan parina on runsaasti kermaa ja voita sisältävä muusi paikkansa ansainnut, mutta toisen ruoan kanssa yksinkertaisempi ja kevyempi muusi on toimivampi. Kuusamossa esimerkiksi muusiin lisätään niin paljon voita, että puhutaan perunamuusin sijaan pottuvoista. Poronkäristys olisi varmasti huomattavasti tylsempi kokemus, jos muusi olisi kevyempää sorttia.

wp-1490625569277.jpg

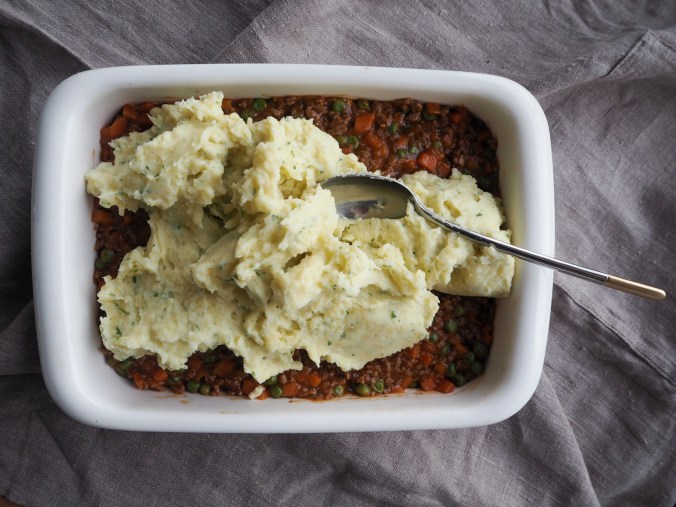
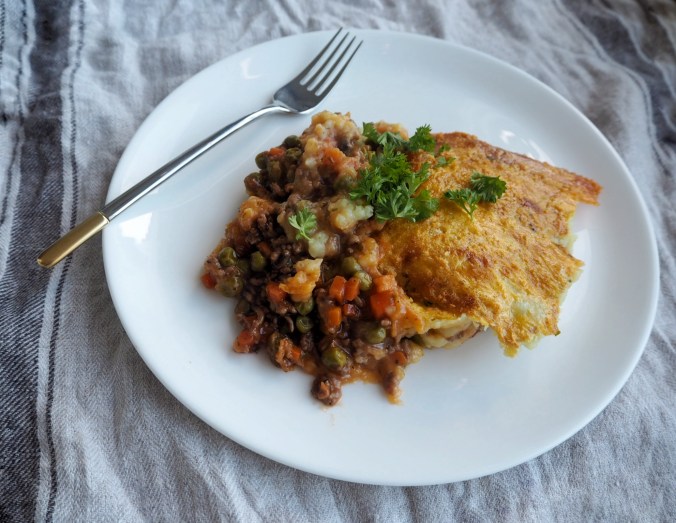
Lopulta päädyin valitsemaan ruokalajin, jossa perunamuusi muodostaa puolet komeasta kokonaisuudesta. Shepherd’s Pie eli paimenen piiras on brittiläisen keittiön kuuluisimpia ruokia, jossa lihakastike peitellään vuokaan perunamuusin alle ennen uunikypsennystä. Idea on kaikessa yksinkertaisuudessaan nerokas, koska kastikkeeseen voi upottaa oikeastaan mitä tahansa lihaa ja kasviksia, mitä kaapista löytyy, ja tuplakypsennys tekee koko komeudesta täydellisen muhevan ja herkullisen. Perunamuusi toimii tässä siis lisukkeen lisäksi suojaavana kuorena, ja se saa samalla itse myös mukavasti makua. Tit for tat, kuten britit sanovat.

wp-1490625585326.jpg

wp-1490625557741.jpg

Kokeilin tätä reseptiä ensimmäisen kerran Pyhän Patrikin päivänä, koska se sattui tulemaan vastaan irlantilaisia reseptejä etsiessäni. En todellakaan osaa sanoa mikä siinä reseptissä teki piiraasta irlantilaisen, mutta hyvin se toimi stoutin kaverina. Otin kuitenkin vapauksia muokata reseptiä omaan tyyliini: lisäsin kasviksien määrää, vähensin lihaa ja säädin mausteita. Lampaanjauheliha on kaikkein perinteisin lihavalinta shepherd’s piehin, mutta itse valitsin luomusika-nautaa, jossa rasvaa oli 20 %. Mikä tahansa runsasrasvainen jauheliha sopii tähän reseptiin, joskin täytyy huomauttaa, että joillain alueilla shepherd’s pie sisältää aina lammasta, kun taas nautaversio on nimeltään cottage pie.

Mausteita voi myös säätää edelleen itselleen sopiviksi, mutta ilman Worchestershire-kastiketta (lausutaan muuten wusteshiir) piiraasta ei tule oikean makuinen. Joissain resepteissä kastikkeeseen käytetään tomaattimurskaa, mutta itse pidän enemmän gravy-tyyppisestä kastikkeesta. Tomaattimurskan kosteutta ei muutenkaan kaivata tässä reseptissä, joten tomaattipyree on parempi ratkaisu. Eetterissä kelluu myös vegaanisia piirasreseptejä, joten halutessaan sellaistakin voi kokeilla. Tälläkin reseptillä saisi varmaan ruoan aikaan, jos vaihtaa lihan härkikseen (ja lisää nesteen määrää) sekä maidon ja voin kasviperäisiin vastineisiin.

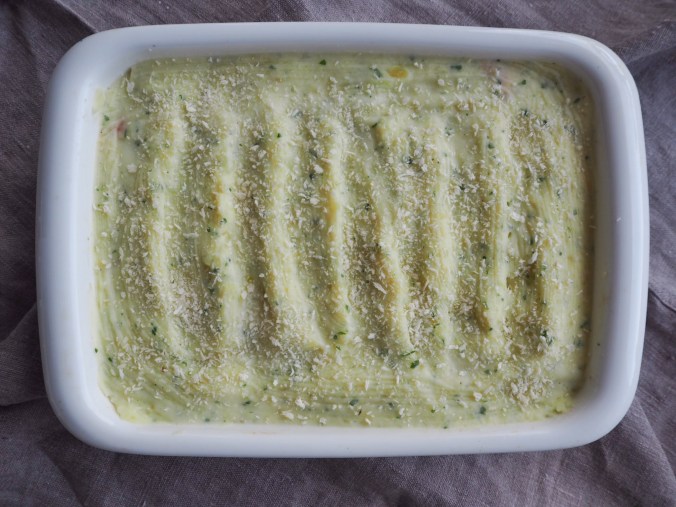
Niin ja se muusi! Voit tehdä sen ihan miten haluat, mutta käytä jauhoisia perunoita ja maltillisesti voita, koska kastike on jo itsessään tuhtia. Itse lisäsin muusiin vielä persiljaa, mutta sekin on makuasia. Muussaustyyli on myös vapaa, tällaisen muusin saa hyvin aikaan perunanuijalla tai -muussaimella, mutta sähkövatkaimella rakenteesta saa tasaisemman ja ilmavamman. Muusin pinnan saa kullanruskeaksi kananmunavoitelulla, mutta se on vain ulkonäköasia. Lisärapeutta kuoreen puolestaan saa ripottelemalla viimeiseksi vuoan päälle korppujauhoja tai juustoa.

Shepherd’s Pie
4 annosta

Ainesosat
Muusi
1 kg jauhoisia perunoita
1-2 dl maitoa
2 rkl voita
suolaa ja pippuria
(persiljaa)

Kastike
300 g luomujauhelihaa
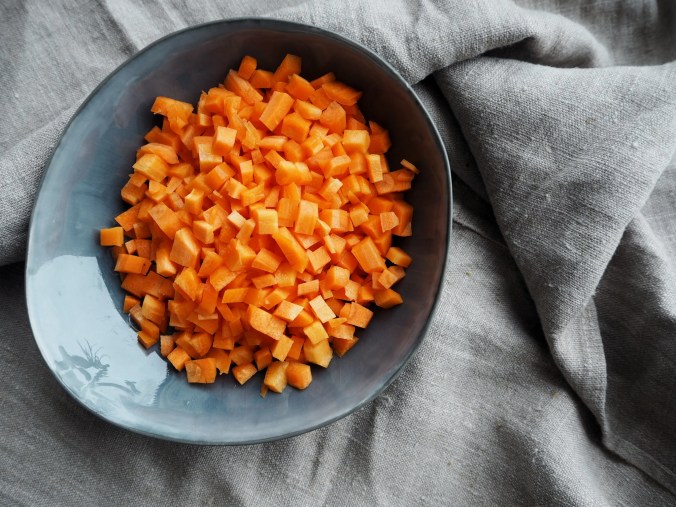
3 keskikokoista porkkanaa
1 sipuli
1 pss (200g) pakasteherneitä sulatettuna
1 rkl voita
pippuria
timjamia
2 rkl tomaattipyreetä
1-2 rkl Worchesterkastiketta
(loraus punaviiniä tai vermuttia)
2 rkl jauhoja
5 dl kana- tai lihalientä

Lisäksi halutessasi
Kananmuna (voiteluun)
Pinnalle korppujauhoja tai juustoa

  • Kuori perunat. Pilko perunat muutamaan osaan, laita kattilaan ja peitä vedellä. Kuumenna liedellä kiehuvaksi, laske lämpötilaa keskilämmölle ja keitä perunat läpikypsiksi (noin 20 minuuttia). Valuta vesi ja muusaa perunat. Lisää voi ja puolet maidosta ja muussaa sekoita tasaiseksi muusiksi. Lisää maitoa, jos rakenne on kovin jäykkä. Mausta suolalla, pippurilla ja halutessasi persiljalla.
  • Laita uuni lämpimään 200 asteeseen.
  • Kuori ja kuutioi porkkanat ja sipuli. Kuumenna kasari tai isohko paistinpannu keskilämmöllä öljytilkan kanssa. Paista porkkanakuutioita öljyssä viitisen minuuttia. Lisää sipuli ja paista vielä muutama minuutti. Lisää jauheliha ja ruskista se. Lisää voi ja herneet. Mausta timjamilla ja pippurilla. Lisää pannulle tomaattipyree ja Worchesterkastike ja sekoita.
  • Ripottele pannulle jauhot ja sekoita ne lihan ja kasvisten joukkoon. Jos keittiöstäsi löytyy loraus punaviiniä tai vermuttia, lisää se pannulle. Lisää tämän jälkeen kana- tai lihaliemi ja sekoita. Muhittele kastiketta muutama minuutti. Kun kastike on sopivan suurustunutta, ota se pois lämmöltä. Maista ja lisää tarvittaessa suolaa tai mausteita.
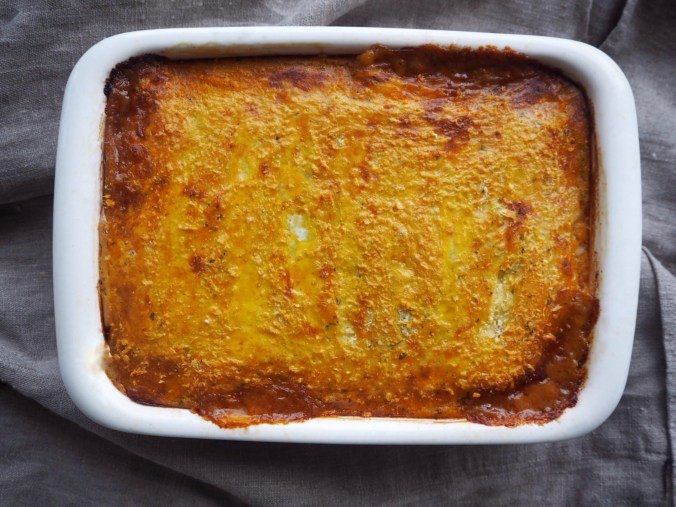
  • Siirrä kastike uunivuokaan (noin 20 x 30 cm). Lusikoi perunamuusia kastikkeen päälle ja tasoita. Jos haluat kullanruskean pinnan, voitele perunamuusin pinta vatkatulla kananmunalla. Voit lopuksi ripotella päälle korppujauhoja tai juustoa. Paista vuokaa uunissa noin 20 minuuttia. Ota vuoka uunista ja anna sen levätä puoli tuntia ennen tarjoilua.

Vinkki! Voit tehdä piiraat myös annosvuokiin kullekin syöjälle.

wp-1490625555242.jpgwp-1490625552856.jpgwp-1490625550408.jpg

Sellainen pottuklassikko tällä kertaa, toivottavasti maistuu!

Nähdään taas!

-Toni

wp-1490625547523.jpg

When I came up with the idea of The Might Potato series, one nut to crack was the potato mash: how to write about a dish that is one of the most common forms of potato side dishes, and also one that everyone does a little differently. All of the variations defend their places: a hearty mash with lots of cream and butter is a natural sidekick to slow cooked stews, while lighter and fluffier mashes go beautifully with fish, for example. In Kuusamo, in Northern Finland, it is customary to refer to the dish as potato butter, since their version on the mash contains a lot thereof. And I wouldn’t have it any other way; the Northern specialty poronkäristys, roasted reindeer served with lingonberries and potato butter, wouldn’t be the same with a different kind of mash.

So I decided to avoid the whole conversation and opted for a dish that incorporates the mash into the dish itself, as opposed to being served as a side dish. The natural choice is of course Shepherd’s Pie, one of the most renowned British foods. In shepherd’s pie, the mash is used as a top layer to protect the wonderful meat stew during oven baking. The idea is nothing short of brilliant: you can add basically anything and everything lying in the vegetable drawer of your fridge, and the double cooking makes everything mellow and gentle. The potato mash serves two purposes here, firstly as the side dish and also as the protective layer, while at the same time sucking up the flavours from the stew. Tit for tat, as the Brits say.

I tried this recipe for a first time on St. Patrick’s Day, as it came up when I searched for Irish recipes. (Them Irish and their ‘tators, am-i-rite?) Don’t ask me what is so Irish about this version, I have no clue, but it went nicely with pint of cold stout. I did, however, take some liberties and adapted the recipe to my liking: I reduced the amount of meat, added some vegetables and tuned the spices. I used a mixture of minced organic pork and beef, but the most traditional choice would be lamb (in fact, the beef variant in some areas is called cottage pie).

The seasonings can be further tuned to your likings, but I wouldn’t skip the Worcestershire sauce, as is responsible for the certain tang the dish should have. Some recipes use tomato pulp for the stew, but I prefer a more gravy-style sauce. I used some tomato paste for the stew to give more depth. By the way, there are several vegan versions of the shepherd’s pie floating around the net, so that’s an option too. You could replace the meat in this recipe with your choice of similarly textured vegetable protein product and opt for vegetable-based replacements for butter and milk as well.

Oh, and the mash! You can do the mash as you please, the recipe down below is how I made it. I only urge you to use starchy potatoes and keep the amount butter on the low side since the stew has quite a lot of fat in it. I added some parsley, but that is entirely optional. There are several ways of mashing the mash, I used a simple masher for this, but using an electric mixer will result in a smoother and fluffier mash. If you want to have a golden crust on the pie, you need to wash it with beaten egg, but that is just for looks. Some crunch can be added by sprinkling some bread crumbs or grated cheese on the pie before putting it in the oven.

Shepherd’s Pie
4 portions

Ingredients
Mash
1 kg starchy potatoes
1-2 dl milk
2 tbsp. butter
salt and pepper
(parsley)

Stew
300 g organic minced meat
3 medium-sized carrots
1 onion
200g thawed frozen peas
1 tbsp. butter
pepper
thyme
2 tbsp. tomato paste
1-2 tbsp. Worchester sauce
(a splash of red wine or vermouth)
2 tbsp. flour
5 dl chicken of beef stock

For the crust (optional)
1 egg
Bread crumbs or grated cheese

  • Peel the potatoes, cut into quarters, place into a kettle, and cover with water. Place on heat, bring to a boil, reduce heat to medium, and let simmer until completely soft. Drain and mash. Add the butter and half of the milk, mix. Add milk if the mash is too thick. Season with salt and pepper, add chopped parsley, if using.
  • Pre-heat the oven to 200 degrees Celsius.
  • Peel and dice the carrots and onion. Heat a sauce pan or a large skillet on medium heat with a spoonful of oil. Add the carrots to the pan and cook for about five minutes. Add the onion and cook for two minutes. Add the meat and cook until browned. Add the peas and butter. Season with pepper and thyme. Add the tomato paste and Worcestershire sauce and mix.
  • Sprinkle the flour on the pan and mix into the meat and vegetables. If you have some red wine or vermouth, add some to the pan. Then add the stock and mix until the stew thickens to a nice, gravy-like consistency. Taste and add seasoning, if needed.
  • Transfer the stew into an oven dish (about 20 x 30 cm) and even the surface. Spoon the potato mash on the stew and spread evenly. If you want a golden crust on the pie, brush the top of the pie with some beaten egg. Add some bread crumbs or grated cheese on top, if using, and stick the whole thing into the oven for about 20 minutes. Then take the dish out of the oven and let rest for a half an hour before serving.

Tip! You can also use individual serving dishes for each person.

So, there’s another potato classic for the series, I hope you like it!

Until next time,

-Toni


Triple Chocolate Brownie

Brownie on täysin perustellusti monen suosikkileivonnainen: se on erittäin täyteläinen ja syntinen suklaaherkku, jota on suklaafanien vaikea vastustaa. Browniekoulukuntia on myös monia: toisten mielestä suklaakakun täytyy olla tahmea (hep!), kun taas toiset pitävät kakkumaisemmasta rakenteesta. Jotkut lisäävät taikinaan pähkinöitä, toiset korkeintaan suklaahippuja. Kaikille brownieille yhteistä lienee kuitenkin suklaan runsas määrä ja muutenkin syntinen sisältö. Tasaisin väliajoin joku yrittää tehdä browniestakin terveellistä, ja olen itsekin sortunut kokeilemaan kookos- ja kesäkurpitsaversioita huonolla menestyksellä. Brownie on kuitenkin niitä lohtuherkkuja, jotka on syytä säilyttää dekadentteina ja harvoin tehtyinä makupaloina, joista saa silloin tällöin nauttia hyvällä omallatunnolla. Kunhan ei turhan usein.

wp-1490012469006.jpg


Olen kokeillut lukemattomia browniereseptejä, joissa on kaikissa ollut jotain hyvää mutta yleensä myös jotain parannettavaa. Täydellinen brownie kun minun mielestäni on pehmeä, muttei liian tahmea, ja sen kuori on paperimaisen lohkeileva. Jälkimmäinen ominaisuus tuntuu olevan vaikea saavuttaa, vaikka suurin osa leffoissa näkyvistä brownieista on juuri tätä rapeakuorista sorttia. Viime viikolla se (lähes) täydellinen resepti tuli vastaan instagramissa, kun Ben Barlow postasi houkuttelevan kuvan leivoksistaan. Benin resepti oli valtava ja sisälsi hurjan määrän sokeria (jota suklaassakin on jo runsaasti). Puolitin reseptin, säädin sokerin määrää ja lisäsin vähän mausteita ja kappas, leipomishistoriani paras brownie oli syntynyt. Jatkossa täytyy kokeilla tätä reseptiä vielä lisää rapeutta tuovilla pähkinöillä, mutta tällaisenaankin brownie oli jo taivaallinen.

wp-1490012465548.jpg

Suklaa kun on reseptin pääosassa, niin siihen kannattaa panostaa. Reseptiin tulee edelleen paljon sokeria, joten suosittelen valitsemaan hyvin tummaa ja jopa hivenen kitkerää tummaa suklaata. Sokeri ja rouhitut vaaleat suklaat tasapainottavat kyllä kokonaisuutta. Käytin tavallisia vehnäjauhoja tällä kertaa, mutta reseptissä olevan pienen määrän jauhoja voi korvata melkeinpä millä tahansa gluteenittomalla jauholla. Lisäksi tarjolle voi laittaa klassisesti vaniljajäätelöä tai vaikka kirpeää veriappelsiinihilloa.

Kolmen suklaan brownie
12 pientä palaa

Ainesosat
120 g tummaa suklaata
120 g voita
60 g jauhoja
30 g kaakaojauhetta
ripaus suolaa
ripaus vaniljaa
2 munaa
150 g hienoa sokeria
50 g valkosuklaata
30 g maitosuklaata

  • Sulata voi voi ja tumma suklaa vesihauteessa: kiehauta kattilassa tilkka vettä ja aseta kattilan päälle lasinen tai metallinen kulho. Varmista, ettei kulhon pohja kosketa vettä. Laita voi ja pilkottu suklaa kulhoon ja anna sulaa hiljalleen välillä sekoittaen. Anna seoksen jäähtyä.
  • Laita uuni lämpiämään 175 asteeseen. Vuoraa noin 25 x 20 cm vuoka leivinpaperilla. Sekoita jauhot, kaakaojauhe, vaniljajauhe ja ripaus suolaa kulhossa keskenään. Rouhi valko- ja maitosuklaa reilunkokoiseksi rouheeksi.
  • Vatkaa kulhossa kananmunat ja sokeri vaaleaksi, kuohkeaksi vaahdoksi. Kaada sekaan voi-suklaaseos ja sekoita tasaiseksi. Sihtaa joukkoon jauhoseos ja sekoita nopeasti sekaisin. Lisää taikinaan vielä suklaarouheet ja kääntele tasaiseksi.
  • Kaada taikina leivinpaperilla vuorattuun vuokaa, levitä tasaiseksi. Paista 175-asteisessa uunissa noin puoli tuntia, tai kunnes brownien pinta on paperimainen eikä taikina enää hylly vuokaa heilutettaessa. Puutikulla kokeiltaessa tikun pitäisi olla kostea, mutta ei valuvan taikinan peitossa.
  • Anna brownien jäähtyä vuoassaan täysin ennen leikkaamista paloiksi.

No miltä vaikuttaa? Syttyikö suklaanhimo, poltteleeko päästä iskemään lusikka pehmeään brownieen?

Toivottavasti makeanhimo talttui, seuraavalla kerralla taitaa olla jotain suolaista luvassa.

-Toni

wp-1490012474139.jpg

It is no wonder that the brownie is the go-to bakery delight for many; the sinful and deeply chocolaty concoction is hard to resist, especially if one happens to like chocolate. There are many schools to brownie, though. Some people (me!) like their brownie sticky and moist, some prefer more cake-like texture. Some add nuts to the mix for crunch, others consider even chocolate chips an abomination. However, what all brownies have in common is chocolate and cocoa, lots of them, and thoroughly sinful ingredients. There seems to be a craze for “healthy alternative” for brownies at certain intervals; I’ve tried at least the coconut and zucchini versions myself. All of these alternatives have led to a disappointment of some degree. Brownie is one of those comfort treats that should remain decadent delight saved for those days you really need it. Don’t feel bad about indulging every now and then in some chocolaty treats, just don’t do it too often.

I have tried numerous recipes for brownies, all of which have had their pros, but also some room for improvement. For me, the perfect brownie is moist and soft, but not too sticky, and the brittle crust is paper thin yet crispy. The latter seems to be hard to attain, even though a vast majority of brownies seen on TV and films seem to have this brittle crust. The finally last week, I ran into a delicious looking picture on Instagram by Ben Barlow . However, Ben’s recipe for his brownies was huge and contained a ton of sugar. I cut the recipe in half, left some sugar out, added some spices, and baked the brownies hoping for the best. My intuition was not wrong: I had just baked the best brownies I’ve ever made! There is still some improvements to be made, for example using even darker cholate and adding some nuts, but even now these brownies are divine.

Like I said, the recipe still contains a lot of sugar, and chocolate has some in it too, so I would urge you to buy very dark and even a little bitter chocolate for this recipe. The added lighter chocolate chunks and the sugar will balance out the flavour nicely. I used regular wheat flour, but the small amount of flout in this recipe could be replaced with most gluten free flours. I used some sour blood orange jam for serving these, but a classic combination with vanilla ice cream would work beautifully as well.

Triple Chocolate Brownie
12 small pieces

Ingredients
120 grams dark chocolate
120 grams butter
60 grams flour
30 grams fark cocoa powder
pinch of salt
pinch of vanilla
2 eggs
150 grams sugar
50 grams white chocolate
30 grams milk chocolate

  • Melt the chocolate and butter in a bain-marie: boil some water in a kettle. Place a glass or metal bowl on the kettle, making sure the bottom of the bowl does not touch the water. Put the butter and chocolate into the bowl and let slowly melt, mixing every now and then. Let the mixture cool to room temperature.
  • Pre-heat the oven to 175 degrees Celsius. Line a rectangular pan, approx. 25 x 20cm with parchment paper. Mix the flour, cocoa powder, vanilla powder and salt in a bowl. Chop the white and milk chocolate into small chunks.
  • In a bowl, beat the eggs and sugar until pale and fluffy. Pour in the butter and chocolate mixture and mix. Sift in the flour mixture and fold it into the batter. Add the chocolate chunks and mix quickly.
  • Pour in the pan lined with parchment paper and even the surface. Bake in the oven for about 30 minutes, or until the surface of the brownie is papery and the brownie isn’t wobbly anymore in the centre. A wooden skewer stuck in the middle of the brownie should come out moist but not sticky.
  • Let the brownie cool complete in the pan before cutting into pieces.

Well, what do you think? Craving some brownie yet? How do you prefer your chocolate treats?

I hope this helped with your sweet tooth, next time there will be something savoury, maybe.

-Toni

Focaccia

Kah, taas reilu pari viikkoa vilahti ohi ja ollaankin jo maaliskuun toisella viikolla. Hiihtolomareissu pohjoiseen vei viime viikon ja työkuviot edellisen, mutta nyt ollaan taas hellan äärellä.

Viime aikoina on kiinnostanut kaakkois-aasialainen ruoka raikkaine sitruunaruohoineen ja limetteineen, mutta en ole saanut aikaiseksi mitään kovin omaperäistä sillä saralla. Tällä kertaa pysytelläänkin tukevasti Euroopassa ja leivotaan kuohkeaa focacciaa. Tämä on yksi niistä resepteistä, jotka olen aikanaan kirjoitellut lehtikantiseen reseptikirjaani, ja tätä leipää tarjottiin muun muassa ylioppilasjuhlissani. Jotkut ylioppilaat heräsivät aikaisin ehtiäkseen kampaajalle, minä heräsin kuudelta leipomaan.

wp-1488892286631.jpg

Focaccia on italialainen ohut leipä, jolla on paljon samaa pizzapohjan kanssa. Focaccia on tosin suosituinta Ligurian alueella, kun taas pizza on kotoisin etelämpää Campaniasta. Joidenkin lähteiden mukaan focacciaa ovat leiponeet jo etruskit ennen Rooman valtakuntaa, mikä on sinänsä uskottava väite, koska Välimeren alueella on leivottu ohuita leipiä, kuten pitaleipiä, jo hyvin kauan. Parhaat focacciat olenkin syönyt juuri Liguriassa, Genovan lähellä merenrantakylässä. Hieman huvittavaa oli se, että juuri sitä parasta leipää tuotiin pyytämättä pöytään ennen pääruokia, jotka taas jäivät täysin leivän varjoon.

Tämä resepti on tehty hiivaan, koska se tuntuu olevan todella merkittävästi helpompaa kuin juureen leipominen. Olen yrittänyt löytää hyvän reseptin juurella leivottuun pizzaan ja focacciaan, mutta joka kerta leipä on jäänyt lättänäksi ja tiiviiksi. Siksi olen todennut, että näissä leivissä kannattaa tyytyä hiivaan, ainakin toistaiseksi.

Kuten kaikissa kohotettavissa leivonnaisissa, focacciakin hyötyy tavattaman paljon hitaasta kohotuksesta. Leivän saa kyllä aikaan muutaman tunnin kohotuksella lämpimässä, mutta isoja kuplia on turha silloin odottaa. Paras rakenne syntyy, kun taikina tehdään illalla nousemaan jääkaappiin ja leivotaan seuraavana päivänä. Tällöin ei tarvitse kikkailla veden tai kohotuspaikan lämpötilallakaan, koska hiivan tuleekin toimia hitaasti.


wp-1488892305464.jpg

Tältä taikinan tulisi näyttää kohotuksen jälkeen | This is how the dough should look like after leavening

wp-1488892301660.jpg

Kumoa taikina pellille… | Pour the dough on the baking tray…

wp-1488892298350.jpg

…ja varovasti painele se littanaksi kosteilla sormilla | … and carefully flatten in using wet fingers

Focacciaan kannattaa käyttää samoja jauhoja, joista pizzakin tehdään. Paras vaihtoehto on siis italialainen 0- tai 00-jauho, jossa on korkea W-arvo ja joka on tarkoitettu pizzan tekemiseen. Tällaista saa esimerkiksi Tampereelta culinaria keittiöelämästä. Toiseksi paras vaihtoehto on Prismojen valikoimasta löytyvä Ramlösa Kvarnin Manitoba Cream -leipäjauho, jonka gluteenipitoisuutta on nostettu hyvän sitkon aikaansaamiseksi. Myös ihan tavallisia leipäjauhoja voi käyttää, mutta durumvehnällä ei ole asiaa pizzaan tai sen enempää focacciaankaan.

wp-1488892295935.jpg

Painele täytteet puoliksi taikinan sisään | Press the toppings halfway into the dough

wp-1488892293594.jpg

Täytteinä käytin pakollisen rosmariinin lisäksi kaapista löytyviä kalamata-oliiveja ja kaprismarjoja sekä punasipulia, mutta näitä voi säätää omien mielitekojen ja kaappien sisällön mukaan. Käytä täytteitä kuitenkin hyvin maltillisesti, leivän on tarkoitus olla itsessään pääosassa.

Focaccia
1 pellin kokoinen leipä

Ainesosat
4 dl vettä
400-500 g jauhoja (pizza- tai leipäjauhoja)
5 g kuivahiivaa
5 g suolaa
½ dl oliiviöljyä

Päälle
Oliiviöljyä
Valkosipulinkynsi
Rosmariinia
Sormisuolaa
Kivellisiä oliiveja
Kaprismarjoja
Punasipulia

  • Sekoita kuivahiivaa kulhossa huoneenlämpöiseen veteen. Lisää oliiviöljy. Sekoita joukkoon noin puolet jauhoista ja suola. Sekoita tasaiseksi ja lisää jauhoja kunnes seos alkaa muistuttaa löysää leipätaikinaa. Tarkka jauhojen määrä riippuu mm. jauhojen laadusta ja kosteudesta, joten tarkkaa määrää ei voi antaa. Tavoitteena on kuitenkin pitää taikina löysänä, joka pysyy kasassa, mutta on tahmeaa sormella koskettaessa.
  • Kun taikina on sopivaa, peitä kulho tuorekelmulla ja leivinliinalla ja laita kulho jääkaappiin. Anna taikinan nousta yön yli tai vähintään 8 tuntia. (Taikinan voi tehdä myös samana päivänä ja kohottaa muutaman tunnin, käytä tällöin 40-asteista vettä ja jätä kulho lämpimään paikkaan.)
  • Ota kulho jääkaapista ja anna taikinan lämmitä jonkin aikaan. Rutista leivinpaperiarkki palloksi ja levitä sitten uunipellille. Kastele kätesi ja kumoa taikina leivinpaperin päälle. Painele taikina kevyin sormin pellille muutaman sentin paksuiseksi levyksi. Älä paina liikaa, koska silloin ilma karkaa taikinasta ja leipä jää lättänäksi. Sormien kostuttaminen helpottaa taikinan käsittelyä. Jätä taikina nousemaan uudestaan lämpimään paikkaan tunniksi.
  • Valmistele kohotuksen aikana täytteet: puolita oliivit ja poista niistä kivet, leikkaa kaprismarjat puoliksi ja viipaloi sipuli. Silppua myös rosmariini. Tee mausteöljy lisäämällä puoleen desiin öljyä murskattu valkosipulinkynsi ja oksa rosmariinia.
  • Laita uuni lämpiämään 225-asteikseksi.
  • Kun taikina on noussut, voitele se oliiviöljyllä ja ripottele päälle sormisuolaa. Lisää täytteet leivän päälle painaen niitä vähän taikinan sisään. Ripottele päälle vielä rosmariinia ja laita leipä uuniin. Paista leipää noin 20 minuuttia, tai kunnes sen pinta on kauniin kullanruskea.
  • Ota leipä uunista ja voitele se heti mausteöljyllä, jotta pinta pehmenee. Anna leivän levätä hetki ennen leikkaamista annospaloiksi.
  • Syö focaccia sellaisenaan vaikka salaatin seurana, tai leikkaa paloiksi ja täytä esimerkiksi mozzarellalla ja basilikalla.

Sellaista tämän viikon alkuun. Onko focaccia jo tuttu kaveri keittiössä, vai rajoittuuko kokemukset kahvilaleipiin? Mitä täytteitä kannattaisi kokeilla?

-Toni

wp-1488892291302.jpg


Over two weeks has passed since the last post, and it’s already the second week of March. Last week was spent on a winter break in the North, and the week before that in work-related things, but now it’s time to bake something!

South-East Asia has been on my mind very much lately, the fresh lemongrass and zingy lime leaves providing some much-needed refreshment. Alas, I don’t have much original content concerning that for now, so let’s stick to European classics and bake some airy and sumptuous focaccia. This recipe is from my leaf-covered recipe book, and I served this in my graduation party in 2009. On the morning of the graduation party, some people woke early to go to hairdressers’, but I woke up at six to bake.

Focaccia is a North Italian flatbread that shares a common core with the southern pizza. Focaccia is most commonly attributed to Ligurian cuisine, whereas as pizza is a Campanian product. According to some sources, focaccia has been baked since the Etruscan times before the Roman empire, and that seems entirely possible since flatbreads (e.g. pita) have been baked around the Mediterranean for ages. I have eaten the best focaccia in a small seaside village near Genoa in Liguria. It was actually a little funny affair: the spectacular focaccia was brought to the table without asking before main courses, but it was by far the best part about that restaurant visit.

I used yeast to bake this focaccia, mainly because my forays into baking pizza and focaccia using sourdough starters have been very disappointing. I have tried to find a good recipe for sourdough pizza, but every time the result is a flat and sometimes even hard crust. Therefore, I have decided to stick to yeast with pizzas and focaccias for now.

Like with every leavened dough, the focaccia really appreciates long and slow leavening. You can make a focaccia with just a couple hours leavening time, but don’t expect much in terms of fluffiness and bubbles in that case. The best result is achieved when the dough is made in the evening and left to leaven in the fridge overnight. That also eliminates any need to use certain temperature water or leavening atmosphere, since you want to slow down the yeast.

I recommend using pizza flour for focaccia. The best choice is Italian flour, either 0 or 00 with a high W value, meaning it has high gluten content. This should be available at Italian shops and some high-end grocery stores. The second-best option is to use any gluten rich flour meant for bread baking. Durum wheat, on the other hand, is not used to make pizza or focaccia, so steer clear of that.

In terms of toppings, I used what I already had in the cupboards: Kalamata olives, caper berries, red onion and the only mandatory ingredient, rosemary. You can choose your own toppings but keep them light, you don’t want to steal the limelight from the bread.

Focaccia
1 baking tray

Ingredients
4 dl water
400-500 grams of flour (pizza or bread flour)
5 grams dry yeast
5 grams salt
½ dl olive oil

On top
Olive oil
Garlic clove
Rosemary
Salt flakes
Olives
Caper berries
Red onion

  • Mix the dry yeast and room-temperature water in a bowl. Add half of the flour and salt. Mix until even and add flour until the mixture resembles a gooey dough. The amount of flour needed depends on the quality and moisture content of the flour, so it varies a lot. Aim for a dough that keeps together but is sticky.
  • When you have reached the right consistency, cover the bowl with cling film and a tea towel and place in the fridge overnight, or at least 8 hours. (You can also do this dough the same day, but then use warm water and leave the dough to leaven in a warm place for a couple of hours.)
  • The next day, take the bowl out of the fridge and let it warm a bit. Crumble a piece of parchment paper and line a baking tray with it. Pour the dough on the baking tray and carefully spread it using fingers dipped in water. The sough should be about an inch thick. Leave the dough to rise in a warm place for an hour.
  • Prepare the toppings while the dough is rising. Cut the olives in half and remove pits, cut the capers, slice the onion, and mince the rosemary. Make a flavoured oil by measuring about ½ decilitre of olive oil in a glass and add a crushed garlic clove and a sprig of rosemary.
  • Preheat the oven to 225 degrees Celsius.
  • When the dough has risen, brush it with olive oil, sprinkle some salt flakes and the minced rosemary on it, and add the toppings. Press the toppings halfway into the dough. Put the focaccia in the oven and bake about 20 minutes, or until the crust is golden brown.
  • Take the focaccia out of the oven and brush it immediately with the flavoured oil to prevent hardening. Let the focaccia rest for a while before cutting.
  • Serve the focaccia as is, with for example a salad, or cut in half and fill with mozzarella and basil.

That should start the week, right? Is focaccia a usual suspect in your kitchen, or is it something that you usually see in the cafés? What are your favourite toppings?

-Toni