Tartin Tatin

Hei siellä!

Hetki ehti vierähtää, mutta täällä vielä ollaan. Kokkailut ovat jääneet varsin vähiin, mutta viime aikoina keittiössä on tullut taas pyörittyä silloin tällöin. Lisääntyvä valokin sallii taas kuvauksen, joten ajattelin ajan olevan kypsä uudelle blogikirjoitukselle.

Tarte tatin, tuo piirakoiden karamellihunnutettu kuningatar, on paikkansa ansainnut jälkiruokien hall of famessa. Sen karamelli kesyttää happaman omenan lempeäksi, yhtä aikaa makeaksi ja vielä hieman kirpeäksi kokonaisuudeksi, joka ei varmasti jätä kylmäksi. Tämä ranskatar tuppaa vaan olemaan harvinaisen vaikea saada onnistumaan. Itse olen kokeillut monien huippukokkien resepteillä, mutta kotiuuni ei tunnu sulattavan sokeria ja voita piirakkavuoan pohjalla itsestään karamelliksi, vaikka resepteissä niin väitetään. Lopputulos on aina ollut vähän vaisu ja tylsä, yleensä vielä lisäksi ruma.

OI001506-01.jpeg

Siihen tuli muutos, kun näin IG:ssä Zoe Bakes -Zoen vääntävän piirakkaa erilaisella tavalla Susan Spungenin reseptin pohjalta. Hän teki karamellin ensin pannulla sitten lisäsi omenat, jotka kypsensi pannulla. Vain pohja kypsennettiin uunissa. Tavallaan tämä tekniikka on työläämpi, mutta toisaalta paljon varmempi, koska ei tarvitse arvailla onkohan karamelli syntynyt ja omenat kypsiä – molemmat asiat ovat varmoja jo ennen kuin piirakka menee uuniin!

Toinen hieno oivallus oli tehdä baklavapohja filotaikinasta. Tarte tatinin kolmas sudenkuoppa nimittäin on kääntäminen. Moni jättää koko piirakan tekemättä, koska pelkää kaiken tuhoutuvan viimeistään, kun piirakkaa yrittää kumota. Tavallinen voitaikinapohja hajoaa todella helposti käännettäessä, joten piiras voi päätyä tarjolle monessa osassa.  Baklava sen sijaan on jopa hieman ärsyttävän sitkeää, joten epäonnistuneen käännön voi pelastaa vielä helposti. Kuvissa näkyväkin piirakkakin lipesi käännettäessä, mutta sen sai nätisti vielä pelastettua. Nerokasta!

OI001403-01.jpeg

Koska karamelli on todella kuumaa, kannattaa käyttää essua ja olla varovainen kokatessa. Suosittelen käyttämään pinnoittamatonta pannua, koska ne kestävät uunia paremmin, eikä kuuma karamelli vahingoita pinnoitetta. Omenoissa kannattaa valita hapokas lajike, Granny Smith on klassikko, Pink Lady taas vähän makeampi ja tasapainoisempi valinta. Valmista piirakkaa kannattaa leikata pizzapyörällä, koska se leikkaa sitkeää pohjaa kokemukseni mukaan parhaiten.

OI001409-01.jpeg

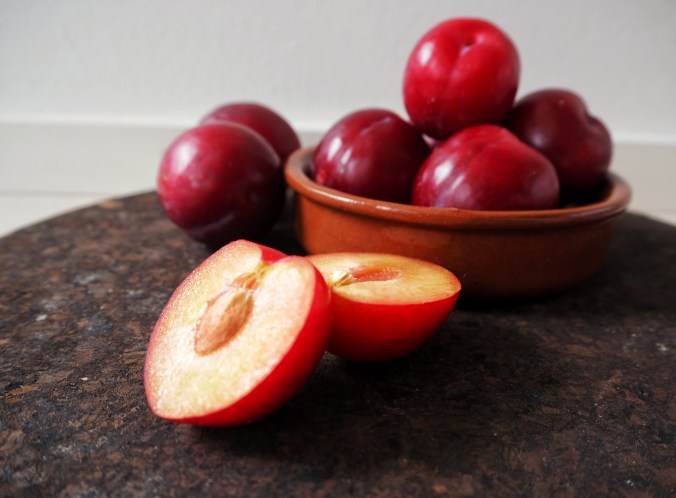
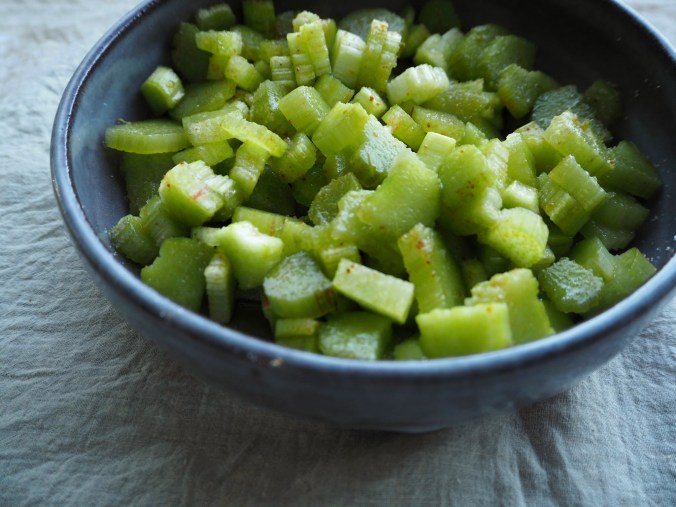
No, they are not potatoes this time.

Tarte tatin baklavapohjalla

4 hapanta omenaa (Pink Lady, Granny Smith)
Sitruunamehua
200 g sokeria
50 g voita kuutioituna
ripaus vaniljaa
(tilkka viskiä)

Pohja
8 levyä filotaikinaa sulatettuna
100 g voita sulatettuna
½ dl hunajaa
ripaus suolaa
80 g saksanpähkinää rouhittuna

Tarjoiluun
Ranskankermaa, sokeria ja vaniljaa
tai
vaniljajäätelöä

  • Sulata filotaikina pakkauksen ohjeen mukaan.
  • Kuori omenat ja leikkaa ne neljään osaan. Poista siemenkodat.
  • Laita omenalohkot kulhoon ja pirskota päälle sitruunamehua tummumisen estämiseksi
  • Laita uuni lämpiämään 200-asteiseksi.
  • Kaada sokeri uuninkestävälle paistinpannulle, ravista jotta sokeri leviää tasaisesti. Laita pannu keskilämmölle ja anna sokerin sulaa koskematta siihen. Kun sokeri on sulanut laikuittain ja alkaa vähän savuta, sekoita se tasaiseksi. Lisää pannulle voi, vaniljajauhe ja loraus viskiä, jos käytät sitä. Sekoita tasaiseksi.
  • Asettele omenalohkot karamellin joukkoon pannulle. Kypsennä omenoita karamellissa miedolla lämmöllä kääntäen muutaman kerran, jotta ne kypsyvät tasaisesti. Kun omenat ovat pehmenneet noin 20 minuutin kypsentämisen jälkeen, ota pannu pois lämmöltä. Asettele omenat lopulliseen asentoon, esimerkiksi kupera puoli pohjaan päin.
  • Kun omena kypsyvät pannulla, tee baklavapohja. Sulata voi ja sekoita joukkoon hunaja ja ripaus suolaa. Ota esiin 8 levyä filotaikinaa ja säilytä niitä pyyhkeen alla.
  • Aseta ensimmäinen filotaikinalevy pöydälle ja sudi voi-hunajaseosta sen päälle. Aseta toinen levy sen päälle, voitele sekin ja lisää kolmas levy filotaikinaa. Voitele sekin ja ripottele sen päälle saksanpähkinärouhetta. Toista lopuilla filotaikinalevyillä, mutta jätä viimeinen levy voitelematta.
  • Leikkaa levy pannun kokoiseksi ympyräksi, se on helpointa saksilla.
  • Asettele pohja pannulle omenoiden päälle. Reunoja voit yrittää painaa kohti pannun pohjaa.
  • Laita pannu uuniin keskitasolle. Paista kunnes pohja on saanut kauniin ruskean värin, se vie noin 15-20 minuuttia. Anna valmiin piirakan levätä muutama minuutti ennen kuin kumoat sen lautaselle.
  • Laita lautanen pannun päälle ja pidä sitä tiukasti pannua vasten esimerkiksi pyyhkeellä ja käännä pannu nopeasti. Piirakka putoaa pannusta lautaselle. Baklavapohja ei hajoa, vaikkei kääntö onnistuisikaan, joten voit korjata piirakkaa vielä lautasella.
  • Jos pannuun jää karamellia, lämmitä pannua ja lisää siihen vielä tilkka viskiä. Kiehauta ja kaada liemi piirakan päälle.
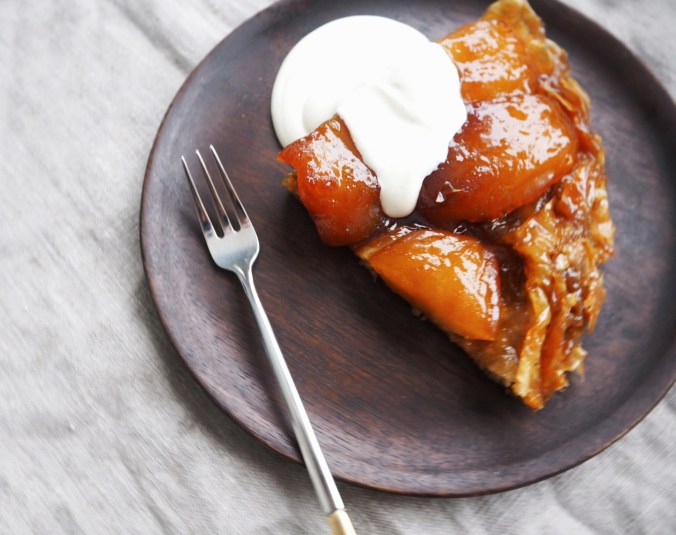
  • Anna piirakan jäähtyä ennen tarjoilua. Tarjoile piirakka vaniljajäätelön tai sokerilla ja vaniljalla maustetun ranskankerman kanssa.
OI001413-01.jpeg

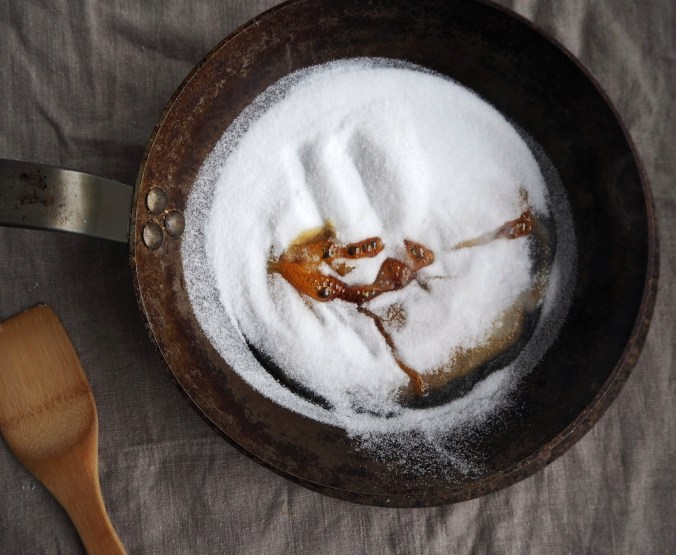
Annan sokerin sulaa koskematta | Allow the sugar melt without touching it

OI001420-01.jpeg

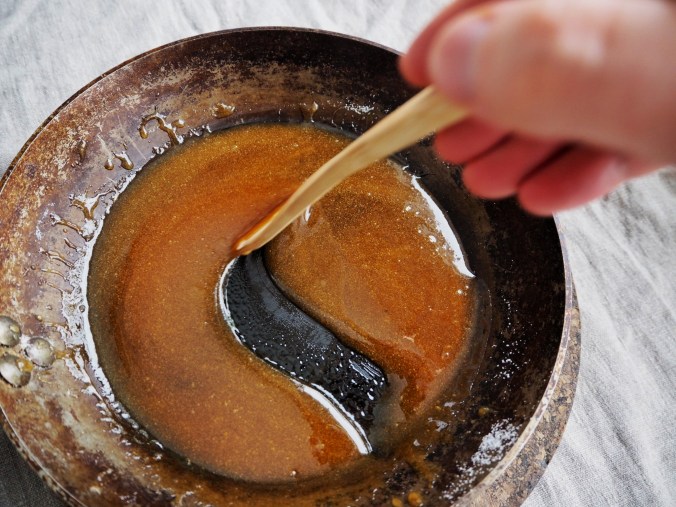
Sekoita sulanut sokeri tasaiseksi | Mix the melted sugar to make an even caramel

OI001432-01.jpeg

Voi saa kinuskin kuohumaan | Adding the butter makes the caramel bubble

OI001465-01.jpeg

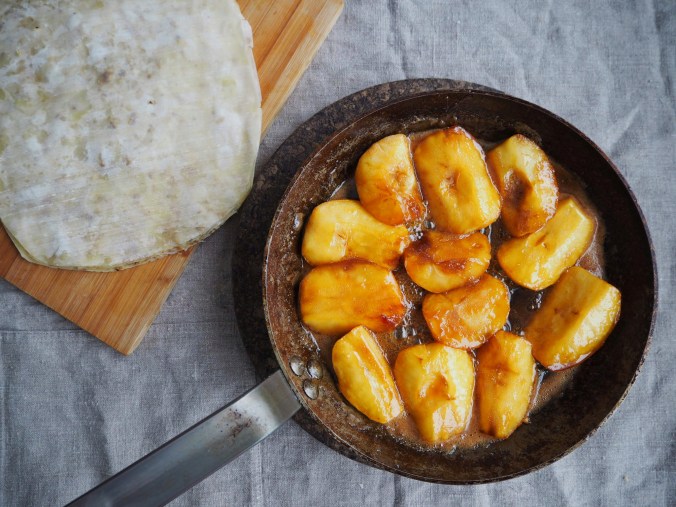
Omenat kypsyvät pehmeiksi karamellissa | Apples cook nice and tender in the caramel

Onnea piirakantekoon ja valoisaa helmikuuta! Josko seuraavan päivitykseen menisi alle 10 kuukautta..

– Toni

OI001496-01.jpeg

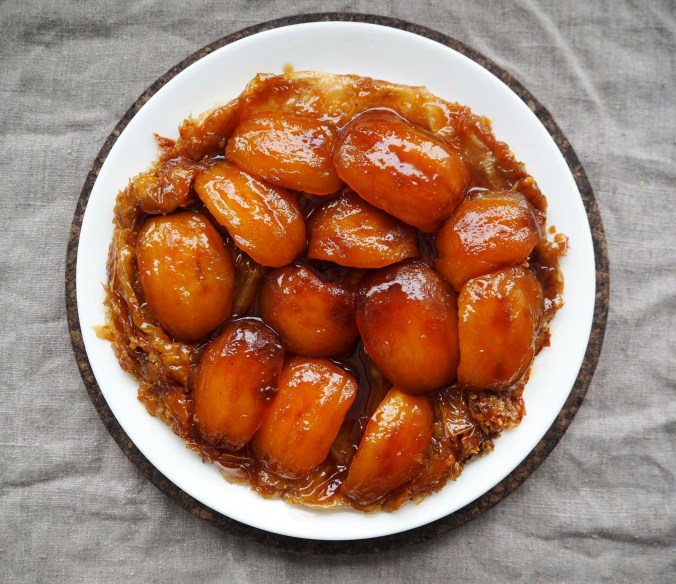
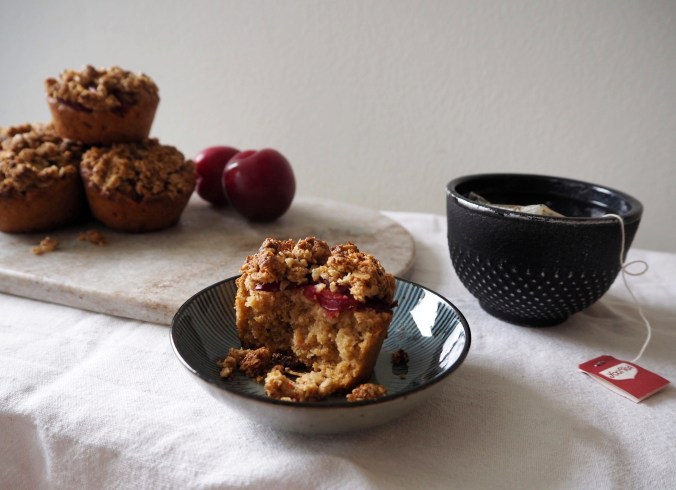
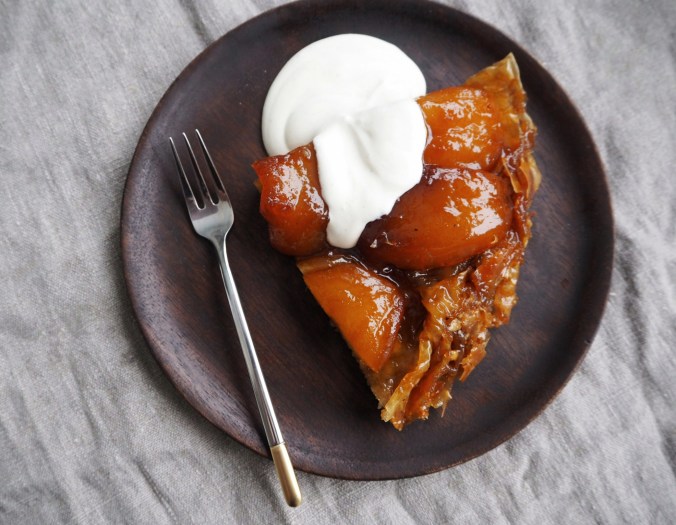
Tarte Tatin ready to serve, sir!

Hi there! It’s been a while, but I’m still here! I have not been cooking much in the last year, but I have surprised myself by twirling around the kitchen lately. The winter darkness has been hard, but now the light is finally returning slowly, so it’s actually possible to take photos in the daylight. Thus, I thought it was a time to write something.

Tarte tatin, the queen of pies in her caramel veil, has undisputedly earned its place on the dessert hall of fame. The sultry sweet caramel mellows the sharp sourness of the apples to form a sweet and sour combination that will not leave you cold. However, this dame française is famously fickle to make. I’ve tried many recipes from top chefs, but a regular oven doesn’t seem to melt the sugar and butter into caramel, even if the recipes so claim. The results have been bland, boring, and usually ugly.

Then I saw one of my baking gurus, Zoë from Zoë Bakes, make this version on her IG based on Susan Spungen’s recipe. She made the caramel in the pan, then cooked the apples in the caramel, and finally baked only the crust in the oven. In a way this means more work, but it also makes sure all of the pitfalls of making this pie are avoided: the caramel will be formed and the apples will be cooked thoroughly – and you know this even before the pie goes in the oven!

Another genius variation is to use baklava made from filo dough as the crust. Many bakers have given up tarte tatin because it is so hard to keep it in one piece when inverting it. Traditional pie crust breaks and crumbles so easily, so the result might be a pile instead of a pie. Baklava, on the other hand, is to flexible that it is virtually impossible to break it accidentally. Even if something goes wrong (like it went with the pie in the pictures), the pie is easy to repair before serving. Genius!

The caramel is super hot, so please wear an apron and be careful. I recommend using a non-coated skillet, as the coating might get damaged with the piping hot caramel and the oven heat. When choosing the apples, opt for a sour variety like the classic Granny Smith or a lightly sweeter Pink Lady. And when it’s time to cut the pie, pizza cutter is the weapon of choice to get through the crust.

OI001454-01.jpeg

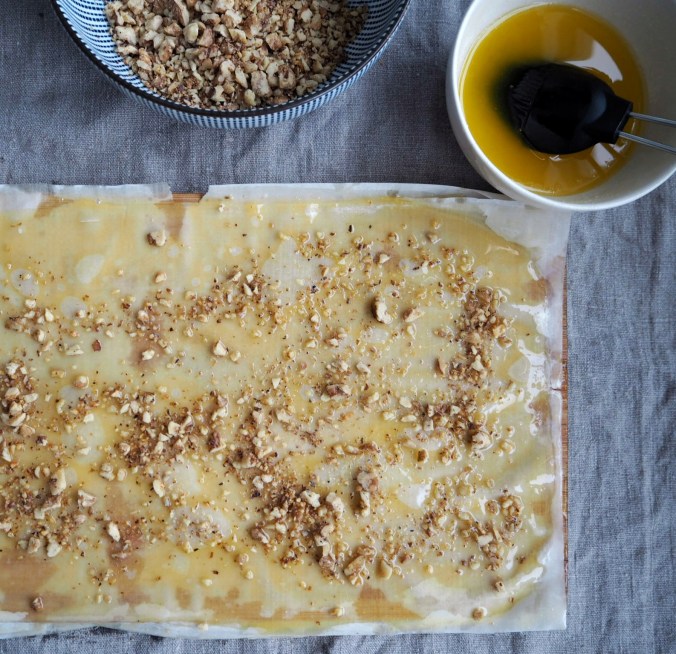
Voin ja pähkinöiden kanssa ei kannata kitsastella | Don’t skimp with the butter or walnuts

OI001458-01.jpeg

OI001469-01.jpeg

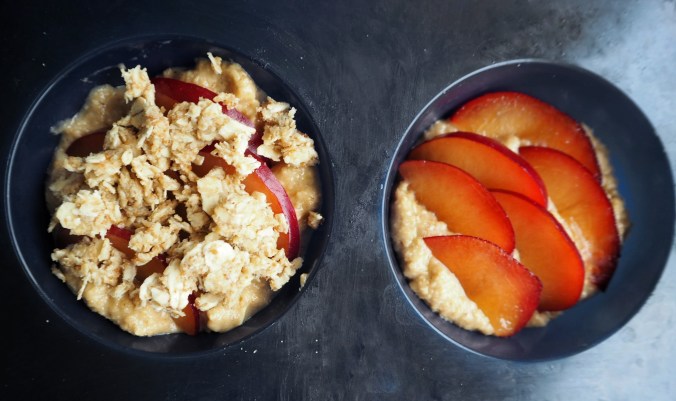
Valmiina kokoamiseen | Ready for the crust

OI001471-01.jpeg

Tarte Tatin with Baklava Crust

4 sour apples (Pink Lady, Granny Smith)
lemon juice
200g sugar
50g butter, cubed
a pinch of vanilla powder
(a splash of whisky)

Crust
8 sheets of filo dough, defrosted
100g butter, melted
½dl honey
a pinch of salt
80 g walnuts, chopped

To Serve
Sour cream, sugar, and vanilla
or
Vanilla ice cream

  • Defrost the filo dough according to instructions on the package.
  • Peel the apples, cut into quarters, and de-core.
  • Place the apple pieces in a bowl and sprinkle lemon juice on them to prevent browning.
  • Pre-heat oven to 200 degrees Celsius
  • Pour the sugar on an oven-proof skillet. Shake lightly to evenly distribute. Place on medium-high heat and leave untouched until some of the sugar is smelted and you see the first whiff of smoke. Mix to melt the rest of the sugar, add butter, vanilla, and whisky (if using). Mix to combine. Remove from heat.
  • Place the apple pieces on in the skillet and place on low heat. Cook until the apples are soft all over, turning a couple times during cooking. This will take about 20 minutes, depending on the apples. Remove from heat and set the pieces in the desired position, for example the round side down.
  • While the apples are cooking, make the crust. Melt the butter, add the honey and a pinch of salt, and mix. Take out the 8 filo sheets and keep them under a tea towel to prevent drying.
  • Place the first filo sheet on the worktop and brush with the butter-honey mixture. Place a second sheet on it and brush again. Add a third sheet and bush it with the butter mixture, then sprinkle some of walnuts on the sheet. Repeat until the rest of the sheets are stacked. Do not brush the last sheet.
  • Cut the crust to fit the skillet you are using. It is easiest to use scissors to cut it.
  • Place the crust on the apples on the skillet. Then place the skillet in the hot oven in the centre and cook until the crust is nicely golden brown, about 15 to 20 minutes. Remove the skillet from the oven and let set a couple of minutes.
  • Flip the pie: place a plate tightly on the skillet and hold in place with a tea towel. In one quick motion, invert the skillet. Do this on a worktop, as something might fall out.
  • The baklava crust won’t break like a traditional pie crust, so you can repair the pie on the plate, if necessary.
  • If there is some caramel left in the skillet, put it back on heat and add a splash of whisky to de-glaze it. Bring to boil and pour onto the pie. Let the pie cool a bit before serving.
  • Serve with vanilla ice cream, or sour cream flavoured with sugar and vanilla.
OI001486-01.jpeg

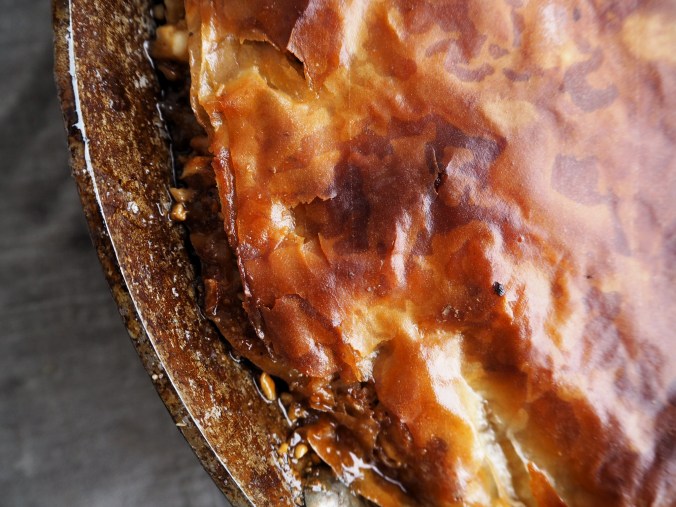
50 shades of nicely golden brown
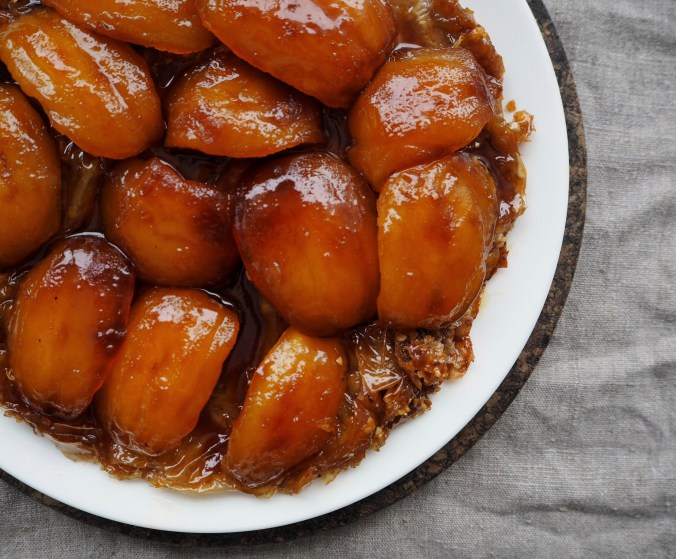
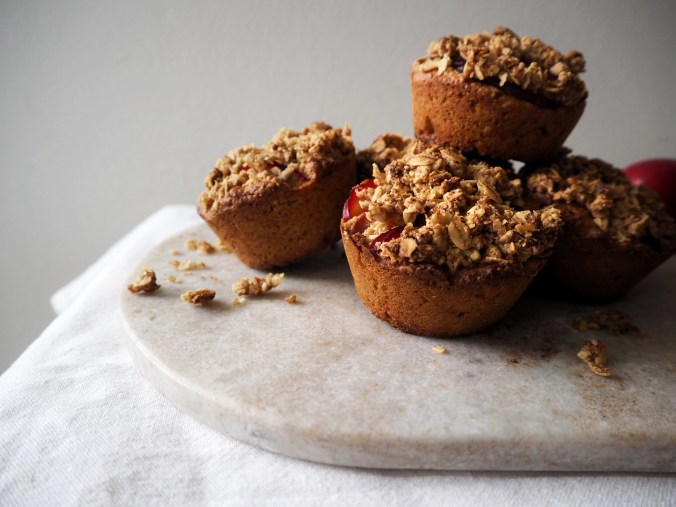
OI001490-01.jpeg

Oh, so shiny!

OI001484-01.jpeg

Good luck with the pie-baking and enjoy as the light begins to brighten the gloomy winter days.
Hope to see you again (in less than 10 months).

Yours,
-Toni


Appelsiini-suklaafudge | Orange Chocolate Fudge

Hei siellä!

Pukkaako joulustressi päälle? Haluaisitko viedä syötäviä lahjoja tutuille, mutta aika ei tunnu riittävän mihinkään? Huomasitko toissajouluna kaverille antamasi konjakkisinapin lojuvan edelleen hänen jääkaappinsa perukoilla? Vastaus pulmiisi on suklaafudge!

IMG_20171217_113626-01.jpeg

”Ai fudge? Eikö sitä keitellä tuntikausia ja se juoksettuu megahelposti?” saatat kysyä. Vastaus on, että periaatteessa kyllä, mutta on olemassa oikotie onneen, joka tässä tapauksessa johtaa usein jopa parempaan lopputulokseen kuin pitkä ja hidas polku. Kerman sijaan fudgen voi nimittäin valmistaa kondensoidusta maidosta, joka notkistaa suklaan ja tekee muikean samettisen ja pehmeän rakenteen fudgepalohin. Resepti on kaiken lisäksi suorastaan niin yksinkertainen, että sen kutsuminen reseptiksi on melkeinpä liioittelua.

Perusresepti sisältää kaksi ainesosaa:  sulatettua suklaata ja tölkin kondensoitua maitoa. Niillä pääsee jo pitkälle, mutta fudgen voi myös tuunata vastaamaan vastaanottajan mieltymyksiä tai omia namufantasioitaan. Tällä kertaa raastoin mukaan appelsiinia ja rouhin päälle suolattuja cashew-pähkinöitä. Jouluksi voisi kokeilla myös vaikka kanelia ja kuivattuja karpaloita, tai raikkaampaa kaipaavalle limeä ja pistaaseja.

OI001517-01.jpeg

Suosittelen käyttämään tummaa suklaata, joka ei ole kovin makeaa, sillä lähes kaikki Suomessa myytävät maitotiivisteet ovat tuhdisti sokeroituja. Jos et kaihda kunnolla makeaa tai löydät sokeroimatonta maitotiivistettä (englanniksi evaporated milk) niin voit kokeilla muitakin suklaalaatuja huoletta. Valkosuklaata käytettäessä kannattaa suklaan määrää kuitenkin lisätä ja tehdä mahdollisuuksien mukaan koe-erä, koska valkosuklaa saattaa laadusta riippuen olla kehnompaa jähmettämiskyvyiltään.

Valmiin fudgen voikin sitten vain leikata paloiksi, pyöritellä halutessaan kaakaojauheessa ja pakata sellofaani- tai paperipussikoihin. Aikaa menee lähinnä fudgen kovettamiseen pakkasessa tunnin verran, muuten projekti on ohi tuossa tuokiossa. Joskus hyvää saa helposti ja nopeasti.

OI001502-01.jpeg

Appelsiini-cashew-suklaafudge
Noin 25 palaa

Ainekset
1 tlk kondensoitua maitoa (n. 400 g)
300 g tummaa suklaata
Luomuappelsiinin kuori
2 dl suolattuja cashew-pähkinöitä

Lisäksi halutessasi
kaakaojauhetta

  • Vuoraa noin 20 x 30 cm vuoka leivinpaperilla. Tee sille tilaa pakkaseen tai jääkaappiin.
  • Rouhi cashew-pähkinöitä pienemmäksi ja raasta appelsiinin kuori hienolla raastimella.
  • Pilko suklaa paloiksi ja sulata vesihauteessa (eli keitä pieni määrä vettä kattilassa ja aseta kulho kattilan päälle niin, ettei sen pohja kosketa vettä) tai mikrossa (30 sekuntia kerrallaan).
  • Kaada kondensoitu maito suklaan mukaan ja sekoita rivakasti. Jos maitotiiviste on viileää, suklaa saattaa jämähtää nopeastikin. Lisää appelsiininkuori ja sekoita.
  • Kaavi massa leivinpaperilla vuorattuun vuokaan ja tasoita. Ripottele cashew-rouhe massan päälle ja painele rouhe kiinni massaan.
  • Laita vuoka pakkaseen tai jääkaappiin ja anna fudgen jähmettyä tunnin verran.
  • Leikkaa jähmettynyt fudge paloiksi lämpimällä veitsellä. Voit halutessasi pyöritellä fudgepalat kaakaojauheessa. Pakkaa fudget pussiin ja anna lahjaksi tai ahmi itse.

Hyvää joulua, muistakaa ottaa iisisti ja nauttia herkuista ja ruoasta hyvällä omallatunnolla!

-Toni

OI001505-01.jpeg


Hi there!

Feeling swamped by everything you have to get done by Christmas? You want to give delicious treats to your loved ones, but it feels like about eight hours of each day are just missing? Did you notice the home-made mustard you gave to your friend in 2014 still hanging in the back of their fridge? Read on, because I may have a solution for your problems.

“Fudge? The soft toffee type thing that takes hours to cook?” you might be asking, and you might be right on that. Though I’m usually an advocate for slow food and original recipes, a shortcut here and there is more than acceptable. Especially since the shortcut I’m about to point out leads to a better result than the winding path. The shortcut I’m talking about is using condensed milk instead of cream. The condensed milk makes the fudge velvety soft and delicious. Moreover, it makes the recipe so easy that calling it a recipe is an exaggeration.

The basic recipe requires two ingredients: melted chocolate and a can of condensed milk. Other things can be added to introduce flavour or texture, like the orange zest and cashew nuts in this recipe. You could add some Christmassy spices and dried cranberries to make a holiday fudge, or lime zest and pistachios for someone looking for some refreshment after a heavy feast.

I would use dark and bitter chocolate for this, as the condensed milk is plenty sweet. If you are not afraid of some serious sweetness, or you can get your hands on a can of unsweetened condensed milk (often called evaporated milk), you can use whatever chocolate you fancy. If using white chocolate, though, I would add some more chocolate and possibly make a test batch, as white chocolate might not be able to set the fudge entirely.

When the fudge is done, you can cut the fudge into pieces and roll them in cocoa powder and pack into festive bags and shell out to people and ta-dah, you got some new fans! The whole thing is done in a little over hour, so I would call this efficient time management in the time of the year when the hours in a day seem to vanish inexplicably. Sometimes good things just might be that quick and easy.

Orange and Cashew Chocolate Fudge
Approx. 25 pieces

Ingredients
1 can of condensed or evaporated milk (about 400g)
300g dark chocolate
Zest of an organic orange
2 dl salted cashews

Additionally
Cocoa powder (optional)

  • Line a rectangular pan (about 20 x 30 cm) with parchment paper. Make room for the pan in your freezer or fridge.
  • Chop the cashews coarsely, grate the zest off the orange.
  • Melt the chocolate either in bain-marie (in a bowl placed on a kettle of steaming water) or microwave (30 seconds at a time)
  • Pour the condensed milk into the melted chocolate and mix briskly. If the condensed milk is cool, the chocolate might stiffen up quickly. Add the orange zest and mix thoroughly.
  • Transfer the fudge into the pan lined with parchment paper and even the surface. Sprinkle the cashews on top and press gently to make them stick to the fudge.
  • Place the pan into a freezer or fridge and let set for an hour.
  • Cut the fudge into chunks using a warm knife. If you want, you can roll the chunks in cocoa powder for a dusty finish. Pack into pretty bags and gift to those who have been nice. Including yourself.

Merry Christmas people, remember to take it easy and enjoy your treats and feasts!

-Toni

IMG_20171217_113207-01.jpeg

Kaura-luumumuffinit | Oat & Plum Muffins

Syksyn satokausi on kuumimmillaan, kun kirsikat ja muut marjat kypsyvät nopeasti, ainakin täällä etelässä. Kirsikoista teinkin jo piirakan pariin kertaan ja muutama täytyy varmaan vielä tehdä, tuoreita hapankirsikoita kun ei kauaa ole saatavilla. Viinimarjat myös kiinnostaisivat, mutta niistä on jostain syystä vaikeampaa keksiä kokattavaa. Ehkä jonkinlainen kastike jollekin suolaiselle ruoalle…

OLYMPUS DIGITAL CAMERA

Seuraavaksi kypsyvät pian luumut, kriikunat ja sensellaiset. Sitten onkin jo omenoiden aika. Ne kaikki sopivat upeasti murupaistokseen (jonka reseptiä voi vilkaista raperperipaistoksen ohjeesta), mutta myös hieman helpommin käsiteltäviin muffineihin. Tämä on yksi niistä reseptikirjan tähdistä, jotka ovat jääneet erityisesti mieleen siksi, että tein näitä evääksi kun syksyisin veimme opiskelukaverin kanssa Tampereelle saapuneita vaihto-opiskelijoita syyskävelylle Pyynikille, Pispalaan ja Tahmelaan. Noihin seutuihin harva tajuaa mennä tutustumaan munkkikahvilaa syvemmin vaikka syytä olisi – Pispalanharjun Pyykkimettä-nimisestä puistosta nimittäin aukeaa yksi Tampereen hienoimmista näköaloista. Rappusseikkailu alas Tahmelaan ja sieltä Varalan kautta Rosendahliin ja eteläpuistoon muodostaa upean, joskin aika rankan kävelylenkin, joten eväille on varmasti kysyntää.

OLYMPUS DIGITAL CAMERA

Tein tämän reseptin gluteenittomana, koska kaapissa lymyili puoliunohdettu kaurajauhopussi, mutta muffinit voi tehdä myös vehnäjauhoista. Valkoista sokeria vältin käyttämästä, joten makeutta leivonnaisiin tulee aavistuksen terveellisemmästä kookossokerista, jota saa aika laajalti jo marketeista. Se on myös hieman valkoista sokeria makeampaa ja tuo leivonnaisiin fariinisokerimaista makua. Muffineista ei suhteellisen pienen sokerimäärän vuoksi tule liian makeita, joten ne ovat omiaan väli- tai aamupalaksi.

Luumujen sijaista voi käyttää oikeastaan mitä tahansa marjoja tai hedelmiä, joten nämä onnistuvat kyllä muinakin vuodenaikoina. Myös pakastetut sesonkiherkut sopivat hyvin, koska uuniin ne päätyvät kuitenkin. Kotona tarjoiltuna muffinin kylkeen voi valuttaa vaniljakastiketta tai kermavaahtoa, syysretkellä ne maistuvat sellaisenaan.

OLYMPUS DIGITAL CAMERA

Ready, set, mix!

OLYMPUS DIGITAL CAMERA

Muffins in various states of undress

Kaura-luumumuffinit
6 kpl

Ainesosat
50 g voita
1 dl piimää
1 sitruunan kuori
1 kananmuna
¾ dl kookossokeria
ripaus vaniljajauhetta
2 dl kaurajauhoa
1 dl isoja kaurahiutaleita
1 tl leivinjauhetta
ripaus suolaa
2-3 luumua

Muru
1 dl isoja kaurahiutaleita
20 g voita
1 rkl kookossokeria
1 rkl kaurajauhoa

  • Lämmitä uuni 175-asteiseksi
  • Mittaa voi ja piimä pieneen kattilaan, raasta mukaan sitruunan keltainen kuori. Laita liedelle ja kiehauta ja jätä sitten jäähtymään.
  • Sekoita keskenään kuivat aineet, eli kaurajauhot ja -hiutaleet, suola ja leivinjauhe.
  • Vatkaa kulhossa kookossokeri, vaniljajauhe ja kananmuna kuohkeaksi vaahdoksi. Lisää vaahtoon vuorotellen kuivia aineita ja piimä-voiseosta kunnes kaikki ainekset ovat sekaisin.
  • Poista luumuista kivet ja leikkaa luumut ohuiksi viipaleiksi.
  • Sekoita murun ainekset pienessä kulhossa ja nypi sormin tasaiseksi.
  • Jaa taikina kuuteen muffinivuokaan. Jos käytät metallivuokaa, vuoraa kupit paperisilla vuoilla, jotta valmiit muffinit irtoavat helposti. Asettele päälle luumuviipaleita ja ripottele lopuksi muruseosta muffinien päälle. Paista uunissa keskitasolla noin 20-25 minuuttia, tai kunnes muffinin keskelle pistetty puutikku tulee ulos puhtaana.
  • Tarjoile muffinit sellaisenaan tai vaniljakastikkeen tai kermavaahdon kanssa.

-Toni

OLYMPUS DIGITAL CAMERA

The harvest season is gathering momentum as cherries and berries are ripening fast here in Southern Finland. I already made a couple sour cherry pies from the cherries in my family’s garden, but I think I’ll have to do a couple more as the cherry season is awfully short. Fortunately, frozen cherries work well in a pie, too. Currants, on the other hand, interest me greatly but I’m quite baffled about what to do with them. Maybe a sauce for a main course…

The next wave of the harvest will be plums and damsons, and then apples. All of them are prefect for a crumble (the recipe of which can be found here), but also for muffins that are easier to travel with and therefore are more than well suited for picnics. This recipe from the leaf-covered recipe book has some special memories attached to, as I used to make these muffins when me and my friend from the university took our exchange students that arrived for the Autumn semester to see the best views and nicest hiking trails in central Tampere. The Pyynikki-Pispala-Tahmela-Rosendahl area on the southern bank of the isthmus on which Tampere is located is a wonderful recreational and residential area which hosts gorgeous views on both lakes and features surprisingly vast forests in the ridge area, considering the central location. The route we took with the exchange students was quite long and hilly, so well-prepared snacks were on high demand.

I made this batch gluten-free as I had some leftover oat flour at hand, but you can also use wheat flour. Additionally, I avoided using white sugar and opted for coconut sugar instead, which is supposed to be a tiny bit better for you. Personally, I like the deeper taste it brings to the muffins, similar to brown or muscovado sugar.

Instead of plums of damsons, you can use basically any and all fruits and berries for these muffins, even frozen ones as they all end up being baked in the oven. When served indoors, some vanilla custard or whipped cream would be a nice addition to the muffins. Outdoors on a picnic or a hike they will be great as a snack on their own.

Oat and Plum Muffins
6 pc.

Ingrefients
50 g butter
1 dl buttermilk
zest of a lemon
1 egg
¾ dl coconut sugar
pinch of vanilla
2 dl oat flour
1 dl jumbo rolled oats
1 tsp. baking powder
pinch of salt
2-3 plums

Crumble
1 dl jumbo rolled oats
20 g butter
1 tbsp. coconut sugar
1 tbsp. oat flour

  • Pre-heat oven to 175 degrees.
  • Measure the butter and buttermilk into a small saucepan. Grate the zest of the lemon and add it to the saucepan. Put on heat, bring to a boil and set aside to cool.
  • Mix together the dry ingredients: oat flour and rolled oats, salt, and baking powder.
  • In a bowl, beat the coconut sugar, vanilla, and egg until a fluffy. Add half of the dry ingredients and half of the butter and sour milk and mix, then add the rest and mix again.
  • Remove pits from the plums and slice thinly.
  • Mix the ingredients for the crumble in a small bowl and rub with fingers to make an even crumble.
  • Divide the batter into 6 muffin cups. If using a metal tin, line the slots with paper cups to make sure the muffins come out easily. Place plum slices on top of each muffin and finish by sprinkling with crumble. Bake in the centre of the oven for about 20 to 25 minutes, on until a wooden skewer inserted in a muffin comes out clean.

Serve the muffins as is or with vanilla custard or whipped cream

OLYMPUS DIGITAL CAMERA

Raparperipaistos & Vaniljakastike | Rhubarb Crumble & Vanilla Custard

Varmoja kesän merkkejä on joka vuosi touko-kesäkuussa maasta ylös puskevat mehevät raparperit, ja myös niistä mesoavat suomalaiset. Joku media kertoi taannoin raparperipiirakan olevan joka vuosi alkukesästä etsityin resepti. Noh, lyödäänpäs nyt sitten lusikka tähän soppaan, tai siis vuokaan.

Raparperi on myös yksi kasviksista, joka on säilynyt sesonkiherkkuna globaalin elintarvikerallinkin aikana. Syynä siihen lienee raparperin totuttelemista vaativa hapan maku, oksaalihappopitoiset myrkylliset lehdet sekä se, että raparperi on parhaimmillaan vaan tässä alkukesästä, kun varret ovat vielä mureita eivätkä tuhottoman happamia.

OLYMPUS DIGITAL CAMERA

Sokeri mehustaa raparperit sopivasti ennen kypsennystä | Sugar draws out the juice in the rhubarb

Ulkomaisissa resepteissä raparperia näkee usein suolaisen ruoan lisäkkeenä tai mausteena, mutta Suomessa 99,8 % varsista taitaa mennä kurkusta alas vaniljajäätelön tai -kastikkeen kanssa. Maitotuotteiden syöminenhän liittyy pelkoon siitä, että oksaalihappo sitoo kalsiumia elimistöstä, jos sitä ei ole ravinnossa. Näinhän se ymmärtääkseni menee, mutta pelko on suurimmaksi osaksi kaiketi turha, koska suurin osa raparperin oksaalihaposta on lehdissä, joita ei syödä muutenkaan. Lisäksi raparperia syödään yleensä hyvin satunnaisesti, joten oksaalihappokertymästä ei tarvitse huolestua.

Tavallisin raparperiherkku on tietenkin se piirakka. Jotkut tekevät sen pilkotusta raparperista, toiset keittävät raparperin ensin kiisseliksi. Siinä lienevätkin piirakan tärkeimmät variantit, joten jätän piirakkaohjeet kunkin suvun salaisiksi resepteiksi. Kaurainen raparperipaistos sen sijaan on mukava herkku, jossa kauran pehmeä maku ja rapea rakenne yhdistyvät raparperin happamuuden ja makeuden kanssa oikein mainioksi yhdistelmäksi. Paistosta voi myös varioida loputtomasti lisäämällä kauden muita hedelmiä ja marjoja mukaan, tai muuttamalla murun maustamista. Erityisesti annosvuoissa tarjoiltuna tämä jälkkäri tuo jokaiselle syöjälle hyvän mielen, kun saa tuhota itse koko kulhon (saatan olla tosin yksin tämän tunteen kanssa). Lisäksi tämä herkku on gluteeniton, kunhan huolehtii, että kaurahiutaleet ja -jauhot ovat gluteenitonta sorttia.

OLYMPUS DIGITAL CAMERA

Valmiina, paikoillanne, uuniin! | Four cocottes reporting for duty, sir!

Bonuksena, tai oikeastaan vähintään yhtä tärkeänä palasena, on klassinen vaniljakastike. Jostain syystä en ollut viime vuosina tehnyt perinteistä vaniljakastiketta. Olen tyytynyt makeuttamaan jogurtti-ranskankermaseoksen ja maustamaan sen vaniljalla. Hyvää sekin on, mutta siitä uupuu aidon vaniljakastikkeen täyteläisyys ja pehmeys. Tämäkin kuitenkin on verrattain helppo valmistaa, kunhan vain jaksaa sekoittaa tarpeeksi, ettei maito pala pohjaan. Kastike hyytyy varsinaisesti kananmunan keltuaisilla, mutta ikään kuin vakuutuksena voi käyttää maissi- tai perunatärkkelystä. Lusikallinen tärkkelystä toimii stabilointiaineena ja helpottaa kastikkeen onnistumista. Hooceimmat kokit voivat jättää tärkkelykset pois, mutta ainakin ensikertalaisille suosittelen niiden käyttämistä, ettei tarvitse heittää pois juoksettunutta kastiketta.

OLYMPUS DIGITAL CAMERA

Raparperipaistokset & vaniljakastike
4 annosta

Ainekset
300 g kuorittua raparperia (noin 6-8 vartta)
1 dl ruskeaa sokeria (esim. kookossokeri)
25 g voita
2 dl isoja kaurahiutaleita
2 rkl kaurajauhoa (muukin jauho käy)
ripaus kanelia
ripaus muskottipähkinää
ripaus kardemummaa

Vaniljakastike
2 dl kuohukermaa
1 dl maitoa
3 kananmunan keltuaista
½ rkl maissitärkkelystä
2 rkl sokeria
reilu ripaus vaniljajauhetta tai puolikas vaniljatanko

  • Laita uuni lämpiämään 200-asteiseksi.
  • Kuori raparperit ja pilko ne puolen sentin paksuisiksi viipaleiksi. Laita raparperiviipaleet kulhoon ja kaada mukaan sokeri. Sekoita ja jätä mehustumaan siksi aikaa, kun teet kastikkeen ja murun.
  • Tee kastike. Mittaa kerma ja maito pieneen kattilaan. Laita mukaan vaniljajauhe. Jos käytät vaniljatankoa, halkaise se ja kaavi sisältä siemenet kerman sekaan. Kuumenna seos kiehuvaksi koko ajan sekoittaen, jotta maito ei pala pohjaan.
  • Sekoita toisessa kattilassa kananmunan keltuaiset, maissitärkkelys ja sokeri. Vatkaa kevyesti vispilällä. Kaada kattilaan kuuma kerma-maitoseos ja sekoita. Laita kattila liedelle, joka on miedolla lämmöllä. Sekoita jatkuvasti, kun kastike paksunee ja alkaa tarttua vispilään tai lusikkaan. Siirrä kastike kannuun tai kulhoon ja laita jääkaappiin tai pakastimeen jäähtymään.
  • Tee muru. Mittaa kulhoon kuutioitu voi, kaurahiutaleet, jauho, sokeri ja mausteet. Nypi seos sormin muromaiseksi massaksi.
  • Kokoa paistokset. Voit tehdä joko yhden ison tai neljä pientä paistosta. Kaada ensin mehustuneet raparperit mehuineen uunivuokaan tai annosvuokiin. Jaa sitten muruseos tasaisesti raparperien päälle. Sekoita kevyesti. Laita paistokset uuniin keskitasolle ja paista 20 minuuttia, tai kunnes raparperit ovat pehmenneet ja muru on saanut hieman väriä. Anna jäähtyä hetki ennen tarjoilua.
  • Tarjoile raparperipaistos jäähtyneen vaniljakastikkeen kanssa.

No, joko on naapurin ramppanperit nyysitty? Mites vaniljakastike, ostatko sen jatkossakin kylmähyllystä, vai aiotko kokeilla itse keittelemistä?

Kesäisin (sateisin) terveisin,
-Toni

Rhubarbs pushing their stalks through the soil towards to sky is a sure sign of the summer’s arrival, and so is the food media going bonkers over rhubarb recipes. Some Finnish food medium told recently that rhubarb pie is their most searched recipe every year in early June. Well, I can’t resist the temptation either, so here goes my rendition.

The rhubarb is one of the produce items that has resisted the global food market’s endeavours to have everything available always, and still today remains as a truly seasonal treat. The reason for the resistance might have something to do with the sour taste that requires some getting used to, the poisonous leaves containing ample amounts of oxalic acid, and the fact that the juicy stalks are at the best in early Summer, and later in the summer they get even more sour and bitter and fibrous.

I’ve encountered rhubarb used in savoury cooking mostly in recipes outside of Finland, but here rhubarb is almost exclusively shoved down the pie-hole covered in vanilla custard or ice cream. The reason people are eating rhubarb with dairy products is the fact that oxalic acid binds calcium from the body unless there is some available in the accompanying food. This is true, to my understanding, but still the fear is mostly misplaced: a vast majority of the oxalic acid in rhubarb is in the leaves (which are not to be eaten), and also the sporadic consumption of rhubarb prohibits dangerous amounts of oxalic acids building up in the body. So keep munching your rhubarbs (with moderation) without feelings of misplaced guilt.

The most usual rhubarb treat, and rightly so, is of course the Rhubarb Pie. Some people make the pie with chopped rhubarb, some boil the stalks into a compote before ladling onto a crust. That’s about the variation the pie will get you, so I’ll leave the rhubarb pie recipes as family secrets. However, a crumble with crunchy oats is a different story: a delightful dessert that combines the mellow taste and the wonderful crunch of the rolled oats with the tang of the rhubarb, all wrapped up in a comforting cocoon of sugar and vanilla sauce. (Well, that got a little out hand, pardon me.) Furthermore, this dish can be varied endlessly by adding other season fruits and berries, or changing the spices in the crumble. This treat is also more accommodating as it is gluten-free, as long as you make sure to use gluten-free rolled oats and oat flour.

As a bonus, or rather as equally important piece of the experience, I’ll give a recipe for a classic vanilla custard. I hadn’t made a real custard in years before now. I used to mix yoghurt, sour cream, sugar and vanilla and call that a vanilla sauce. Although that is good as well, the thick and soothing vanilla custard is in a league of its own. Custard seems to be regarded as something tricky to make, but I assure you it’s not that hard: you just need to make sure not burn the milk. The egg yolks do the emulsifying here, but adding a spoonful of corn starch to the yolks adds a layer of security (or stability, actually) and makes the creation of perfect custard that much more likely. The most hardcore cooks out there can skip the starch, but for all other I suggest adding a spoonful of insurance to the pot.

Rhubarb Crumble & Vanilla Custard
4 portions

Ingredients
300 g peeled rhubarb (about 6-8 stalks)
1 dl brown sugar (for example coconut sugar)
25 g butter
2 dl jumbo rolled oats
2 tbsp. oat flour (or other flour)
pinch of cinnamon
pinch of nutmeg
pinch of cardamom

Vanilla Custard
2 dl heavy cream
1 dl milk
3 egg yolks
½ tbsp. corn starch
2 tbsp. caster sugar
a generous pinch of vanilla powder or half of a vanilla pod

  • Pre-heat the oven to 200 degrees Celsius.
  • Peel the rhubarb and cut into half a centimetre thick slices. Put the slices in a bowl with the brown sugar and mix. Let sit while you make the custard and crumble.
  • Make the custard. Measure the cream and milk in a small saucepan. Add the vanilla. If using vanilla pod, cut it lengthwise and scrape the seeds into the cream. Put the mixture on heat and bring to a boil while mixing the whole time to prevent burning the milk. Remove from heat.
  • In another saucepan, whisk the egg yolks, corn starch and sugar lightly. Pour in the hot cream mixture, mix thoroughly and place on low heat. Whisk the sauce constantly until the sauce thickens and starts to cling to the whisk or the back of a spoon. Remove from heat, transfer into a bowl or a small jug and place in the fridge or freezer to cool down.
  • Make the crumble. Cube the butter into a bowl, measure in the rolled oats, flour, sugar and spices. Knead until an evenly textured crumble forms.
  • Assemble the portions. You can do one large pot or four small cocottes. Measure the rhubarb with the juice into the oven dish(es) and spread the crumble evenly on top. Mix lightly. Put the dish(es) into the oven and bake for about 20 minutes, or until the rhubarbs are soft and the crumble is nicely golden. Let cool for a while before serving with the cooled vanilla custard.

So, have you stolen borrowed your neighbour’s rhubarbs already? How about the custard, still reaching out for the ready-made carton in the supermarket, or do you make your own?

Summer (rain) greeting,
-Toni