Focaccia

Kah, taas reilu pari viikkoa vilahti ohi ja ollaankin jo maaliskuun toisella viikolla. Hiihtolomareissu pohjoiseen vei viime viikon ja työkuviot edellisen, mutta nyt ollaan taas hellan äärellä.

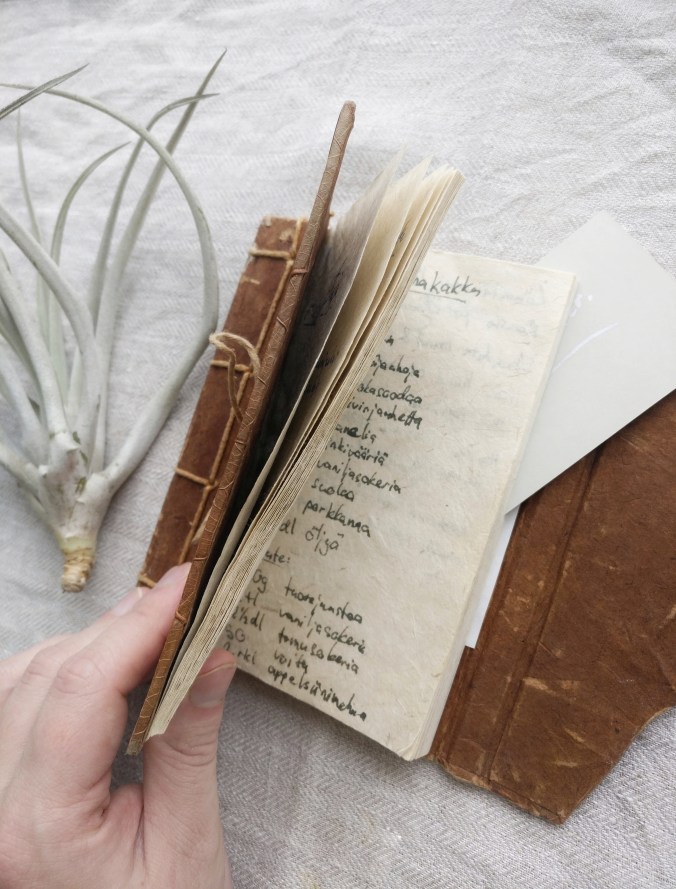
Viime aikoina on kiinnostanut kaakkois-aasialainen ruoka raikkaine sitruunaruohoineen ja limetteineen, mutta en ole saanut aikaiseksi mitään kovin omaperäistä sillä saralla. Tällä kertaa pysytelläänkin tukevasti Euroopassa ja leivotaan kuohkeaa focacciaa. Tämä on yksi niistä resepteistä, jotka olen aikanaan kirjoitellut lehtikantiseen reseptikirjaani, ja tätä leipää tarjottiin muun muassa ylioppilasjuhlissani. Jotkut ylioppilaat heräsivät aikaisin ehtiäkseen kampaajalle, minä heräsin kuudelta leipomaan.

wp-1488892286631.jpg

Focaccia on italialainen ohut leipä, jolla on paljon samaa pizzapohjan kanssa. Focaccia on tosin suosituinta Ligurian alueella, kun taas pizza on kotoisin etelämpää Campaniasta. Joidenkin lähteiden mukaan focacciaa ovat leiponeet jo etruskit ennen Rooman valtakuntaa, mikä on sinänsä uskottava väite, koska Välimeren alueella on leivottu ohuita leipiä, kuten pitaleipiä, jo hyvin kauan. Parhaat focacciat olenkin syönyt juuri Liguriassa, Genovan lähellä merenrantakylässä. Hieman huvittavaa oli se, että juuri sitä parasta leipää tuotiin pyytämättä pöytään ennen pääruokia, jotka taas jäivät täysin leivän varjoon.

Tämä resepti on tehty hiivaan, koska se tuntuu olevan todella merkittävästi helpompaa kuin juureen leipominen. Olen yrittänyt löytää hyvän reseptin juurella leivottuun pizzaan ja focacciaan, mutta joka kerta leipä on jäänyt lättänäksi ja tiiviiksi. Siksi olen todennut, että näissä leivissä kannattaa tyytyä hiivaan, ainakin toistaiseksi.

Kuten kaikissa kohotettavissa leivonnaisissa, focacciakin hyötyy tavattaman paljon hitaasta kohotuksesta. Leivän saa kyllä aikaan muutaman tunnin kohotuksella lämpimässä, mutta isoja kuplia on turha silloin odottaa. Paras rakenne syntyy, kun taikina tehdään illalla nousemaan jääkaappiin ja leivotaan seuraavana päivänä. Tällöin ei tarvitse kikkailla veden tai kohotuspaikan lämpötilallakaan, koska hiivan tuleekin toimia hitaasti.


wp-1488892305464.jpg

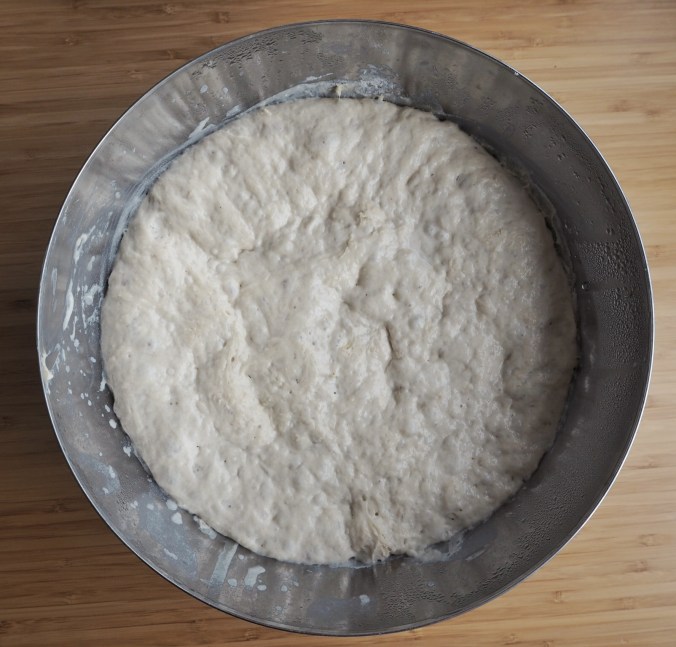
Tältä taikinan tulisi näyttää kohotuksen jälkeen | This is how the dough should look like after leavening

wp-1488892301660.jpg

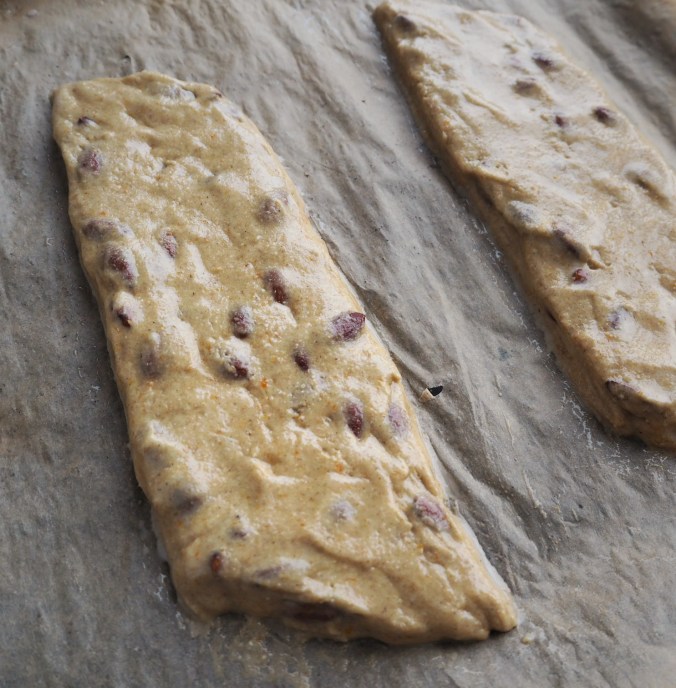
Kumoa taikina pellille… | Pour the dough on the baking tray…

wp-1488892298350.jpg

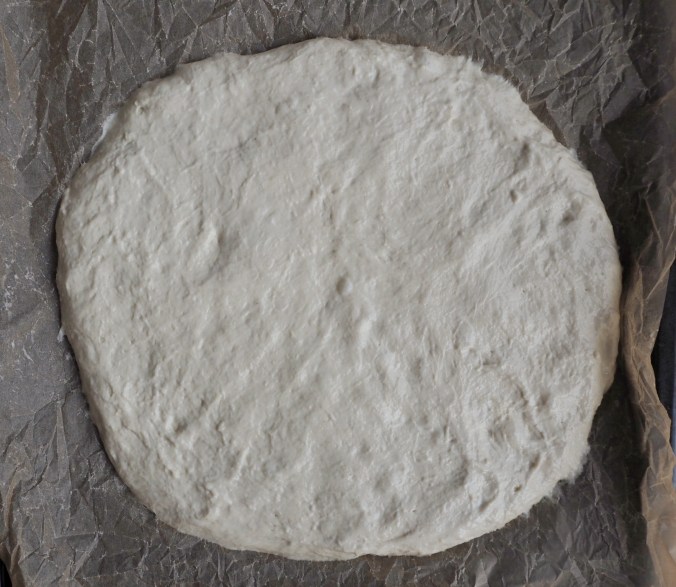
…ja varovasti painele se littanaksi kosteilla sormilla | … and carefully flatten in using wet fingers

Focacciaan kannattaa käyttää samoja jauhoja, joista pizzakin tehdään. Paras vaihtoehto on siis italialainen 0- tai 00-jauho, jossa on korkea W-arvo ja joka on tarkoitettu pizzan tekemiseen. Tällaista saa esimerkiksi Tampereelta culinaria keittiöelämästä. Toiseksi paras vaihtoehto on Prismojen valikoimasta löytyvä Ramlösa Kvarnin Manitoba Cream -leipäjauho, jonka gluteenipitoisuutta on nostettu hyvän sitkon aikaansaamiseksi. Myös ihan tavallisia leipäjauhoja voi käyttää, mutta durumvehnällä ei ole asiaa pizzaan tai sen enempää focacciaankaan.

wp-1488892295935.jpg

Painele täytteet puoliksi taikinan sisään | Press the toppings halfway into the dough

wp-1488892293594.jpg

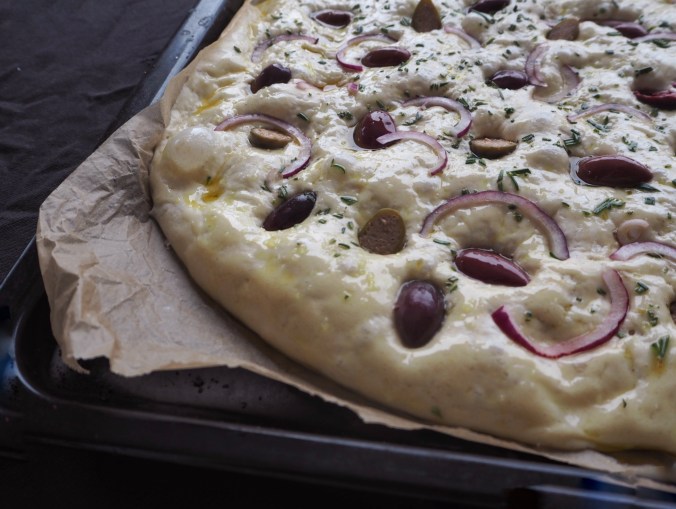
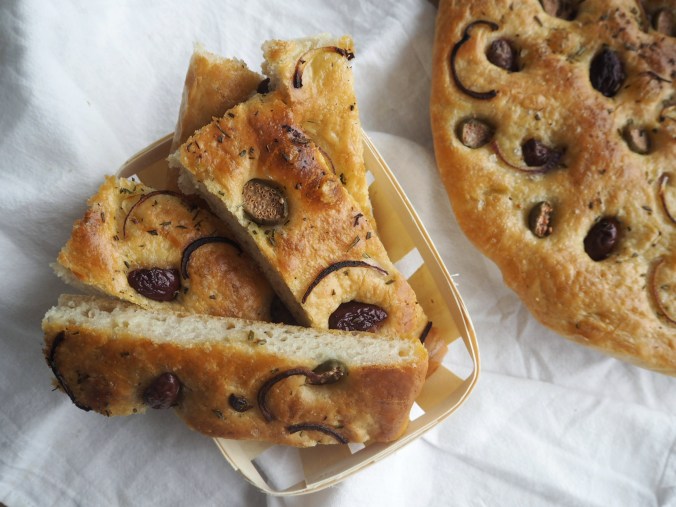
Täytteinä käytin pakollisen rosmariinin lisäksi kaapista löytyviä kalamata-oliiveja ja kaprismarjoja sekä punasipulia, mutta näitä voi säätää omien mielitekojen ja kaappien sisällön mukaan. Käytä täytteitä kuitenkin hyvin maltillisesti, leivän on tarkoitus olla itsessään pääosassa.

Focaccia
1 pellin kokoinen leipä

Ainesosat
4 dl vettä
400-500 g jauhoja (pizza- tai leipäjauhoja)
5 g kuivahiivaa
5 g suolaa
½ dl oliiviöljyä

Päälle
Oliiviöljyä
Valkosipulinkynsi
Rosmariinia
Sormisuolaa
Kivellisiä oliiveja
Kaprismarjoja
Punasipulia

  • Sekoita kuivahiivaa kulhossa huoneenlämpöiseen veteen. Lisää oliiviöljy. Sekoita joukkoon noin puolet jauhoista ja suola. Sekoita tasaiseksi ja lisää jauhoja kunnes seos alkaa muistuttaa löysää leipätaikinaa. Tarkka jauhojen määrä riippuu mm. jauhojen laadusta ja kosteudesta, joten tarkkaa määrää ei voi antaa. Tavoitteena on kuitenkin pitää taikina löysänä, joka pysyy kasassa, mutta on tahmeaa sormella koskettaessa.
  • Kun taikina on sopivaa, peitä kulho tuorekelmulla ja leivinliinalla ja laita kulho jääkaappiin. Anna taikinan nousta yön yli tai vähintään 8 tuntia. (Taikinan voi tehdä myös samana päivänä ja kohottaa muutaman tunnin, käytä tällöin 40-asteista vettä ja jätä kulho lämpimään paikkaan.)
  • Ota kulho jääkaapista ja anna taikinan lämmitä jonkin aikaan. Rutista leivinpaperiarkki palloksi ja levitä sitten uunipellille. Kastele kätesi ja kumoa taikina leivinpaperin päälle. Painele taikina kevyin sormin pellille muutaman sentin paksuiseksi levyksi. Älä paina liikaa, koska silloin ilma karkaa taikinasta ja leipä jää lättänäksi. Sormien kostuttaminen helpottaa taikinan käsittelyä. Jätä taikina nousemaan uudestaan lämpimään paikkaan tunniksi.
  • Valmistele kohotuksen aikana täytteet: puolita oliivit ja poista niistä kivet, leikkaa kaprismarjat puoliksi ja viipaloi sipuli. Silppua myös rosmariini. Tee mausteöljy lisäämällä puoleen desiin öljyä murskattu valkosipulinkynsi ja oksa rosmariinia.
  • Laita uuni lämpiämään 225-asteikseksi.
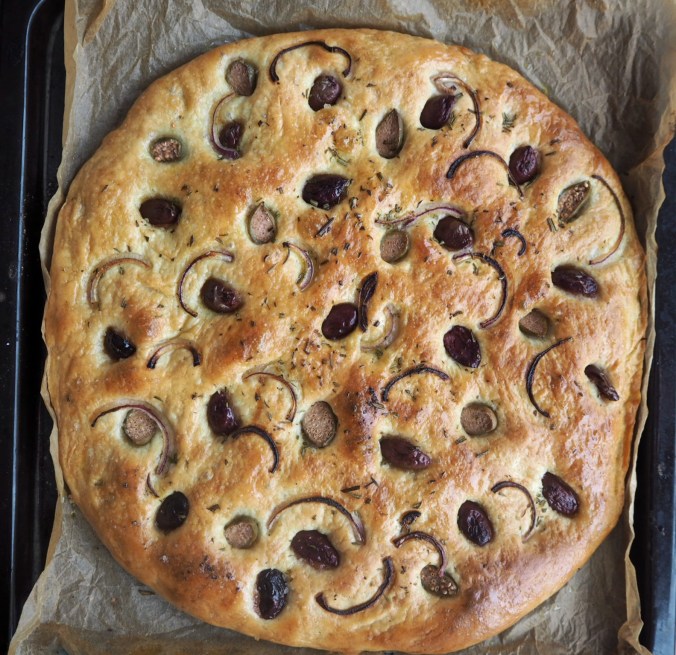
  • Kun taikina on noussut, voitele se oliiviöljyllä ja ripottele päälle sormisuolaa. Lisää täytteet leivän päälle painaen niitä vähän taikinan sisään. Ripottele päälle vielä rosmariinia ja laita leipä uuniin. Paista leipää noin 20 minuuttia, tai kunnes sen pinta on kauniin kullanruskea.
  • Ota leipä uunista ja voitele se heti mausteöljyllä, jotta pinta pehmenee. Anna leivän levätä hetki ennen leikkaamista annospaloiksi.
  • Syö focaccia sellaisenaan vaikka salaatin seurana, tai leikkaa paloiksi ja täytä esimerkiksi mozzarellalla ja basilikalla.

Sellaista tämän viikon alkuun. Onko focaccia jo tuttu kaveri keittiössä, vai rajoittuuko kokemukset kahvilaleipiin? Mitä täytteitä kannattaisi kokeilla?

-Toni

wp-1488892291302.jpg


Over two weeks has passed since the last post, and it’s already the second week of March. Last week was spent on a winter break in the North, and the week before that in work-related things, but now it’s time to bake something!

South-East Asia has been on my mind very much lately, the fresh lemongrass and zingy lime leaves providing some much-needed refreshment. Alas, I don’t have much original content concerning that for now, so let’s stick to European classics and bake some airy and sumptuous focaccia. This recipe is from my leaf-covered recipe book, and I served this in my graduation party in 2009. On the morning of the graduation party, some people woke early to go to hairdressers’, but I woke up at six to bake.

Focaccia is a North Italian flatbread that shares a common core with the southern pizza. Focaccia is most commonly attributed to Ligurian cuisine, whereas as pizza is a Campanian product. According to some sources, focaccia has been baked since the Etruscan times before the Roman empire, and that seems entirely possible since flatbreads (e.g. pita) have been baked around the Mediterranean for ages. I have eaten the best focaccia in a small seaside village near Genoa in Liguria. It was actually a little funny affair: the spectacular focaccia was brought to the table without asking before main courses, but it was by far the best part about that restaurant visit.

I used yeast to bake this focaccia, mainly because my forays into baking pizza and focaccia using sourdough starters have been very disappointing. I have tried to find a good recipe for sourdough pizza, but every time the result is a flat and sometimes even hard crust. Therefore, I have decided to stick to yeast with pizzas and focaccias for now.

Like with every leavened dough, the focaccia really appreciates long and slow leavening. You can make a focaccia with just a couple hours leavening time, but don’t expect much in terms of fluffiness and bubbles in that case. The best result is achieved when the dough is made in the evening and left to leaven in the fridge overnight. That also eliminates any need to use certain temperature water or leavening atmosphere, since you want to slow down the yeast.

I recommend using pizza flour for focaccia. The best choice is Italian flour, either 0 or 00 with a high W value, meaning it has high gluten content. This should be available at Italian shops and some high-end grocery stores. The second-best option is to use any gluten rich flour meant for bread baking. Durum wheat, on the other hand, is not used to make pizza or focaccia, so steer clear of that.

In terms of toppings, I used what I already had in the cupboards: Kalamata olives, caper berries, red onion and the only mandatory ingredient, rosemary. You can choose your own toppings but keep them light, you don’t want to steal the limelight from the bread.

Focaccia
1 baking tray

Ingredients
4 dl water
400-500 grams of flour (pizza or bread flour)
5 grams dry yeast
5 grams salt
½ dl olive oil

On top
Olive oil
Garlic clove
Rosemary
Salt flakes
Olives
Caper berries
Red onion

  • Mix the dry yeast and room-temperature water in a bowl. Add half of the flour and salt. Mix until even and add flour until the mixture resembles a gooey dough. The amount of flour needed depends on the quality and moisture content of the flour, so it varies a lot. Aim for a dough that keeps together but is sticky.
  • When you have reached the right consistency, cover the bowl with cling film and a tea towel and place in the fridge overnight, or at least 8 hours. (You can also do this dough the same day, but then use warm water and leave the dough to leaven in a warm place for a couple of hours.)
  • The next day, take the bowl out of the fridge and let it warm a bit. Crumble a piece of parchment paper and line a baking tray with it. Pour the dough on the baking tray and carefully spread it using fingers dipped in water. The sough should be about an inch thick. Leave the dough to rise in a warm place for an hour.
  • Prepare the toppings while the dough is rising. Cut the olives in half and remove pits, cut the capers, slice the onion, and mince the rosemary. Make a flavoured oil by measuring about ½ decilitre of olive oil in a glass and add a crushed garlic clove and a sprig of rosemary.
  • Preheat the oven to 225 degrees Celsius.
  • When the dough has risen, brush it with olive oil, sprinkle some salt flakes and the minced rosemary on it, and add the toppings. Press the toppings halfway into the dough. Put the focaccia in the oven and bake about 20 minutes, or until the crust is golden brown.
  • Take the focaccia out of the oven and brush it immediately with the flavoured oil to prevent hardening. Let the focaccia rest for a while before cutting.
  • Serve the focaccia as is, with for example a salad, or cut in half and fill with mozzarella and basil.

That should start the week, right? Is focaccia a usual suspect in your kitchen, or is it something that you usually see in the cafés? What are your favourite toppings?

-Toni


The Mighty Potato | Hasselbacka

Muutama viikko sitten aloitin oodin perunalle, tuolle mukuloista monipuolisimmalle. Viimeksi peruna raastettiin kokonaan uuteen muotoon, mutta nyt pidetään potut pottuina. Tällä kertaa vuorossa ovat suomenruotsalaiselta kalskahtavat Hasselbackan perunat.

wp-1487342865143.jpg

Tukholman Drurgårdenin Hasselbacken-kokkikoulusta ja ravintolasta peräisin oleva valmistustapa on yksi eleganteimpia keinoja kypsentää peruna. Tarkat viillot mahdollistavat voin, suolan ja lämmön valumisen perunan sisään, jolloin kuorrutettu pinta on upean rapea ja peruna taas sisältä kiinteän mehevä. Hasselbackan perunat ovat tyylikäs juhlaruoan lisuke, mutta jo itsessään nostavat arkiruoan tasoa melkein juhlasapuskaksi. Eikä niiden tekeminen ole edes hidasta tai vaikeaa!

Jos haluaa välttää pitkän uunikypsennyksen, kannatta valita pienehköjä perunoita. Niitä on myös kivempi siivuttaa ja ne näyttävät pienenä rykelmänä lautasella suloisilta. Oman kokemukseni mukaan monet valmiissa pussissa myytävät luomuperunat ovat tavallisia siskojaan pienempiä, mutta se on tietenkin merkki- ja vuodenaikakohtaista.

wp-1487342818827.jpg

wp-1487342815798.jpg

Tässä ”älä tee näin”-esimerkki metallilusikalla. Suosittelen puu-tai muovilusikkaa veitsen säästämiseksi | I suggest using wooden or plastic spoon for cutting the potatoes, metal (like pictured) might damage your knife

Perusresepti ei vaadi perunoiden lisäksi kuin öljyä tai voita sekä suolaa ja pippuria. Lisäksi perunoiden päälle voi rapeuden maksimoimiseksi ripotella korppujauhoja (aasialaiset panko-korppujauhot loistavat tässäkin) sekä raastaa parmesaania tai pecorinoa. Joku kypsentää samassa vuoassa pekonitkin, mutta itse annan perunan loistaa perunana.

wp-1487342813011.jpgwp-1487342810490.jpg

wp-1487342807957.jpg

Rapea päältä, mehevä sisältä | Crispy on the outside, mellow on the inside

Hasselbackan perunat
Kahdelle, valmistusaika 45-60min

Ainesosat
6-8 kpl pienehköjä perunoita (tai muutama vähemmän isompia)
oliiviöljyä
voita
suolaa
pippuria
panko-korppujauhoja
pecorinoa tai parmesaania

  • Laita uuni lämpimään 175-asteiseksi.
  • Kuori perunat. Aseta kuorittu peruna sopivankokoiseen muovi- tai puulusikkaan (metallinen lusikka saattaa vahingoittaa veitsen terää). Leikkaa terävällä ja ohuella veitsellä, esimerkiksi vihannes- tai fileointiveitsellä, perunaan pystysuoria viiltoja. Lusikan reuna pysäyttää veitsen, jotta peruna ei halkea. Leikkaa viiltoja koko perunan leveydeltä niin tiheään kuin osaat.
  • Aseta perunat pienen uunivuokaan. Valuta perunoiden päälle oliiviöljyä ja rouhi suolaa pippuria. Aseta kunkin perunan päälle nokare voita. Ripottele perunoiden päälle vielä korppujauhoja sekä pecorinoa tai parmesaania niin halutessasi. Laita vuoka varovasti uusiin keskitasolle.
  • Perunoiden kypsyminen vie niiden koosta riippuen 30-60 minuuttia. Kokeile kypsyyttä vaikka puutikulla. Kypsään perunaan puutikku uppoaa helposti. Ota vuoka ulos uunista kypsentämisen puolivälissä ja valele lusikalla vuoan pohjalle valunutta rasvaa perunoiden päälle, ja laita vuoka takaisin uuniin. Valelu auttaa rapean pinnan aikaansaamisessa.
  • Tarjoile kypsät perunat lisäkkeenä juhla- tai arkipöydässä.

Ovatko Hasselbackat jo perusrepertuaariasi vai uusi tuttavuus?

Tällaista perunasta tällä kertaa, ensi kerralla onkin leipähommia luvassa. Stay tuned!

-Toni

wp-1487342805280.jpg

A couple of weeks ago I started The Mighty Potato series, highlighting the potato as a versatile king of tubers on our tables. Last time the potatoes were shredded into a completely different form, but this time the ‘tators will be ‘tators. Intoducing The Hasselbacka Potato, an elegant and sophisticated tuber from Stockholm.

This method of cooking potatoes originates in the Hasselbacken restaurant school and restaurant in the royal Djurgården area of Stockholm, Sweden.  It is by far one the most elegant ways of cooking potatoes: the precise vertical cuts allow the potato to remain in its original form, but also let the heat, butter and salt penetrate the inner spheres of the tuber. This makes a wonderful potato that is crispy on the outside but wonderfully juicy on the inside. The Hasselbacka potatoes are a sure crowd pleaser on feast banquets, but they also elevate any weekday meal to new heights. And they don’t even require hours of cooking or insane skills.

To avoid long baking time, choose small potatoes. Smaller potatoes are also easier to slice and they look awfully cute in a little bunch. I have often found that organic potatoes are small than their regular counterparts, but that is a completely regional and seasonal variable. Choose the ones that look the best for you.

The basic recipe calls for only potatoes, olive oil or butter, and salt and pepper. You add crispy breadcrumbs (the Asian panko works best) and pecorino or parmesan cheese if you want to get more crisp. I’ve heard someone cooking bacon in the same oven dish as well, but I’m sticking to the potatoes.

Hasselbacka Potatoes
For two, cooking time 45-60min

Ingredients
6-8 small potatoes (or fewer big ones)
Olive oil
Butter
Salt
Pepper
Panko bread crumbs
Pecorino or Parmesan

  • Pre-heat the oven to 175 degrees Celsius.
  • Peel the potatoes. Place a peeled potato in a wooden or plastic spoon (metallic spoon might damage your knife). Make vertical cuts to the potato with a thin and sharp knife, like a vegetable or fillet knife. The rim of the spoon will stop the knife before it cuts the potato in half. Make as many cuts to the whole length of the potato as you can.
  • Place the cut potatoes in an over dish. Pour olive oil on them and sprinkle salt and pepper. Place some butter on each potato. Add the breadcrumbs and grated cheese too, if using. Put the dish into the oven.
  • The potatoes bake between anywhere 30 to 60 minutes, depending on their size. You can check if they are done by sticking a toothpick into the largest potato: if the toothpick sinks in easily, the potatoes are done. About halfway through the cooking, take the dish out of the oven and ladle the oil and melted on the bottom of the dish onto the potatoes with a spoon. This helps to attain the crisp top on the potatoes.
  • Serve the potatoes as a side dish as a part of a feast or as everyday luxury meal.

There you go! Have you already tried Hasselbacka potatoes, or is the method new for you?

Next time there will be some bready things, stay tuned!

-Toni

Blood Orange Upside Down Cake

Runebergin päivänä lienisi asianmukaista kirjoittaa Fredrikan tortuista, mutta omaan repertuaariini ne eivät tällä haavaa kuulu. Olen joskus kokeillut niiden leipomista, mutta jotenkin ne ovat jääneet vaillinaisiksi. Lisäksi oikeaoppisten torttujen tekemiseen tarvitsisi erikoismuotin, mikä tuntuu hieman turhalta. Pidän Runebergin tortuista kyllä, mutta tyydyn toistaiseksi laadukkaisiin valmistuotteisiin.

wp-1486304209170.jpg

Jotain saman tyyppistä teki kuitenkin mieli tehdä sunnuntaikahveille. Päätin yhdistää tällä hetkellä sesongissa olevat veriappelsiinit ja runebergintorttumaisen murean rakenteen. Kokeilin joskus tehdä appelsiinikeikauskakkua, ja muistelin sen olleen varsin pätevä leivos, joten kaivoin esiin aiemmin käyttämäni reseptin Not Quite Nigella -blogista. Säädin hieman reseptiä korvaamalla vehnäjauhot kaurajauholla, jotta kakku olisi varmasti murea. Lopputuloksena syntyi oikein mukava kakku, jossa todellakin on hyvin samanlainen murea rakenne, kuin Runebergin tortuissa. Veriappelsiinin kuoresta tulee myös tortuista tuttua pientä katkeruutta, joka taittaa runsasta sokerisuutta mukavasti.

wp-1486304217391.jpg

Veriappelsiinit ovat ehdottomasti yksiä lempihedelmistäni. Ne ovat makeita, hapokkaita ja parhaimmillaan todella kauniita punaisine hedelmälihoineen. Tällä kertaa tosin punaista oli kovin vähän, sen määrä kun vaihtelee hyvin paljon. Veriappelsiineihin liittyy tiettyä salaperäisyyttä, joka varmaankin juontaa juurensa nimeen sekä lyhyeen satokauteen. Veriappelsiinit nimittäin ovat yksiä niistä harvoista kasviksista, joita ei yksinkertaisesti ole saatavilla kuin tammikuun loppupuolelta maaliskuulle. Veriappelsiinien punainen väri on peräisin muun muassa lykopeenista ja antosyaanista, joiden syntymiseen tarvitaan kylmiä öitä ja lämpimämpiä päiviä. Tällaiset olosuhteet ovat alkuvuodesta veriappelsiinien kotiseudulla Etnan rinteillä Sisiliassa. Lämpötilavaihteluvaatimuksen vuoksi veriappelsiineja ei voi kasvattaa lämpimillä alueilla, kuten Brasiliassa ja Lähi-Idässä. Tämän vuoksi niiden sesonkikin on aidosti rajallinen. Lisää veriappelsiineista (ja kaikista muistakin olemassa olevista sitruksista) voi lukea loputtoman kiinnostavilta Sitrussivuilta.

wp-1486304203554.jpg

Veriappelsiinit kannattaa pestä huolella, koska ne käytetään kuorineen. Lisäksi tarvitset hyvin terävän veitsen, jolla saa leikattua mahdollisimman ohuita viipaleita appelsiineista. Yritin käyttää mandoliinia tähän, mutta omani oli auttamattomasti liian tylsä. Ohut ja terävä fileointiveitsi toimi sen sijaan kiitettävästi. Appelsiinien maustamaa siirappia jää muuten yli, sitä voi käyttää vaikka juomien maustamiseen tai salaatinkastikkeen pohjana. Säilytä siirappia suljetussa purkissa jääkaapissa.

Tein oman kakkuni tuttuun tapaan 16 cm vuokaa. Tuplaa resepti, jos käytät suurempaa vuokaa.

wp-1486304213044.jpg

Veriappelsiinikeikauskakku

Appelsiinit
1-2 veriappelsiinia
1 dl sokeria
1 dl vettä

Kakkutaikina
100 voita
100 g sokeria
2 munaa
2 dl mantelijauhoa (1 pussi)
1 dl kaurajauhoa (voi korvata vehnäjauhoilla)
1 dl maustamatonta jogurttia
1 tl leivinjauhetta
½ tl suolaa

  • Pese veriappelsiinit huolella. Leikkaa ne kuorineen mahdollisimman ohuiksi viipaleiksi esimerkiksi fileointiveitsellä. Sekoita pienessä kattilassa vesi ja sokeri. Kiehauta siirappia ja lisää veriappelsiiniviipaleet kiehuvaan siirappiin. Laske lämpötila matalaksi ja anna appelsiinien kypsyä muutama minuutti. Kun appelsiinien kuoret alkavat muuttua läpinäkyviksi, nosta ne reikäkauhalla lautaselle. Keitä siirappia vielä viidestä kymmeneen minuuttia, jotta se tiivistyy. Anna sekä appelsiinien että siirapin viilentyä.
  • Laita uuni lämpiämään 175-asteiseksi. Rutista arkki leivinpaperia tolloksi ja avaa tollo varovasti. Vuoraa kakkuvuoka (esim. irtopohjavuoka) rutistetulla paperilla.
  • Vatkaa kulhossa voi ja sokeri vaahdoksi. Lisää munat yksitellen sekoittaen kummankin munan jälkeen. Lisää seokseen mantelijauho, kaurajauho, leivinjauhe, suola ja jogurtti. Sekoita nopeasti tasaiseksi.
  • Voitele kakkuvuokaan asetettu leivinpaperi appelsiinisiirapilla. Asettele appelsiiniviipaleita vuoan pohjalle haluamallasi tavalla. Myös vuoan reunat voi vuorata appelsiineilla. Lusikoi taikina varovasti vuokaan ja tasoita pinta. Laita vuoka uuniin keskitasolle ja paista noin 45 minuuttia, tai kunnes kakun keskelle pistetty puutikku tulee ulos puhtaana. Anna kakun jäähtyä kokonaan vuoassa.
  • Kumoa jäähtynyt kakku lautaselle. Poista leivinpaperi varovasti ja voitele kakku vielä appelsiinisiirapilla. Voit halutessasi koristella kakkua vielä, mutta vuoan pohjalle asetellut appelsiiniviipaleet ovat jo itsessään näyttäviä.

Hyvää Runebergin päivää, miten sitten ikinä sitä vietätkään!

-T

wp-1486304206481.jpg

Today in Finland we celebrate Johan Ludwig Runeberg, the national poet of Finland. Runeberg was one of the most important figures in Finnish literary history, and the Finnish national anthem was written by him, but most of all he is known for the little cakes his wife, Fredrika, used to bake. These Runeberg tortes are available everywhere for a few weeks around this time in Finland. They are made of a crumbly dough with flavours of bitter almond and rum. I have tried making these pastries in the past, unsuccessfully, so nowadays I just buy them from a bakery. Still, I wanted to make something reminiscent of them on this day. I decided to combine their crumbly texture with the fruit of the season, the blood orange. I once made an upside-down cake with Not Quite Nigellas recipe, but this time I tuned it a bit to make sure the texture is moist and crumbly. I used oat flour instead of wheat. The result was a wonderful cake that really has a similar texture to the Runeberg tortes. The orange peel and pith give the cake some much needed bitterness, which is also reminiscent of the bitter almond aroma of the tortes.

Blood oranges are one of my favourite fruits. They combine the sweetness and acidity in an exhilarating way, and they are really beautiful with their red tinted flesh. This time my blood oranges had only little ’blood’ in them, which perfectly normal since the amount of red varies a lot. Furthermore, blood oranges have some mystery to their aura, which probably has much to do with their ominous name and their seasonal existence. The blood orange is one of the last fruits that are truly seasonal: they are available only from the end of January until March. This is due to the method their colour appears: the lycopene and anthocyanin compounds that tint the flesh of the oranges red require cool night and warmer days to develop. The conditions on the slopes of Etna in Sicily, from where blood oranges originate, in this time of the year are perfect for blood oranges. These temperature requirements mean that blood oranges cannot be grown in warmer areas, like Brazil or the Middle-East, that produce other kinds of citrus fruits. The geographical restrictions create a tight schedule for blood orange connoisseurs, so we must eat as much of them as possible during these months. You can read more on blood oranges and all other kinds of citruses on the ever-so-inspiring Citrus Pages.

I recommend washing the blood oranges well since you’ll be using them peel and all. You’ll also need a very sharp knife to cut the oranges into thin slices. I tried  using my mandolin, but it was nowhere as sharp as it would have needed to be to cut the oranges nicely. My fillet knife, however, was perfect for the job. There will be surplus of the orange syrup from the recipe. You can use the syrup to flavour drinks or as a base for salad dressings, or whatever to want to do with it. It keeps in a tight container in the fridge at least a week.

I made my cake in the 16 cm spring form, as usual. Double the recipe, if using bigger pan.

Blood Orange Upside Down Cake

Orange slices
1-2 blood oranges
1 dl sugar
1 dl water

Cake
100 butter
100 g sugar
2 eggs
2 dl ground almonds
1 dl oat flour (can be replaced with wheat flour)
1 dl natural yoghurt
1 tsp. baking powder
½ tsp. salt

  • Wash and dry the blood oranges well. Cut them into thin slices with a sharp knife. Mix the water and sugar in a small kettle. Bring the mixture to a boil and add the orange slices. Turn the heat down and let the oranges simmer for a couple of minutes until their peel turns a bit translucent. Remove them from the syrup with a slotted spoon. Turn the heat up the syrup and boil for a few minutes more to condense. Let the orange slices and the syrup to cool.
  • Heat the oven to 175 degrees Celsius. Crumble a sheet of parchment paper into a ball and open carefully. Line a can tin with the crumbled parchment paper.
  • In a bowl, beat the sugar and butter until light and fluffy. Add eggs one at a time and mix in between. Add the ground almonds, oat flour, baking powder, salt, and yogurt and mix quickly.
  • Brush the parchment paper in the cake thin with the orange syrup. Place the orange slices on bottom of the tin on a design of your choosing. You can also but slices on the sides, if you can make them stick. Spoon the cake dough carefully on the slices and even the surface. Put the tin in the oven and bake for about 45 minutes, or until a wooden skewer stuck in the middle of the cake comes out clean. Take the cake out of the oven and let cool completely.
  • Turn the cake upside down on a plate. Remove the paper carefully. Brush some orange syrup on the cake to make it glisten. You can add some decorations, but the blood orange slices on top of the cake are quite nice on their own, too.

Happy Runeberg day to you, however you celebrate it, or don’t!

-T


Rösti | The Mighty Potato

Lupasin vaihteeksi jotain suolaista, joten saamanne pitää. Peruna on ikisuosikki, vaikka se välillä pääseekin unohtumaan. Peruna on nimittäin lohturuokien lohturuoka, pahan mielen karkottaja. Mietipä oikeastaan mitä tahansa lohturuokaklassikkoa: siellä se peruna säestää taustalla muusina, ranskalaisina, paistiperunoina, Hasselbackan sellaisina tai ihan vaan uusina perunoina voin kera. Hyvä perunamuusi pelastaa kuraisenkin päivän. Eräs ystäväni eläisi pelkällä perunamuusilla, jos se oli mahdollista. Tästä alkaakin sarja perunaa ylistäviä kirjoituksia, onhan tuo mukuloiden kuningas sellaisen ansainnut.

Peruna harvoin kuitenkaan on pääosassa lautasella, sillä se mielletään yleensä lisukkeeksi. Halusin tehdä kuitenkin ruoan, jossa peruna on pääraaka-aine ja saa siten päähuomion. Kauaa sellaista ei tarvinnut ideoida, ja pian suunnitelmissa olikin alppiklassikko rösti. Röstissä peruna pääsee hienosti esiin sekä maultaan että rakenteeltaan, koska perunasuikaleet kiinnittyvät tärkkelyksen voimalla yhteen.

wp-1485258053073.jpg

Röstiin, kuten harvaan muuhunkaan klassikkoon, ei tunnu olevan oikeaa reseptiä. Osa tekee röstin esikeitetyistä perunoista, osa raaoista. Osa käyttää jauhoisia perunoita, joku toinen taas kiinteitä. Joskus rösti ei sisällä muuta kuin perunaa ja rasvaa, toisinaan siihen lisätään sipulia tai juustoa tai pekonia. Silläkin riskillä, että mennään kauas autenttisesta, sekoitin tällä kertaa perunan sekaan emmentalia ja kevätsipulia.

En ole kokeillut raa’asta perunasta röstin tekemistä, koska isot pojat ja tytöt internetissä sanoivat, että silloin röstin suutuntuma voi olla turhan pureskeltava. Raasta perunasta tulisi varmasti kauniimman näköinen rösti, kun yksittäiset perunasuikaleet jäävät näkyviin, mutta tällä kertaa päätin pelata varman päälle ja esikeittelin perunat jo edellisenä päivänä. Perunat voi keittää myös vähän ennen paistamisajankohtaa, mutta niiden täytyy jäähtyä kokonaan ennen raastamista.

wp-1485258050739.jpg

Kokeilin muutamaa eri juustoa rösteissä ja ainakin omaan makuuni kävi parhaiten mieto emmental (mustaleima oli aivan liian voimakasta), mutta esimerkiksi Appenzeller toimii myös erinomaisesti. Perunan sekaan silppusin myös kevätsipulia, joka toimii perunan kanssa hienosti. Kevätsipulin taas voi hyvin korvata ruohosipulilla tai ohuesti viipaloidulla purjolla. Röstin sekaan tai päälle voi myös lisätä pekonia tai vihanneksia, mutta pidättäydyin toistaiseksi lisäyksistä.

Tarjoiluun kannattaa varata ranskankermaa tai smetanaa ja halutessaan lisää juustoa. Jääkapissa lojui vielä retiisejä, jotka ohueksi viipaloituina raikastivat röstiä entisestään.

Rösti
1 noin 20 cm rösti

Ainesosat
2 keskikokoista kiinteää perunaa
1 kevätsipuli tai pieni nippu ruohosipulia tai pala purjoa
20-50 g juustoraastetta (mieto emmental, appenzeller)
suolaa ja pippuria
voita paistamiseen

Tarjoiluun ranskankermaa, juustoa, viipaloituja kasviksia (esim. retiisiä)

  • Esikeitä perunoita kuorineen 15 minuuttia mielellään edellisenä päivänä. Laita perunat jääkaappiin yöksi. Jos keität perunat vasta juuri ennen paistamista, viilennä ne kylmässä vedessä.
  • Kuori perunat ja raasta karkealla raastimella. Raasta myös juusto ja hienonna kevätsipuli.
  • Sekoita peruna, juustoraaste ja sipuli kulhossa ja mausta suolalla ja pippurilla.
  • Laita paistinpannu lämpiämään keskilämmölle (matalareunainen lettupannu on kätevin). Sulata voi kuumalla pannulla ja painele perunaseos pannulle lätyksi. Voit siistiä röstin reunoja paistamisen aikana. Paista ensimmäistä puolta 8-10 minuuttia. Irrota rösti pannusta varovasti työntämällä ohut lasta sen alle. Käännä rösti lautasen avulla ympäri ja paista toista puolta vielä viitisen minuuttia. Älä kääntele röstiä turhaan, koska sen paistopinta tarttuu helposti pannuun kiinni.
  • Tarjoile valmis rösti ranskankerman ja esimerkiksi viipaloidun retiisin kanssa.

Täytyy myöntää, että yllätyin itsekin kuinka hyvää röstistä tuli. Sellaisenaan se oli erinomainen lounas, mutta röstiä voi tehdä pienempinä lättyinä myös lisukkeeksi. Hapokas valkoviini sopii kylkeen myös paremmin kuin hyvin.

Onko röstit jo hallussa, vai mikä on sinun perunabravuurisi?

-Toni

wp-1485258055536.jpg

I promised you something savoury last time, so here goes. The potato is the original comfort food that accompanies basically every Western comfort food classic in different shapes: mash, fried, oven cooked or as just new potatoes in the summer. A pile of good potato mash is sure to vanquish any feelings of gloom or discomfort and replace them with a sense of security. A friend of mine would eat only potato mash if that was actually possible, and I understand her very well. This post will be the first one in a series about the mighty potato, the king of tubers, that truly deserves all the praise it can get.

The potato, however, rarely gets the limelight. It is almost always the sidekick to the main component of the meal. I wanted to reverse this pattern and make something where the potato is the star. I didn’t have to think for long before the idea of an Alpine classic creeped into my mind. Rösti is a great showcase for the humble potato: its flavour remains unmasked and the starchy quality of the potato gives the rösti its structure.

There doesn’t seem to be the original recipe for rösti, as is the case with most food classics. Some people make rösti out of parboiled potatoes, some use raw grated ‘tators. Some use floury potatoes, some use waxy.  Sometimes onion, cheese or bacon is added to the mixture, sometimes they are served on top of the rösti, and sometimes rösti is just potatoes and butter (or goose fat). I risked being called unauthentic and added Swiss cheese and spring onions to the mix this time around, and in my opinion it was a good decision.

I have only made rösti with parboiled potatoes, mainly because the big boys and girls on the internet told that even though raw grated potatoes do make a beautiful cake with the individual strands showing, the texture can be chewy. So I parboiled my potatoes the day before and chilled them in the fridge. If you boil the potatoes just before making the rösti, let them chill completely in cold water before grating.

I tried a couple of different cheeses and I liked mild Swiss cheese best in terms of flavour. Aged swiss was too strong and it covered all other flavours. Also Appenzeller would be an excellent choice. I chopped a spring onion into the mixture, but chives or a small piece of leek will work just as well. You can add bacon or vegetables to the mixture or serve them on the finished rösti.

I used sour cream for serving as well as some thinly sliced radish that happened to roll around my fridge. The combination was nicely fresh yet comforting at the same time.

Rösti
1 rösti approx. 20 cm

Ingredients
2 medium-sized potatoes
1 spring onion or a small bunch of chives or a piece of leek
20-50 g grated cheese (mild Swiss, Appenzeller)
salt and pepper
butter for frying

For serving: sour creme, cheese, sliced vegetables (radishes etc.)

  • Parboil the potatoes for 15 minutes with their skin on, preferably on the previous day, and chill the potatoes in the fridge. If you boil the potatoes just before making the rösti, let them cool completely in cold water.
  • Peel the potatoes and grate them into thin strips using a coarse grater. Grate the cheese too. Chop the spring onion, chives or leek into thin slices.
  • Mix the grated potatoes, grated cheese and onion in a bowl. Season with salt and pepper.
  • Place a small skillet (approx. 20cm) on medium heat. Melt a generous amount of butter in it. Form a loose disk of the potato mixture and put that on the skillet. Press down on the disk with a spatula to form the rösti cake. Let the first side cook for 8-10 minutes, then with the spatula carefully loosen the rösti from the skillet. Once the rösti is loose, flip it over with a help of a plate. Cook the other side for five more minutes. Do not flip the rösti more than once, because the surface easily sticks to the skillet.
  • Serve the rösti with sour cream and other toppings, for example thinly sliced radishes.

I have to say I’m surprised how good the rösti tasted. On its own the rösti makes a great lunch, but you can also make several smaller röstis and serve them as a side dish.

So how are your rösti-frying skills? Care to reveal your own potato bonanza?

-Toni

Puolukkaraakakakku | Lingonberry Raw Cake

Tiedän kyllä, että raakakakut ovat niin nähty, kokeilin itsekin sellaisen tekemistä muutama vuosi sitten. Silloin kakku oli sitruunapohjainen ja pohja sisälsi muun muassa kookosjauhoja. Tuntien hyydyttämisen jälkeen otin palan kakkua, jonka koostumus ja maku lähentelivät sahanpurua. Siihen jäivät raakakakkukokeilut pitkäksi aikaa.

wp-1484918966662.jpg

Viime viikolla ostin rasiallisen tuoreita taateleita, joita tarvitsin välipalapatukkoihin, jotka vilahtivat instagramin puolella (linkki tuossa oikeassa sivupalkissa.) Patukkoihin kului alle puoli pakettia taateleita, joten jäin miettimään käyttöä lopuille. Taatelit ovat suosittu ainesosa raakaleivonnassa, koska ne ovat luonnostaan hyvin makeita ja niiden maku on karamellinen. Lisäksi niiden erittäin tahmea rakenne auttaa pitämään leivokset kasassa.

Melkein kaikissa näkemissäni raakakakkujen pohjien resepteissä on ollut taateleita, joten lähdin itsekin sille tielle jälleen kerran. Päätin kuitenkin pitää reseptin hyvin yksinkertaisena ja käytin vain kaapeista jo löytyviä aineksia. Puolukkaakin riitti pakkasessa runsaasti, joten kakun makukin oli nopeasti päätetty.

Tämä kakku oli hyvin nopea tehdä, kun pähkinät oli liotettu yön yli. Lisäksi hyydyttämiseen menee vähintään neljä tuntia. Lisäksi täytyy mainita, että raakaleivonta on välineurheilua: lähes kaikkiin raakaresepteihin tarvitaan ”tehokas blenderi tai monitoimikone”. Itse sain tämän kakun aikaiseksi sauvasekoittimeni mukana tulleella monitoimikonelisäosalla. Joka tapauksessa pähkinöiden hienontamiseen tarvitaan jonkinlainen laite, käsipelillä ei saa tarpeeksi hienoa jälkeä.

No entä se maku ja rakenne? Parempi kuin ensimmäisellä yrityksellä, jopa miellyttävä. Puolukka saa happamuudelleen vastapainoa ja karamellisuutta taateleista ja vaahterasiirapista. Kakun rakenne on pehmeä, mutta ei sahanpuruinen. Parannusta aiempaan selvästi, joskaan en todellakaan voi väittää olevani raakaleipuri. Kyllä perinteiset kakut raa’at serkkunsa vielä voittavat, mutta mukavaa vaihtelua nämä ovat. Ravintosisältönsä puolesta raakakakku käy myös vaikka tuhdista välipalasta, tai vaikka lounaasta, joten niihin kannattaa suhtautua vähän eri tavalla, kuin perinteisiin leivonnaisiin.

Kakun lisäksi tein puolukkamehusta kastikkeen kakulle, mutta se vaatii kasaan keittämistä, joten se ei ole raakaa. Muutenhan kakku on gluteeniton, maidoton ja vegaaninen, eikä siihen ole käytetty lisättyä sokeria, joskin monet raaka-aineet sisältävät sokeria runsaasti.

wp-1484918969606.jpg

Puolukkaraakakakku
6-8 palaa/ 16 cm vuoka

Pohja
12 taatelia
2 dl kuorellisia manteleita

Täyte
2 dl puolukoita
3 dl cashew-pähkinöitä
½ dl vaahterasiirappi
½ dl kookosöljyä
½ tl vaniljajauhetta
5 taatelia

Kastike
1 dl puolukkamehua
½ makeutusta (käytin vaahterasiirappia ja kookossokeria)

  • Laita edellisenä iltana mantelit ja cashewit erikseen likoamaan runsaaseen veteen jääkaappiin.
  • Aloita pohjan tekeminen poistamalla taateleista kivet. Kaada manteleista vesi pois. Laita taatelit ja liotetut mantelit monitoimikoneeseen tai tehosekoittimeen ja jauha, kunnes massa on tasaista.
  • Pingota leivinpaperi irtopohjavuoan pohjan ja reunojen väliin. Kaada pohjamassa vuokaan ja painele taisaiseksi. Laita vuoka kylmään.
  • Putsaa monitoimikone tai tehosekoitin pikaisesti esim. talouspaperilla. Sulata kookosöljy vesihauteessa tai mikrossa (kuuma vesi hanasta riittää sulattamaan kookosöljyn). Poista taateleista kivet ja valuta cashew-pähkinöistä vesi pois. Laita kaikki täytteen ainesosat monitoimikoneeseen ja jauha tasaiseksi. Tähän voi mennä muutama minuutti, sammuta kone välillä, jos se kuumenee.
  • Kumoa täyte pohjan päälle ja tasoita. Laita vuoka kylmään vähintään neljäksi tunniksi. Viilennysaikaa voi lyhentää pitämällä kakkua pakkasessa.
  • Valmista kastike sekoittamalla mehu ja makeutus pienessä kattilassa. Kiehauta, laske lämpötilaa ja keitä kastiketta muutamia minuutteja, kunnes kastike tiivistyy siirappiseksi. Laita kastike kylmään.
  • Koristele valmis kakku niin halutessasi. Itse käytin puolukkajauhetta, pakastepuolukoita ja mantelilastuja.

Siinäpä se. Tällainen kakku ei vaadi juurikaan kokkaustaitoja, mutta kärsivällisyyttä kyllä hieman perinteistä kakkua enemmän. Oletko sinä maistanut tai tehnyt raakakakkuja? Onko hyviä makuehdotuksia?

Ensi kerralla voisi olla aika tehdä jotain suolaista pitkästä aikaa, pysy kanavalla!

-T

wp-1484918972388.jpg

Yes, I know, raw cakes have been around for ages. I even tried making one a couple years back. That cake was lemon flavoured and the crust contained coconut flour, among other things. After hours of setting, I ate a piece of that cake, and unfortunately the taste and texture were really close to sawdust. Needless to say, I did not try to make another one.

However, last week I bought a box of fresh dates for some nutty snack bars that you might have noticed on my Instagram (widget in the right column). I used less than half of the box for the bars, so I had to come up with an idea for the rest of the dates. Dates are a popular ingredient in raw baking for their high natural sugar content and caramel-like aroma. Also, their sicky texture helps to give shape to the cakes.

Almost all the raw cake recipes I have seen contain dates, so I decided to head that way too one more time. I wanted to keep the recipe very simple, and used only the things I already had in cupboards. I had lots of lingonberries in the freezer, so the choosing the flavour was easy.

This cake requires quite little time for the actual “baking”, once the nuts have been soaked overnight. Afterwards, it takes about four hours for the cake to set. One thing you need, however, is a powerful food processor or a blender to mince the nuts and make a smooth filling. I used the food processor accessory that came with my immersion blender, and that worked just fine.

‘Well how about the taste and texture’, you may ask. Better than my first try, quite pleasant even. The acidic lingonberry is nicely balanced with the deep caramel flavour of the dates and maple syrup. The texture is soft but not like sawdust. Overall, this was a clear improvement compared to my previous try, but I still can’t claim to be a raw baker. Traditional cakes still get to keep their throne in my book, but raw cakes are a nice variation. In terms of nutritional content, raw cakes resemble more healthy snacks than cakes and can even substitute a lunch, so they aren’t really the same thing as traditional pound cakes anyway.

I also made a sauce for the cake, but that required cooking and adding (coconut) sugar, so that is not raw. Otherwise, the cake is gluten and dairy free, vegan, and it contains no added sugar (though the ingredients are abundant with natural sugars).

Lingonberry Raw Cake
6-8 pieces / 16cm spring form

Crust
12 dates
2 dl almonds

Filling
2 dl lingonberries
3 dl cashew nuts
½ dl maple syrup
½ coconut oil
½ tsp. vanilla powder
5 dates

Sauce
1 dl lingonberry juice
½ dl sweeteners (I used maple syrup and coconut sugar)

  • Place the almonds and cashews in separate bowls, cover with water, and let soak in the fridge overnight.
  • Next day, start by making the crust. Remove the pits from the dates. Drain the almonds. Place the dates and almonds in the food processor and blitz for a couple of minutes until even.
  • Tighten a piece baking sheet between the bottom and the sides of a small spring form pan. Transfer the date and almond mass into the form and spread evenly and press down. Place the form in the fridge while you make the filling.
  • Clean the food processor quickly with piece of paper. Melt the coconut oil in the microwave or in a bain-marie (hot water from the tap is hot enough). Remove the pits from the dates. Place all of the ingredients in the food processor and blitz until smooth. This might take a while. If some of the filling sticks to the sides of the processor, stop and scrape the sides to make sure you get a smooth texture. You should also let your processor rest for a while, if it overheats.
  • When the filling is smooth, pour it into the form over the crust, smooth the surface with a spoon, and place the cake in the fridge or freezer. You should let the cake rest for at least four hours.
  • Make the sauce by combining the ingredients in a small sauce pot and bring the mixture into boil. Reduce heat and cook for a couple of minutes while mixing. The sauce is ready when it has reduced to a syrupy consistency. Place the sauce in the fridge to wait for the cake.
  • When the cake has set, you may decorate it as you like. I used lingonberry powder, lingonberries and almond flakes.

That’s it! This kind of cake doesn’t really require baking skills, but it does require patience. Have you tasted or made raw cakes? Any flavour suggestions you care to share?

Next time I’m planning to make something savoury, this blog has been so sweet recently. Stay tuned!

-T

Apricot Pie

Hei siellä ja hyvää vuotta 2017!

Joululoma hieman venähti, ja samalla menivätkin sitten uusivuosi ja synttäritkin. Kaikennäköistä pikku puhdetta on riittänyt tukholmanvisiitistä paluumuuttajien pikkujouluihin, synttärikakkuihin ja gyoziin. Osaltaan blogihiljaisuuteen on muuten vaikuttanut sekin, että joulun ja vuodenvaihteen aika on ruokapöydässä hyvin pitkälti perinteiden sanelemaa (ja hyvä niin), joten mitään kovin inspiroivaa ei ole tullutkaan hetkeen kokkailtua.
Koitan päästä vauhtiin pikkuhiljaa täälläkin, jos vaikka alkava vuosi saisi kiinnostumaan uusien ruokien kokeilusta jälleen. Kovasti ainakin kiinnostaisi jälleen Aasia.

Tänään pysytellään kuitenkin turvallisesti suorastaan perinteisessä leivonnassa. Työpaikalla saimme eräältä tavarantoimittajalta joululahjaksi megapurkin moscato-viiniin säilöttyjä aprikooseja. Oma osuuteni noista komean oransseista herkuista keikkui jääkaapissa muutaman viikon, ennen kuin keksin niille käyttöä. Tällä tavalla säilöttyjen aprikoosien maku on nimittäin erittäin makea ja yhtä aikaa karvasmantelinen, joten ihan mihin tahansa ne eivät sovellu.

wp-1484046817920.jpg

Päähäni oli kuitenkin jämähtänyt ajatus rahkapiirakasta, mikä on erikoista, sillä en yleensä pidä niistä erityisesti. Asiaan saattoi vaikuttaa se, että aprikoosit näyttivät samalta kuin ne luumut, joista Niisku leipoo Niiskuneidille piirakan yhdessä muumijaksossa, ja tuo piirakka näyttää erehdyttävästi rahkapiirakalta. Tämän epämääräisen mielikuvan takia päädyin sitten leipomaan itsekin rahkapiirakan. Muumeilla on pitkäaikaisia vaikutuksia selvästikin.

Piirakan pohja on kirjaimellisesti ja kuvainnollisesti perusta koko leipomukselle. Jos pohja on huono, ei hyväkään täyte pelasta piirakkaa. Valmiit pakastepohjat ajavat yleensä asiansa, mutta vilkaisu niiden ainesosiin on usein kivuliasta. Margariinipohjaisiahan ne melkein poikkeuksetta olevat ja melkein aina sisältävät palmuöljyä. Siksi teenkin melkeinpä aina piirakkapohjan itse voitaikinasta. Klassinen paté briseé on nimittäin hyvin helppo ja nopea tehdä, eikä se vaadi kuin voita, jauhoja ja kananmunan. Kananmunankin voi jättää pois ja korvata tilkalla vettä, jos haluaa murotaikinamaisen pohjan. Lisäksi täytyy sanoa, että voitaikinan nyppiminen on ehkä terapeuttisinta, mitä keittiössä voi tehdä.

Lueskelin erilaisia rahkapiirakoiden täytereseptejä, mutta koska eri reseptien sisältä vaihteli hyvin paljon, päädyin tekemään täytteen omin päin jääkaapin sisällöstä. Muutamassa kohtaamassani aprikoosipiirakkareseptissä aprikoosit kehotettiin karamellisoimaan pannulla, minkä olisin ilomielin tehnytkin, jos aprikoosit olisivat olleet tuoreita. En nimittäin usko, että pehmeät säilötyt aprikoosit olisivat kestäneet paistamista ainakaan nätteinä.

Rahkapiirakan voi tietenkin myös tehdä melkeinpä mistä tahansa hedelmästä tai marjasta. Mustikkarahkapiirakka on tietenkin ansaitusti klassikko, mutta esimerkiksi puolukoita voisi kokeilla myös. Jos käytät tuoreita hedelmiä, kannattaa ne ehkä esikypsentää ennen piirakan päälle latomista, etteivät vaan jää raaoiksi.

wp-1484046814875.jpg


Aprikoosirahkapiirakka

Pohja
150 g voita
200 g jauhoja
1 rkl sokeria
ripaus suolaa
1 kananmuna tai tilkka kylmää vettä

Täyte
1 prk maitorahkaa
2 rkl turkkilaista jogurttia
1 rkl ranskankermaa
1 kananmuna
1 rkl sokeria
1 sitruunan kuori ja puolikkaan mehu
1-2 tölkkiä säilöttyjä aprikooseja

  • Aloita pohjasta. Kuutioi kylmä voi kulhoon. Kaada mukaan jauhot, sokeri ja suola. Upota kädet seokseen ja ala nyppiä voita ja jauhoja sekaisin. Aluksi se tuntuu hankalalta, mutta pikkuhiljaa taikinasta muodostuu pientä murua eikä sormissa tunnu enää isoja voiklimppejä. Sekoita mukaan kanamuna (tai tilkka kylmää vettä) ja sekoita tasaiseksi. Kananmunan kosteus saa taikinaan kertymään yhteen palloksi. Kokoa taikina yhteen ja kääri pallo kelmuun ja laita puoleksi tuntia jääkaappiin.
  • Laita uuni lämpiämään 175-asteiseksi.
  • Ota taikina jääkaapista ja muotoile siitä kiekko. Aseta kiekko noin 24 cm piirakkavuokaan ja painele taikina koko vuokaan, myös reunoille. Tee pohjaan runsaasti reikiä haarukalla ja laita pohja esikypsymään uuniin noin 10 minuutiksi, tai kunnes reunat saavat hieman väriä. Ota pohja jäähtymään hetkeksi.
  • Sekoita täytteen ainesosat kulhossa aprikooseja lukuun ottamatta. Kaada täyte pohjan päälle ja asettele lopuksi aprikoosit täytteen päälle. Laita piirakka uuniin noin 15-20 minuutiksi, tai kunnes täyte on jämähtänyt ja hedelmät tuntuvat pehmeiltä.
  • Anna piirakan jäähtyä kokonaan ennen leikkaamista. Tarjoa vaikkapa kermavaahdon tai turkkilaisen jogurtin kera.

Tällä piirakalla alkoi siis vuosi täällä, toivottavasti maistuu!

Nähdään pian!

-Toni

wp-1484047340654.jpg

Hapan mutta täyteläinen jogurtti passaa täydellisesti piirakan pariksi | Sour but velvety yoghurt is a perferct paring for the pie

Hey there and happy new year!

The Christmas holidays dragged on a bit, and suddenly it was new year, and then my birthday. I’ve been quite busy with some little things, like a visit to Stockholm, and making birthday cakes and gyozas and such. Also the nature of Christmas time cooking has had its part in the radio silence; the food served during the holidays is pretty much dictated by tradition (which is great), so I haven’t really been cooking anything that inspiring. I’m trying to get back on the wagon, so to speak, and maybe the new year will come with some fresh ideas. For example, Asia has been interesting me a lot lately.

However, today I’m staying in the traditional, Western comfort zone. While working before Christmas, we received a present from one of the suppliers: a giant jar of apricots preserved in moscato wine. My portion of those deeply orange balls of splendour had been hanging out in my fridge with no allocated task, so I had to come up with a mission for them. Apricots preserved like this have a strong bitter almond-y flavour, so they need a certain kind of flavour pairings.

After looking at the apricots for a while, an image popped up in my mind: a creamy pie with deep orange hemispheres all around. I found it strange, as I usually don’t even like quark pies that much. I think it has to do with another image, one from Moomins. In one episode of the cartoon, Snork makes a pie of yellow plums for Snork Maiden to make up for being a jerk. Those yellow plums looked almost exactly like the apricots I had been staring at. Watching cartoons seems to have some serious long-terms effects.

The crust of a pie is both literally and metaphorically the base of the whole concept. It the crust is bad, even the best of fillings won’t save the day. Ready-made frozen crusts are usually quite good, but looking at their ingredient lists gives headache: they are based on margarine instead of butter, and usually contain lots of palm oil. That is why I always make the crust myself with paté brisée. The French classic is so easy and quick to make, that it really does not make any sense to buy the crust frozen. You’ll only need butter and flour, maybe an egg, but even that can be replaced with some cold water. Most importantly, pinching the butter and flour into little flakes is perhaps the most therapeutic thing one can do in the kitchen.

Never having baked a quark pie, I read some filling recipes online, but since they all seemed to differ, so I made one up using the stuff I had in the fridge. Some apricot pie recipes I read instructed to caramelise the apricots on a pot pan with sugar, and I would have loved to do that, but I didn’t dare since my preserved apricots were already soft. If you are using fresh fruit, feel free to caramelise them.

By the way, you can make this kind of a quark pie with any fruit or berry. Quark-bilberry pie is a classic, and deservedly so, but one could also experiment with lingonberries too. Using sour berries will probably need some additional sugar, though, to counter the acidity. If you are using fresh fruit, like apples, pears of stone fruits, I recommend cooking on the pan with some butter first before putting them in the pie.

Apricot Pie

Crust
150 g butter, cubed
200 g flour
1 tbsp. sugar
pinch of salt
1 egg or a splash of cold water

Filling
200 g quark
2 tbsp. Turkish yoghurt
1 tbsp. sour cream
1 egg
1 tbsp. sugar
zest of one lemon, and juice of a half a lemon
1-2 cans of preserved apricots

  • Start with the crust. Cube the cold butter into a bowl. Add the flour, salt and sugar. Stick your fingers in and start pinching the butter and flour together. It’s a bit sticky at first, but as you go on the butter will start to form little flakes. You are done when all of the butter has formed flakes or crumbs with the flour, and there are no big clumps of butter left. Add the egg or a spoonful of cold water and mix. The moisture will bring the dough together into a ball. Gather all the dough in a ball and wrap it in cling film and place in the fridge for about a half an hour.
  • Pre-heat the oven to 175 degrees Celsius.
  • Take out the sough and form a disc with it. Place the disc in pie dish and using your fingertips, spread the dough into an even layer, including the sides of dish. Make several holes in the bottom with a fork to prevent air pockets forming, and put the pie in the oven to pre-cook. Cook for about 10 minutes, or until the sides of the crust have turned lightly golden. Take the crust out and let cool down for a moment.
  • Mix all the ingredients of the filling in a bowl, excluding the fruits. Pour the filling on the crust and place the fruit on the filling. Put the pie in the oven for 15 to 20 minutes, or until the filling has set and the fruit are soft.
  • Let the pie cool down completely before cutting. Serve with whipped cream or Turkish yoghurt.

So, this pie started the year here, I hope you like it! I’m excited to get back to blogging again.

Seeya soon!

-Toni

wp-1484047343351.jpg

I just had to

Orange Cantuccini

Lupasin toisenkin joulureseptin, joten saamanne pitää. Edellisen postauksen glögisiirapilla valmistetun glögin kanssa nimittäin saattaa tehdä mieli pientä makeaa, ja piparit saattavat alkaa tympiä. Italialaiset biscottit rientävät tällöin apuun. Biscottit, eli italialaiset kovat pikkuleivät paistetaan nimensä mukaisesti kahdesti, joten ne ovatkin omiaan juomaan dippailtavaksi – tarjoillaanhan Toscanalaiset biscottit eli cantuccinit aina makean vin santo -viinin tai kahvin kanssa. Perinteiset cantuccinit höystetään manteleilla, mutta tähän reseptiin lisäsin aimo annoksen appelsiinia jouluista henkeä tuomaan. Cantuccinit voi jättää myös maustamatta, tai maustaa muilla pähkinöillä ja hedelmillä. Mantelin aromia voit korostaa lisäämällä tilkan mantelilikööriä taikinaan. Sitruksista makua puolestaan saa lorauttamalla sekaan Cointreauta.

wp-1482066494366.jpg

Cantuccinien valmistaminen on helppoa, mutta aikaa kannattaa varata reilu tunti kahteen paistamiseen ja jäähtymiseen. Lisäksi tarvitset terävän veitsen, koska manteleita sisältävä keksiharkko täytyy saada näteiksi viipaleisiksi. Tässä reseptissä käytin sekä vehnä- että kaurajauhoja, mutta reseptin voi tehdä myös kokonaan vehnäjauhoilla tai vastaavasti kokonaan gluteenittomilla jauhoilla. Kekseihin tulevat mantelit kannattaa paahtaa, sillä se syventää niiden makua. Se onnistuu helposti uunissa, joka lämmitetään joka tapauksessa keksien paistamista varten.

wp-1482066483505.jpg

Appelsiini-Cantuccinit
Yksi pellillinen, noin 30 keksiä

Ainesosat
160 g hienoa sokeria
2 kananmunaa
150 g kaurajauhoja
100 g vehnäjauhoja
1 tl leivinjauhetta
½ tl suolaa
½ tl vaniljajauhetta
1 rkl oliiviöljyä
1-2 luomuappelsiinin kuori
150 g kokonaisia kuorellisia manteleita.
(loraus mantelilikööriä (esim. Disaronno) tai Cointreauta tai lusikallinen manteliuutetta)

  • Lämmitä uuni 175 asteeseen.
  • Paahda ensin mantelit: laita mantelit vuokaan, johon ne mahtuvat olemaan yhdessä kerroksessa. Laita vuoka uuniin noin kymmeneksi minuutiksi. Sekoita manteleita välillä ja vahdi, etteivät ne pala. Ota paahtuneet mantelit ulos uunista ja jätä jäähtymään.
  • Sekoita kuivat aineet (jauhot, leivinjauhe, suola, vanilja) keskenään.
  • Vatkaa kulhossa sokeri ja kananmunat vaahdoksi. Raasta joukkoon appelsiinin kuori, lisää myös oliiviöljy ja mahdollinen likööri tai uute.
  • Kaada vaahdon sekaan kuivat aineet ja mantelit ja sekoita tasaiseksi massaksi. Jaa massa kahtia ja muotoile massasta kaksi suorakulmiota leivinpaperilla vuoratulle uuninpellille. Suorakaiteiden pitäisi olla muutaman sentin paksut ja noin viisi senttiä leveät.
  • Laita pelti uuniin ja paista noin puoli tuntia, tai kunnes keksisuorakaiteiden pinta on kullanruskea. Ota pelti uunista ja anna jäähtyä vartin verran. Laske uunin lämpötila 125 asteeseen.
  • Nosta suorakaiteet leikkuulaudalle ja leikkaa niistä noin kahden sentin viipaleita. Käytä terävää veistä, jolla saat manteleita sisältävät kohdat siististi leikattua.
  • Asettele keksiviipaleet pellille toinen leikkauspinta alaspäin. Keksit eivät enää kasva kokoa uunissa, joten ne voi asetella tiiviisti. Laita pelti 125 asteiseen uuniin. Kuivaa keksejä 15-20 minuuttia, tai kunnes keksit ovat kovettuneet ja saaneet vähän väriä leikkauspintoihinsa. Ota keksit pois uunista ja anna jäähtyä.
  • Säilytä keksejä tiiviissä rasiassa. Keksit säilyvät parhaimmillaan viikkoja tai jopa kuukausia. Tarjoile glögin, kahvin tai makean viinin ohessa.

Sellaiset keksit jouluksi ja joulun jälkeenkin. Toivottavasti maistuu!

Ennen joulua en taida ehtiä kirjoittelemaan tänne uusia juttuja, joten toivotan jo nyt levollista joulua kaikille!

  • wp-1482066491657.jpgwp-1482066489119.jpg


wp-1482066480370.jpg

Cantuccinit toimivat myös syötävänä viemisenä | The Cantuccini is a perfect holiday greeting!


I promised you another recipe for the holiday season, so here goes. These will go well together with a hot glass of spiced apple juice, made with the recipe in the previous post. Cantuccini are a Tuscan variety of biscotti, hard cookies that have been baked twice, as their name suggests. They are perfect for dipping in glögi, as in Tuscany they are always served with vin santo or coffee. The traditional cantuccini are made with almonds, but I infused this batch with an ample dose of orange zest to make them more festive. You can also leave the orange out, or use some other nuts and fruits to flavour your cookies. You can enhance the almond flavour by adding some almond liqueur, for example Disaronno, to the dough. If you want more more prominent citrus aroma, add some Cointreau.

Making cantuccini is easy, but it takes some time as the cookies are baked twice and need also to cool down twice. You’ll also need a sharp knife to cut the cookies, because the almonds will break the cookie log if the knife is dull. I used a mixture of wheat and oat flour for this recipe, but you can use just wheat flour or replace the whole amount with gluten free flour. Furthermore, I recommend toasting the almonds as it deepens their flavour. Toasting is easy in the oven, which is heated anyway for the cookies.

Orange Cantuccini
One baking tray, about 30 cookies

Ingredients
160 g sugar
2 eggs
150 g oat flour
100 g wheat flour
1 tsp. baking powder
½ tsp. salt
½ tsp. vanilla powder
1 tbsp. olive oil
Zest of 1 or 2 organic orange(s)
150 g whole, unpeeled almonds
(a splosh of almond liqueur (e.g. Disaronno), Cointreau, or spoonful of almond extract)

  • Pre-heat the oven to 175 degrees Celsius
  • Start by toasting the almonds: place almonds in an oven dish and put them in the oven for ten minutes. Shake the almonds a couple of times during toasting, and be careful not to burn them. Take the toasted almonds out of the oven and allow to cool while making the dough.
  • Mix the dry ingredients (flours, salt, baking powder, vanilla powder).
  • In a bowl, whisk the eggs and sugar into a light foam. Add the grated orange zest, olive oil and liqueur or extract, if using.
  • Mix in the dry ingredients and toasted almonds. Mix until a smooth paste is formed. Divide the dough in half, and on a baking tray lined with parchment form two rectangles with the halves. The rectangles should be about 2cm thick and 5cm wide.
  • Put the baking tray in the oven and bake the cookie rectangles for 30 minutes, or until their crust is nicely golden brown. Take the tray out and let cool down for 15 minutes. Lower the temperature to 125 degrees Celsius.
  • Transfer the rectangles onto a cutting board and slice them into 2 cm thick slices. Use a sharp serrated knife to cut through the almonds.
  • Place the cookie slices back onto the baking tray. The cookies won’t expand anymore, so you can place them closely together. Put the tray in the 125-degree oven and bake the cookies again for 15 to 20 minutes, or until the cookies have hardened and their surfaces have browned a bit. Take the cookies out and let cool completely.
  • Keep the cookies in an air tight jar. The cookies will keep for weeks, even months. Serve with hot glögi, sweet wine or coffee.

There you go, a little different kind of cookies for this Christmas. Not that I don’t like gingerbread cookies, I love them, but I also like these very much. I hope you like them too!

My next week is so busy that I probably won’t be able to write new posts for you guys. Therefore I wish you very relaxing Holidays already!


Glögisiirappi & Oleo Saccharum

Hopsansaa, taisi taas päästä pari viikkoa lipsahtamaan blogihiljaisuutta. Joulukuu on ollut töiden puolesta kiireistä aikaa, ja tämä loppuvuosi teettää tunnetusti tekemistä muutenkin. Muutama jouluresepti olisi tarkoitus saada kuitenkin tännekin, joten aloitetaanpas mausteisilla glögisiirapeilla.

Joulunaika on ruokajuttujen osalta minulle erityisesti mausteiden juhlaa: kaneli, neilikka, inkivääri ja sitrukset saavat ylpeinä olla täydellä voimalla esillä. Muina vuodenaikoina mausteet ovat usein taustakuoron tehtävässä syventämässä makupohjaa, mutta jouluherkuissa ne saavat pääosan. Mausteisesta juomista glögi on tietenkin suomalaisten lemppari, mutta valitettavasti oikeasti hyviä glögejä on varsinkin marketeista vaikea löytää. Erityisesti liika sokerisuus pilaa muuten hyvän glögin monessa tapauksessa minun mielestäni. Lisäksi mausteita saisi olla usein runsaammin.

Ensimmäinen siirapeista onkin juuri glögeihin sopiva maustesiirappi, jossa loistavat perinteisten joulumausteiden, kanelin ja neilikan, lisäksi tuore inkivääri ja kardemumma. Siirappi on helpointa keitellä kokonaisista mausteista, koska niiden maku on yleensä jauhettuja versioita parempi, ja ne on huomattavasti helpompi siivilöidä pois valmiista siirapista. Vielä muutama vuosi sitten erityisesti kokonaisia kardemummakotia oli turha etsiä etnisten kauppojen ulkopuolelta, mutta nyt olen nähnyt niitä isojen markettien maustehyllyillä. Lisäksi kaikkia tässä käytätettäviä kokonaisia mausteita, kanelia, neilikkaa, tahtianista ja kardemummaa, saa Tigerin valikoimista.

wp-1481563055183.jpg

wp-1481563052557.jpg

Siirapin teko on hyvin yksinkertaista: siirappi kiehautetaan sokerista ja vedestä ja mausteiden annetaan uuttua siirapissa. Siirapista tulee sitä voimakkaampaa mitä enemmän mausteita käyttää ja miten pitkään antaa niiden uuttua. Suosittelen ainakin 4-5 tunnin uuttoa, mutta yönkin yli mausteet voi jättää siirappiin. Kun siirapin maku on sopivan voimakas, mausteet vain siivilöidään pois ja siirappi pullotetaan. Valmista siirappia voi käyttää esimerkiksi kuumennetun omena- tai marjamehun, siiderin tai viinin maustamiseen. Itse pidän erityisesti kuumasta, mausteisesta siideristä. Siirappi sopii myös moniin jouluajan leivonnaisiin.

Glögisiirappi
N. 2,5 dl valmista siirappia

Ainesosat
2 dl vettä
2 dl sokeria
4 kanelitankoa
3 tähtianista
n. 15 kokonaista neilikkaa
10 kardemummapalkoa
5 cm pala inkivääriä kuorittuna ja siivutettuna
1 luomuappelsiinin kuori
(½ tl sitruunahappoa)

  • Sekoita vesi ja sokeri kattilassa. Laita kattila liedelle keskilämmölle ja kiehauta koko ajan sekoittaen. Siirappi on aluksi sameaa, mutta kirkastuu nopeasti. Ota kiehahtanut siirappi pois levyltä.
  • Kuori ja viipaloi inkivääri. Vuole vihanneskuorijalla appelsiinin oranssi kuori irti, vältä karvasta valkoista osaa. Murskaa kardemummakodat veitsen lappeella tai morttelissa, rapsuta siemenet irti. Väännä kanelitangot puoliksi.
  • Lisää mausteet siirappiin ja sekoita. Lisää halutessasi ½ teelusikallista sitruunahappoa parantamaan säilyvyyttä. Peitä kattila kannella ja anna siirapin maustua huoneenlämmössä vähintään 4-5 tuntia, tai vaikka yön yli.
  • Kun siirappi on maustunut sopivasti, siivilöi se suppilon avulla pulloon. Säilytä jääkaapissa. Siirappi säilyy vähintään muutaman viikon.
  • Käytä siirappia esimerkiksi kuumennetun omena- tai marjamehun, suodattamattoman omenasiiderin tai punaviinin maustamiseen.

Vinkki! Voit korostaa erityisesti kanelin makua siirapissa kiehauttamalla siirapin vielä uudestaan, kun se on jäähtynyt ensimmäisen kiehautuksen jälkeen.

Kuuma joulusiideri
2 annosta

5 dl kuivaa, sameaa siideriä, esimerkiksi Crafty, tai hapokasta tuorepuristettua omenamehua, esimerkiksi Pirkka/Rainbow luomuomenamehu.
4-8 cl maustesiirappia
Koristeeksi kanelitankoja

  • Kaada siideri tai omenamehu pieneen kattilaan. Lämmitä varovasti keskilämmöllä, kunnes siideri on noin 65-asteista, eli kuumaa mutta juotavaa. Mausta kuuma siideri maustesiirapilla halutun makeuden ja mausteisuuden mukaan, kaada mukeihin ja koristele kanelitangoilla. Tarjoa kuumana.

wp-1481563068738.jpg

Toinen siirappi onkin samaan aikaa hyvin klassinen ja eksoottinen. Kyseessä on oleo-saccharum, eli sitrusten kuorista sokerin avulla kylmäuutettu öljysiirappi. Nimensä siirappi saa raaka-aineistaan, sitrusöljyistä ja sokerista. Oleo-saccharum on peräisin 1800-luvulta, jolloin sitrukset eivät olleet saatavilla ympäri vuoden, joten silloin kuin niitä oli, niistä haluttiin saada kaikki irti. Oleo-saccharum onkin monella tapaa sitruksen täyden potentiaalin hyödyntämistä, koska suurin osa sitrusten tärkeimmistä mauista on juuri kuoren eteerisissä öljyissä. Oleo-saccharumin käyttäminen juomissa tuokin niihin syvyyttä, jota ei voi saavuttaa pelkkää mehua käyttämällä. Oleo-saccharumia voi lorauttaa pienen tujauksen glögiin maustesiirapin lisäksi, tai käyttää sitä drinkkien tekemiseen.

Vaikka koko oleo-saccharum vaikuttaa todella mystiseltä ja erikoiselta, sen tekeminen on jopa vielä helpompaa kuin ylläolevan maustesiirapin keittely. Periaate on hyvin yksinkertainen: sokeri saa sitrusten kuorissa olevat öljyt valumaan ulos kuorista. Siirappia ei siis tarvitse keitellä tai lämmitellä, vaan sokeri tekee lähes kaiken työn.

wp-1481563061011.jpg

Oleo-saccahrumia voi tehdä mistä tahansa sitruksesta, tässä esimerkissä käytin luomusitruunoita ja verigreippejä. Myös appelsiinit, klementiinit ja limet sopiva erinomaisesti. Lisäksi eri sitrusten kuoria voi sekoittaa keskenään. Sitrusten kuoria käytettäessä suosittelen aina ostamaan mahdollisuuksien mukaan luomuhedelmiä, koska niiden kuorissa on vähemmän torjunta-aineita sun muita vahoja, joita tuskin haluat siirappiisi. Muista myös käyttää kuorittujen sitrusten mehu tai hedelmäliha, ettei hyvä hedelmä lennä roskiin kuorimisen jälkeen.

Oleo-saccharum on vahvaa tavaraa, koska se perustuu sitrusöljyihin. Sen kanssa kannattaa siis olla varovainen annostelussa, koska liian suurina määrinä se maistuu helposti karvaalta. Nyrkkisääntönä voisi sanoa, että korkeintaan 2 cl juomaa kohden yhdistettynä sitrusmehuun, muuten vähemmän.

Oleo-saccharum -siirappi
Noin 1 dl valmista siirappia

Ainesosat
4 sitruunaa tai 2 greippiä
1 dl sokeria
½ dl lämmintä vettä

  • Pese ja kuivaa sitrukset. Kuori sitrukset vihanneskuorijalla. Pyri saamaan pelkkä värillinen ulkokuori, vaalea malto on karvasta.
  • Laita sitruksenkuoret kannelliseen astiaan tai minigrip-pussiin. Kaada mukaan sokeri. Puristele tai painele kuoret ja sokeri sekaisin. Kuorten puristelu saa kuoren solut hajoamaan, jolloin öljy pääsee valumaan ulos. Jätä kuoret uuttumaan kannella peitettynä vähintään muutamaksi tunniksi, tai vaikka yön yli. Pidempi uuttumisaika syventää siirapin makua.
  • Kun kuoret ovat saaneet uuttua, astian tai pussin pohjalle on valunut pieni lätäkkö kellertävää siirappia. Kaada astiaan muutama lusikallinen lämmintä vettä ja sekoita. Valuta siirappi pulloon, varmista että saat talteen mahdollisimman paljon siirappia sekoittamalla kuoria välillä. Valmis siirappi säilyy jääkapissa vähintään viikon.

Oleo-saccharum sopii etenkin vaaleisiin glögeihin tuomaan aimo annoksen raikasta, mutta syvää sitruksisuutta, joten pieni liraus tätä eliksiiriä herättää vienon glögin henkiin. Oleo-saccharum on kuitenkin myös drinkkien ja boolien klassikkoainesosa, joten kehittelin muutaman nopean drinkin sitruuna- ja verigreippisiirapin ympärille. Käytin molemmissa myös kyseisten hedelmien mehua, jotta hävikkiä tulisi mahdollisimman vähän. Ensimmäinen on varsin perinteinen vahva aperitiivi, mutta jälkimmäisen greippijuoman voi tehdä myös hyvin ilman alkoholia.

wp-1481563049616.jpg

Deep Yellow

Deep Yellow
1 annos

2-4 cl giniä tai akvaviittia
2 cl punaista vermuttia (Antica formula)
2 cl sitruuna-oleo-saccharumia
2 cl sitruunamehua
(dash angostuuraa)
Koristeeksi sitruunankuorta
Jäitä

  • Mittaa ainekset sekoituslasiin. Lisää jäitä ja sekoita tai ravista (jos sinulla on sheikkeri). Siivilöi jalalliseen lasiin ja koristele sitruunankuorella.
wp-1481563046408.jpg

Ruby Refresh

Ruby Refresh
1 annos

2 cl verigreippi-oleo-saccharumia
4 cl verigreippimehua
2 cl punaista vermuttia (Antica Formula) [voi jättää pois]
soodaa
jäitä
Koristeluun verigreippiviipale

  • Täytä juomalasi jäillä. Mittaa ainekset lasiin soodaa lukuun ottamatta ja sekoita. Täytä lasi soodalla ja koristele verigreippilohkolla.

Noniin, siinä olisi muutama joulujuomaidea. Mitä pidätte, kiinnostaako glögisiirapin keittely, vai ovatko jo sitruunat riisuttu kuoristaan?

Miellyttävää joulunodotusta!

-Toni

wp-1481563057777.jpg

Loppukevennyksenä nakuja sitruksia 😉 | Some naked citruses for your enjoyment

Whoopsie, it’s been a couple of weeks since the last post, hasn’t it? December has been busy on the work front, and the last month of the year tends to be quite hectic for everyone. I have been thinking about posting a couple of Christmassy recipes anyhow, so let’s start with some drink syrups!

For me the Christmas time is a festival of the spices – cinnamon, ginger, clove, and the citrus fruits march proudly as the mood-setters of the season. In other season, spices tend to be in the chorus, deepening the flavour base, but during Christmas they get to be on centre stage. The Scandinavian glögi or glögg, spiced juice, sometimes spiked with alcohol, is the hot Christmas time favourite, but it can be hard to find proper versions in the supermarkets. Many of the ready-to-drink mixes are way too sweet for me, and usually lacking in the spice department.

Therefore, the first recipe is a spiced syrup for glögi, starring cinnamon, clove, fresh ginger, cardamom and orange peel. It is best to make the syrup with whole spices, as they usually hold more flavour and are much easier to sieve away when the syrup is done. A couple of years ago, whole cardamoms were nowhere to be found in Finland, which is funny, as ground cardamom has been very popular for sweet baking for decades here. Luckily, the big supermarkets have started to stock whole cardamoms as well (and the Danish Tiger too!).

Making the syrup is very straight-forward: the simple syrup is made my mixing water and sugar and bringing it to a boil. Then the spices are added and left to steep in the syrup for at least four hours, but overnight would be best. When the syrup’s flavour is properly spiced, the syrup is poured into a bottle through a sieve and then stored in the fridge. The syrup can be added to heated apple or berry juice, cider or red wine to give them a splash of spice and warmth. I like especially hot apple cider with this syrup.

Spiced syrup
About 2,5 dl of syrup

Ingredients
2 dl water
2 dl sugar
4 cinnamon sticks
3 star anise
15 whole cloves
10 cardamom pods
5 cm piece of fresh ginger, peeled and cut into discs
1 zest of an organic orange
(½ tsp. citric acid)

  • Mix the water and sugar in a small pot. Place on medium heat, bring to a boil while mixing continuously. The syrup is cloudy at first but will clear up quickly. Once boiled, remove the syrup from heat.
  • Peel the ginger and cut into discs. Cut the orange zest of orange with a vegetable peeler, avoiding the white pith. Crush the cardamom pods and remove the seeds. Break the cinnamon sticks in half.
  • Add the spices to the syrup, mix. You can add some citric acid to make the syrup keep longer. Let steep covered for at least 4 hours, preferably overnight.
  • When the syrup is spicy enough, pour into a bottle through a sieve. Keeps in the fridge for a couple of weeks.
  • The syrup can be used to spice up heated apple or berry juice, cloudy apple cider or red wine.

Tip! You can deepen the cinnamon flavour of the syrup by bringing the syrup again to a boil once it has cooled down from the first heating.

Hot Holiday Cider
2 portions

5 dl dry cloudy cider or cloudy apple juice (tangy quality works best)
4-8 cl spiced syrup
Cinnamon sticks for garnish

  • Pour the cider in a small pot. Heat carefully on medium heat until it reaches about 65 degrees Celsius, so it’s hot but drinkable. Add some spiced syrup to taste and mix.
  • Pour in glasses and garnish with cinnamon sticks.

wp-1481563065533.jpg

The second syrup is at the same time a true classic and very exotic. I’m talking about oleo-saccharum, a syrup based on citrus oil from citrus peels and sugar. Oleo-saccharum is a whiff on 19th century mixology; a gift from a time when the citruses were not available whole year round, so people made the most with the lemons, oranges, and grapefruits when they were available. Oleo-saccharum is truly a way to maximize pleasure from the citrus, as it unlocks the most potent compounds in the fruit: the essential oils in the peel.  Using oleo-saccharum brings depth and character to drinks and punches that would not be attainable with just juice and simple syrup. Oleo-saccharum really is more than the sum of its parts.

Even if the whole concept of oleo-saccharum seems mystical and peculiar, the method of making is very easy: sugar pulls the oils out of the citrus peels. No need for any heat or manual labour after initial mixing. Oleo-saccharum can be made with any citrus, in this example I used lemons and ruby grapefruits. Oranges, tangerines and limes will would just as fine; different citrus peels can also be combined to make bespoke syrups.

I recommend buying organic citruses where possible when using the peel of the fruit. Organic fruits contain less residues of pesticides etc. and tend to taste better as well. And don’t forget to use the juice or the rest of the fruits after removing the peel! Oleo-saccharum is rich in essential oils of the citrus, so it will come off as cloying when used excessively. A rule of thumb is to use a maximum of 2 cl or oleo-saccharum per drink when combined with citrus juice, and less without juice.

Oleo-saccharum syrup
About 1 dl of syrup

Ingredients
4 lemons or 2 ruby grapefruits
1 dl sugar
½ dl of warm water

  • Wash and dry the fruits. Peel the fruits with a vegetable peeler to remove the fragrant zest, avoiding the bitter white pith.
  • Place the peel strips in a container with a lid or a zip-lock bag. Add the sugar. Toss and knead the peel and sugar together. Squeezing the peels breaks their cellular structure, which allows the oils to seep out more easily. Close the bag or cover the container with a lid and let steep for at least a couple of hours, or preferably overnight. The longer the steeping time, the stronger the flavour.
  • When the peels have had time to steep, a golden yellow elixir will have formed a puddle in the bottom of the container or bag. That’s the stuff you want. Add a couple spoonfuls of warm water to loosen of the syrup and dissolve the remaining sugar. Mix and drain the syrup into a bottle, mixing once in a while to make sure you get as much as possible. The syrup keeps in the fridge about a week.

Oleo-saccharum is great for apple-based glögi to bring a breeze of fresh but deep citrusy character, so feel free to add a little drizzle of this elixir to your hot beverage on top of the spiced syrup above. However, oleo-saccharum is originally an ingredient for cocktails, so I whipped a couple quick and no-frills drinks to brighten up your Christmas days after all that over-eating. I used the juice of the citrus used to make to syrup in each drink to create use for the rest of fruit, as well as providing a full spectrum of the fruits aromas for the drink. The first drink is typical strong aperitive with zesty heart, but the second can be made without alcohol just as well. Enjoy them as a part of your Christmas festivities and feel free to tweak them to your liking.

Deep Yellow
1 drink

2-4 cl gin or aquavit
2 cl red vermouth (Antica Formula)
2 cl lemon oleo-saccharum
2 cl lemon juice, freshly squeezed
(dash of bitters)
Garnish with a lemon peel
Ice

  • Measure the ingredients in a mixing glass. Add ice and mix or shake, if you have a shaker. Strain into a stemmed cocktail glass and garnish with a twist of a lemon peel.

Ruby Refresh
1 drink

2 cl ruby grapefruit oleo-saccharum
4-6 cl ruby grapefruit juice, freshly squeezed
2 cl red vermouth (Antica Formula)
club soda
ice
Garnish with a wedge of ruby grapefruit

  • Fill an old-fashioned glass with ice. Measure the ingredients, minus the club soda, straight into the glass and mix. Top up with club soda and garnish with a wedge of ruby grapefruit.

So, there you go, a couple of drink ideas for the holiday season. What do you think? Interested in steeping some spiced syrup for hot beverages, or stripping some innocent citruses of their peels?

I hope your December is full of flavour!

-Toni

Fish Kara-Age + 2 sauces

Viikonlopun ruoat olivat vielä täysin päättämättä, kun eilen kävelin ruokakauppaan, mikä harvoin on hyvä asia. Ilman suunnitelmia ruokaostokset ovat usein hätäisiä ja jotain jää aina puuttumaan. Tällä kertaa pelastukseksi osoittautui kuitenkin palvelutiski, jossa köllötteli tuoretta turskaa tarjouksessa sekä hyvännäköistä possua. Possu päätyy sunnuntaina pataan hitaasti haudutettavaksi, mutta turskasta sen sijaan tehdään nopea lauantairuoka.

wp-1479560061447.jpg

Turska saa tällä kertaa japanilaisen käsittelyn. Japanilaiset rakastavat friteerattuja ruokia. Siellä käytetään monia erilaisia friteeraustapoja kevyestä tempurakuorrutuksesta paksumpiin kara-ageihin ja paljaaltaan öljyssä friteeraukseen. Aiemmin kirjoitinkin jo tonkatsusta, joka edustaa kara age -tyyliä, samoin kuin tämä turskaresepti. Vaalean kalan sijasta kara-agea voi tehdä myös vaikka kanasta, porsaasta tai kasviksista.

Menetelmä on sama, kuin tonkatsussa: kala paloitellaan, maustetaan suolalla, jauhotetaan, kastetaan kananmunaan ja lopuksi kuorrutetaan ihanan rapeilla panko-korppujauhoilla. Turska (ja suurin osa muista vaaleista kaloista) on kuitenkin niin miedon makuista, että se kaipaa parikseen voimakkaita kastikkeita. Tällä kertaa dippikulhoihin päätyy sitruunamajoneesia ja soijadippiä.

Majoneesi on hyvin yksinkertainen kastike, jota moni tuntuu pelkäävän sen väitetyn vaikeuden vuoksi. Käsin vatkaamalla majoneesin eteen saakin tehdä töitä, ja silti majoneesi saattaa juoksettua. Oikotie loistavaan majoneesiin on ostos-tv:stä tuttu: sauvasekoitin. Öljy, kananmuna ja mausteet vaan lorotetaan korkeaan ja kapeaan astiaan kerralla, jonka jälkeen sauvasekoittimella aloitetaan vatkaaminen pohjalta ja noustaan pikkuhiljaa ylöspäin. Koko koettelemukseen menee alle minuutti, enkä koskaan ole onnistunut juoksettamaan majoneesia tällä tavoin. Valmiin majoneesin voi lopuksi maustaa haluamallaan tavalla, tällä kertaa sitruunalla, mutta esimerkiksi valkosipuli ja kaprikset tai chili toimivat erinomaisesti.

Toinen kastike, soijadippi, taas on niin naurettavan helppo, ettei sitä oikein voisi edes reseptiksi kutsua. Maultaan soijadippi on kuitenkin täydellisen pureva ja raikastava erityisesti juuri friteeratuille ruoille, mutta se toimii erinomaisesti myös esimerkiksi erilaisten nyyttien kastikkeena. Sen tekemiseen ei montaa sekuntia kulu: kolme ainesosaa kulhoon, nopea sekoitus ja sen oli siinä. Tässä käyttämäni raaka-aineet ovat aasialaisesta ruokakaupasta, mutta markeiteistakin pitäisi nämä tuotteet nykyään löytyä.

Turska kara-agen voi tarjota lisukkeiden kanssa pääruokana tai sellaisenaan snäcksinä tai alkupalana. Lisukkeena kara-agen kanssa toimii tietenkin riisi ja salaatti, myös kaaliraaste toimisi hyvin. Salaattiin kannattaa valikoida raikkaan makuisia kasviksia, esimerkiksi retikkaa, retiisejä ja vihreää paprikaa. Salaattikastikkeen voi myös sekoittaa öljystä ja kalan kastikkeisiin käytetystä riisiviinietikasta. Riisistä aion kirjoittaa oman kirjoituksen lähiaikoina, koska se on aasialaisissa ruoissa kaiken perusta.

Turska kara-age + 2 kastiketta
Kahdelle pääruokana

Sitruunamajoneesi
2 dl ruokaöljyä (viinirypäleensiemen, rypsi, rapsi, auringonkukka)
1 kananmuna
1 tl (riisi)viinietikkaa
½ tl suolaa
1 luomusitruunan kuori
½ sitruunan mehu

  • Mittaa korkeaan ja kapeaan astiaan 2 dl ruokaöljyä. Riko öljyn joukkoon kananmuna ja mittaa mukaa myös viinietikka ja suola. Kananmuna vajoaa astian pohjalle.
  • Laske sauvasekoitin astian pohjalle. Jos sauvasekoittimessasi on tehonsäätö, aloita sekoittaminen pohjalla pienellä teholla ja nopeuta sitten sekoitin täyteen vauhtiin. Kun kananmunan rakenne on hajonnut ja vaalea emulsio alkaa muodostua astian pohjalle (10 sekuntia), ala nostaa sekoitinta hitaasti ylöspäin. Sekoita pikkuhiljaa kaikki öljy majoneesin sekaan. Surauta lopuksi koko komeus pinnalta pohjaan varmasti sekaisin.
  • Raasta majoneesin mausteeksi sitruunankuorta ja purista puolikkaan sitruunan mehu mukaan. Sekoita lusikalla. Maista ja lisää tarvittaessa suolaa.

Soijadippi
2 rkl hyvälaatuista soijaa tai tamaria
2 rkl riisiviinietikkaa
1 tl paahdettua seesamiöljyä

  • Mittaa ainesosat astiaan ja sekoita nopeasti.

Turska kara-age
300 g turskafileetä tai jotain muuta vaaleaa kalaa
suolaa
½ dl jauhoa
1 kananmuna
2-3 dl panko-korppujauhoja
öljyä friteeraukseen

  • Leikkaa kalafileistä ruodot pois. Ne ovat fileen keskellä, tunnet ne sormella. Leikkaa viilto ruotojen molemmilta puolin, jolloin fileestä tulee housujen muotoinen. Leikkaa fileet sitten suupalan kokoisiksi.
  • Mausta kalapalat suolalla. Pyörittele palat jauhoissa, jotta niihin tarttuu tasainen kuorrutus.
  • Riko kananmuna kulhoon tai syvälle lautaselle. Vatkaa munan rakenne rikki. Laita panko-korppujauhot toiselle lautaselle. Kastele kalapalat yksitellen ensin kananmunassa ja heitä sitten korppujauhojen päälle. Kierittele pala joka sivulta korppujauhoissa ja painele korppujauhot vielä kunnolla kiinni kalaan.
  • Kaada kattilan pohjalle noin 2-3 cm kerros ruokaöljyä. Lämmitä öljy kuumaksi liedellä keskilämpöä hieman kuumemmalla. Voit kokeilla öljyn lämpöä leivänpalalla: jos öljyä alkaa kuohua, kun laitat leivänpalan kattilaan, ja leipä ruskistuu noin puolessa minuutissa, öljy on tarpeeksi kuumaa.
  • Laske kalapalat yksitellen pihdeillä kattilaan. Friteeraa kerralla vain sen verran kalaa kuin kattilaan helposti mahtuu. Kun kala on saanut kauniin kullanruskean värin (muutama minuutti), käännä palat ja paista vielä hetki toiselta puolelta. Kun kala on paistettu molemmilta puolilta, nosta palat talouspaperilla vuoratulle lautaselle valumaan. Paista loput kalat samalla tavalla.

wp-1479560013864.jpgwp-1479560018314.jpgwp-1479560024811.jpgwp-1479560050739.jpg

Tarjoa kala kastikkeiden, riisin ja salaatin tai kaaliraasteen kera.

Miltäs vaikuttaa? Oletko kokeillut majoneesin tekemistä tai friteeraamista kotona?

-Toni

This weekend’s food was still a mystery to me when I walked into a grocery store yesterday. That’s never good, as it usually leads to hasty impulse buys and something is always forgotten. However, this time the service counter saved me: fresh cod was on sale, and also nice looking pork was waiting for me behind the glass. The pork will be slow cooked on Sunday, but the cod would become Saturday’s easy and quick lunch.

This time the cod gets a Japanese treatment. The Japanese love to deep-fry. They have several different techniques for deep-frying, ranging from light tempura to crunchier kara-ages and even “naked” frying in oil. Earlier I wrote a recipe for tonkatsu, which is a kara-age dish, much like this fish recipe. In addition to fish, kara-age can be made with chicken, pork, beef or vegetables.

The technique is the same as with the tonkatsu: the fish is cut into pieces, flavoured with salt, tossed in flour, dipped in egg and finally coated with oh-so-crispy panko bread crumbs. Cod (and many other white-fleshed fish) is very tender flavour-wise, so I paired it with two strong sauces: lemon mayo and tangy soy dipping sauce.

Mayonnaise is a simple but satisfying sauce, but many seem to think it’s too hard to make yourself. If you whisk it by hand, you do need to put quite a lot of effort into it, and it may curdle anyway. However, for this there is a shortcut: immersion blender (just like on shopping channels in the 90s). When using an immersion blender, you can just measure the ingredients to a tall cup and blitz the whole thing in less than a minute, and I’ve never managed to curdle mayo making it this way. You can flavour the mayo as you please, I used lemon for this recipe, but garlic, capers and chili are excellent options as well.

The other sauce, the soy dip, is even more simple and it takes just seconds to make. Its flavour is something to behold, though. It has a perfect bite to refresh fried foods, and it also works well with for example dumplings and gyozas.

The cod kara-age can be served on its own as a snack or a starter, or with rice and salad or shredded cabbage as a main course. I recommend selecting fresh tasting vegetables for the salad, for example radishes, daikon, and green pepper. The salad dressing can be made with oil and the same rice wine vinegar that go into both sauces. And about the rice; I plan on writing a separate post about rice soon, as it is the cornerstone of most Asian cuisines, so stay tuned!

Cod Kara-Age + 2 sauces
For two as main course

Lemon mayonnaise
2 dl of oil (grape seed, canola, sunflower all work)
1 egg
1 tsp. (rice) wine vinegar
½ tsp. salt
zest of an organic lemon
juice of a half lemon

  • Measure the oil in a tall cup. Add the egg, vinegar and salt. The egg will fall to the bottom.
  • Lower the immersion blender into the cup, all the way to the bottom. If there are speed settings in your blender, start blending with low speed holding the blender in the bottom of the cup and then increase the speed. When the egg is starting to emulsify (about 10 seconds), start lifting the blender slowly to incorporate more oil in to the emulsion. Finally, blend through the whole mayo to make sure it’s all blended.
  • Grate some lemon zest and squeeze the juice of half a lemon into the mayo and mix with a spoon. Taste and add salt or lemon juice if necessary.

Soy dipping sauce
2 tbsp. good quality soy sauce or tamari
2 tbsp. rice wine vinegar
½ tsp. toasted sesame oil

  • Measure the ingredients into a cup and mix.

Cod Kara-Age
300 g of cod fillets
salt
½ dl of flour
1 egg
2-3 dl of panko bread crumbs
oil for deep-frying

  • Cut the bones out of the fish fillets. They are located in the centre of the fillets, you can feel them with your finger. Make a cut on both sides of the bones, and remove the strip with the bones. The fillets are shaped like trousers now. Cut the fillets into bite-sized pieces.
  • Season the fish with salt. Toss the pieces in flour to coat them.
  • Break the egg in a deep plate and whisk lightly. Pour the panko into a separate plate. Dip the pieces of fish individually first in the egg and then toss on the bread crumbs. Roll the piece in the bread crumbs to coat it on all sides, and press to make the bread crumbs stick to the fish. Repeat with rest of pieces.
  • Pour a layer of 2-3 cm of oil into a pan and heat on medium-high heat. You can check if the oil is hot enough by putting a piece if the bread into the oil: if the oil bubbles and the piece of bread gets a nice golden colour about in 30 seconds, the oil is hot enough. Put the pieces of fish into the oil individually with a pair of tongs. Don’t put too many pieces at once; the pieces need room to cook and the oil might cool too much. When the pieces a starting to look nicely golden brown (a couple of minutes), turn them and fry the other side golden as well. When cooked, lift the pieces from the oil onto a plate lined with paper towels to drain excess oil. Fry rest of the fish.

Serve the fried fish with the sauces, rice, and salad or shredded cabbage.

So, what do you guys think? Have you tried making mayo at home of deep-frying before?

-Toni


Porkkanakakku | Carrot Cake

Lupasin kirjoitella sen kuuluisan porkkakakkureseptin, jota useampi on vuosien saatossa kysellyt, tänne eetteriin, mutta en osannut päättää milloin se kannattaisi tehdä. Porkkanakakku edustaa montaa hyvää asiaa ja muistoa, joten sen julkaiseminen vaatii myös oikeat olosuhteet. Nyt kuitenkin tuntuu siltä, että joku saattaisi hyötyä pienestä annoksesta lohtua, joten aika on koittanut.

wp-1478703505112.jpg

Tässä kakussa yhdistyy monta upeaa tekijää: mehevä rakenne, makeuden ja mausteisuuden yhdistelmä sekä sopiva annos hapokkuutta. Uskaltaisin jopa sanoa, että se hipoo omassa kategoriassaan huippua. Liioittelen tarkoituksella, mutta en kovin paljoa – tämä kakku on kehujensa arvoinen, vaikka itse sanonkin.

wp-1478689131331.jpg

Reseptin olen aikoina kirjoitellut lehtikantiseen reseptikirjaan muistiin, joskaan ei pienintäkään arvausta että mistä. Yksi reseptin tärkeimmistä ainesosista (porkkanat pois lukien) on öljy. Voi on ansainnut paikkansa rasvojen kuninkaana, mutta tämän tyyppiseen kakkuun se ei sovi, sillä se tekee leivonnaisen rakenteesta yleensä tiiviin ja murustelevan. Öljy ei kilpaile voin kanssa mausta, mutta rakenteeseen sillä on suuri vaikutus: öljy säilyttää kakun kosteana ja mehevänä sekä tekee kakusta joustavan, sienimäisen. Öljyllä leivottu kakku on yhtä aikaa kevyt ja mehevä.

Kuvissa näkyy monivärisiä porkkanoita, mutta kakun voi tietenkin tehdä ihan tavallisista oransseista. Suosittelen kuitenkin luomuporkkanoita, koska ne ovat yleensä tavallisia makeampia ja usein mehukkaampia. Porkkanat kannattaa myös raastaa aika karkeaksi raasteeksi, koska karkea raaste säilyttää paremmin kosteuttaan ja jälleen vaikuttaa kakun rakenteeseen.

wp-1478703498134.jpg

Makean porkkanan vastapainoksi kakkuun leivotaan reilusti mausteita, itse käytän kanelia ja inkivääriä. Myös neilikkaa voi käyttää, joskin se tekee kakusta aavistuksen jouluisemman. Muskottipähkinäkin sopisi varmasti myös erinomaisesti. Kakun kohottamiseen käytetään sekä leivinjauhetta että ruokasoodaa. En osaa sanoa onko välttämätöntä käyttää molempia, mutta eipä se iso vaiva ole.

Kuorrute on kakun kruunu ja huipennus. Se on helppo ja kohtuullisen nopea tehdä, mutta sen energiasisältöä ei kannata laskeskella, siihen ei nimittäin mitään kovin terveellistä käytetä. Tuorejuustona käytän Philadelphiaa, koska se sisältää kilpailijoitaan vähemmän lisäaineita, esimerkiksi tavallisessa Philadelphiassa ei ole liivatetta, jonka käyttöä tuorejuustoissa en ymmärrä alkuunkaan. Kevytversiot voi myös suosiolla jättää hyllyyn.

Moni oli järkyttynyt, kun kerroin laittavani tämän reseptin blogiin. Heitä lepytelläkseni lupasin käyttää kakun alkuperäistä nimeä, eli

Toni-tädin porkkanakakku

Ainesosat
Kakku
4 munaa
3 dl sokeria
3 dl jauhoja
2 tl ruokasoodaa
1½ tl leivinjauhetta
2 tl kanelia
1 tl inkivääriä (kuivamauste)
½ tl vaniljajauhetta
½ tl suolaa
4 keskikokoista porkkanaa raastettuna (reilu 300 g)
1,5 dl ruokaöljyä

Kuorrute
20 g huoneenlämpöistä voita
150 g maustamatonta tuorejuustoa
1-2 tl appelsiinimehua
ripaus vaniljajauhetta
250-300 g tomusokeria

  • Laita uuni lämpiämään 190 asteeseen. Pingota leivinpaperi 24 cm irtopohjavuoan pohjan ja reunojen väliin, voitele vuoan reunat. Raasta porkkanat karkeaksi raasteeksi.
  • Vatkaa kulhossa munat ja sokeri vaaleaksi vaahdoksi. Sekoita keskenään jauhot, sooda, leivinjauhe, suola ja mausteet. Siivilöi kuivat aineet muna-sokerivaahdon sekaan ja sekoita tasaiseksi varovasti nuolijalla.
  • Sekoita joukkoon porkkanaraaste (älä pelästy, sitä on aika paljon) ja ruokaöljy. Sekoita tasaiseksi ja kaada taikina voideltuun irtopohjavuokaan.
  • Laita kakku uuniin keskitasolle ja paista 45-60 minuuttia. Kakku on kypsä, kun sen keskelle pistetty puutikku tulee ulos puhtaana. Ota kakku uunista ja anna jäähtyä täysin.
  • Tee kuorrute. Sekoita huoneenlämpöinen voi ja tuorejuusto keskenään. Lisää vanilja. Lisää suurin osa tomusokerista ja appelsiinimehusta ja sekoita. Sekoittaminen käy helpoiten haarukalla. Kuorrute saa olla jäykkää, jos se tuntuu löysältä niin lisää tomusokeria.
  • Kuorruta jäähtynyt kakku tuorejuustokuorrutteella. Levitä kuorrutetta pyörivin liikkein lusikalla kakun päälle. Kuorrutteen on tarkoitus jäädä epätasaiseksi.
  • Koristele kakku halutessasi esimerkiksi raastetulla appelsiininkuorella. Nauti.

Vinkki: Reseptin voi hyvin myös puolittaa pienempään vuokaan.

Siinä se. Tulipa vähän tyhjä olo. Toivottavasti tästä on jollekin iloa.

Koittakaahan jaksaa, tuuli kääntyy kyllä aikanaan.

-Toni

wp-1478689134985.jpg

Porkkanaraaste saa olla karkeaa | The carrots can be grated coarsely

wp-1478690798169.jpg

Muna-sokerivaahto pitää vatkata vaaleaksi ja kuohkeaksi | Whisk the eggs and sugar until pale and fluffy

wp-1478690792355.jpg

Älä pelästy porkkaraasteen määrää, sitä kuuluukin olla reippaasti | Lots of carrot for a carrot-y cake

wp-1478703511370.jpg

Earlier I promised to share with you my famous carrot cake recipe, but I couldn’t decide when to do it. The carrot cake represents all that’s good in the world and there are many golden memories attached to it, so it would need exceptional circumstances to publish the recipe. However, I get a feeling that some people could use some consolation after recent events, so I think the time has come.

Many wonderful factors collide in this cake making it an exceptional specimen in its category: the moist texture, combination of sweetness and spice, and a right amount of acidity. In my opinion, it’s a culmination point. I’m, of course, exaggerating, but only slightly. It truly is a masterpiece.

I’ve written the recipe in my leaf-covered recipe book many years hence, but absolutely no idea where from. However, the most crucial thing about the ingredients (excluding the carrots) is the oil. Butter has earned its place as a royal among fats, but it makes dense and crumbly texture in cakes. Cooking oil does not compete with flavour, but it makes a huge difference in texture: a cake baked with oil is moist, light, and spongy. It’s fluffy and succulent at the same time.

There are multi-coloured carrots in the pictures, but you can definitely use regular orange ones. I recommend using organic carrots, though, they are usually sweeter and juicier. Furthermore, I recommend using a coarse grater as coarse textured carrot retains more moisture and therefore enhances the cake’s texture.

To counter the sweet carrot, an ample dose of spice is needed. I use cinnamon and powdered ginger, but one could also add cloves and nutmeg, albeit that makes the cake a bit Christmassy. Both baking soda and baking powder are used to make the cake rise. I don’t know if it is necessary to use both, but it’s not much of a trouble.

The crown of the cake is the frosting. It’s easy and quick to make, but you shouldn’t worry about its dietary composition; it is comfort food after all. As cream cheese, I use Philadelphia because it contains less additives than many of its rivals; for example Philadelphia doesn’t contain gelatine. And you can forget about the light versions.

Carrot cake

Ingredients
Cake
4 eggs
3 dl sugar
3 dl flour
2 tsp. baking soda
1½ tsp. baking powder
2 tsp. cinnamon
1 tsp. ginger (powder)
½ tsp. vanilla
½ tsp. salt
4 medium carrots grated (generous 300 g)
1,5 dl cooking oil

Frosting
20 g butter in room temperature
150 g cream cheese
1-2 tsp. orange juice
pinch of vanilla
250-300 g icing sugar

  • Pre-heat oven to 190 degrees Celsius. Tighten a parchment paper between the bottom and sides of a 24cm spring form. Butter the sides of the pan. Grate the carrots coarsely.
  • In a bowl, whisk the eggs and sugar until light and fluffy. Mix together the flour, salt, soda, baking powder and spices, and sift into the egg and sugar foam. Mix gently with a spatula.
  • Mix in the grated carrot (yes, there is plenty of it) and oil. Mix until even and pour into the pan.
  • Put the cake in the oven and bake for 45-60 minutes. The cake is done when a wooden skewer comes out clean when it’s inserted in the middle of the cake. Remove the cake from oven and let cool completely.
  • Make the frosting: mix the cream cheese and butter. Add vanilla. Add most of the icing sugar and the orange juice, and mix with a fork until the icing sugar in incorporated. The frosting should be thick, so if it’s still runny, add more icing sugar.
  • Crown the cooled cake with the frosting. Spread the frosting with a spoon using circular movements. It’s supposed to remain uneven.
  • Decorate the cake with for example grated orange zest, if desired. Enjoy.

Tip: You can half the recipe for a smaller pan, like I did in most of the pictures.

So, there it is. I feel a little empty inside now; I’m sure it will pass, though. I hope this recipe brings joy to someone out there.

Take care, munchkins, the tide will turn soon.

-Toni

wp-1478689163197.jpg