Kesä näyttää viimein saapuvan pikkuhiljaa tänne pohjolaan. Sen mukana saapuu myös himo herneitä ja muita kesäisiä kasviksia kohtaan. Kesäinen sää saikin minut selailemaan pitkästä aikaa Ottolenghin Plenty More -opusta, joka on ainakin omasta mielestäni modernin kasvisruoan merkkiteoksia. Kyseisestä teoksesta on aiemminkin täällä vilahtaneet jo thaihenkinen linssisoppa ja vihreä papupata. Ottolenghin kasvisreseptit eivät ole sieltä yksinkertaisimmasta päästä, mutta vaivannäkö palkitaan komeasti välimerellisen muhkealla makumaailmalla.
Tässä reseptissä on hieman erikoista se, että hernetäytteeseen laitetaan sideaineeksi vain yksi kananmuna. Täyte on siis hyvin irtonaista, mutta se pakastetaan käsiteltäviksi pihveiksi. Pakastaminen onkin tosi kätevä tapa käsitellä tällaisia raaka-aineita, mutta se vaatii luonnollisesti myös aikaa. Nämä kroketit voi kuitenkin tehdä paistamista vaille valmiiksi ja säilyttää pakkasessa vaikka kuinka pitkään.
Tein kroketit kotimaisista pakasteherneistä, jotka kuulemma pakastetaan muutaman tunnin sisällä poiminnasta. Kroketit voi tietenkin kesän tullen tehdä tuoreista herneistä, mutta se vaatii jo vähän enemmän käsityötä kuorimiseen (ja myös rahallista panostusta). Mintuksi kannattaa valita ”vahvana minttuna” myytävä paksuruotinen yrtti, jossa on merkittävästi perinteistä minttua voimakkaampi maku. Jos vahvaa minttua ei kaupasta löydy, käytä hieman enemmän tavallista minttua.
Herne-minttukroketit
10-12 krokettia
Ainekset
2 pss (400 g) pakasteherneitä tai vastaava määrä tuoreita
2 salottisipulia
1 valkosipulinkynsi
1 rkl valkoviinietikkaa
pieni nippu vahvaa minttua
1 kananmuna
suolaa ja pippuria
Panerointiin ja friteeraukseen
2 kananmunaa
jauhoja
panko-korppujauhoja
1 litra rypsi/rapsiöljyä
Kastike
200 g ranskankermaa
2 rkl turkkilaista jogurttia
1 rkl oliiviöljyä
2 tl limemehua
suolaa ja pippuria
minttua
- Tee ensin kroketit. Kuori ja silppua sipulit. Kuumenna tilkka oliiviöljyä paistinpannulla tai kasarissa keskilämmöllä ja lisää sipulit. Kuullota viitisen minuuttia, älä ruskista. Lisää ruokalusikallinen valkoviinietikkaa, sekoita ja hauduta vielä minuutti. Ota syrjään.
- Sulata herneet. Laita herneet monitoimikoneeseen ja surauta sen verran, että herneiden rakenne rikkoutuu. Voit muussata herneitä kevyesti myös kulhossa perunanuijalla. Silppua mukaan kourallinen minttua. Lisää mukaan paistetut sipulit. Mausta suolalla ja pippurilla. Riko mukaan yksi kananmuna ja sekoita massa tasaiseksi.
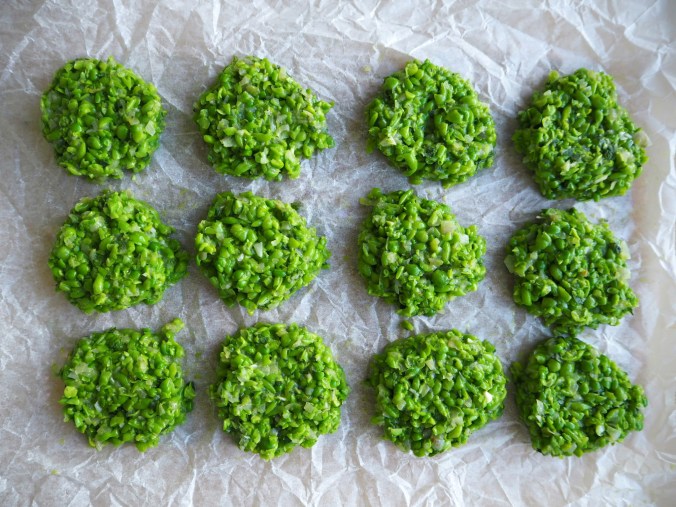
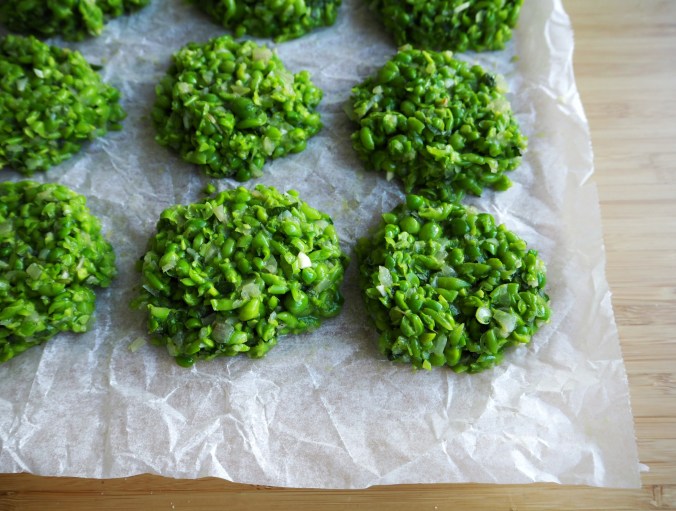
- Ota leikkuulauta tai muu astia, joka mahtuu pakkaseesi. Laita laudan päälle leivinpaperi. Lusikoi hernemassaa laudalle 10-12 keoksi ja painele kevyesti pihveiksi. Massa on hyvin irtonaista, joten sitä on helpointa siirrellä lusikalla. Laita hernekroketit pakkaseen ja anna niiden pakastua ainakin tunti, tai kunnes ne ovat kokonaan jähmettyneitä.
- Ota kroketit pakkasesta. Ota esiin kolme kulhoa: laita yhteen reilu desi jauhoja, riko toiseen kananmunat ja vatkaa niiden rakenne rikki, ja kaada kolmanteen reilusti korppujauhoja. Paneroi kroketit yksi kerrallaan: pyörittele kroketti ensin kauttaaltaan jauhoissa, kasta sitten kananmunassa ja kuorruta lopuksi koko pihvi korppujauhoissa. Painele korppujauhot kunnolla kiinni krokettiin. Jos paistat kroketit heti, jätä ne sulamaan tunniksi huoneenlämpöön. Voit myös pakastaa ne ja paistaa tarvittaessa vaikka yksitellen.
- Tee kastike tässä välissä: silppua muutama ruokalusikallinen minttua ja sekoita muiden ainesten kanssa pienessä kulhossa. Jätä jääkaappiin maustumaan.
- Laita uuni lämpiämään 200-asteiseksi. Kaada öljy kattilaan ja laita kuumenemaan hellalle. Voit testata öljyn kuumuuden paistamalla leivänpalalla: jos öljyyn pudotettu leipä alkaa heti kuplia ja paistuu noin puolessa minuutissa kullanruskeaksi, öljy on tarpeeksi kuumaa. Paista kroketit kattilan koosta riippuen 2-4 kerrallaan. Paista muutama minuutti per puoli ja käännä pihvit reikäkauhaa tai pihtejä käyttäen. Kun kroketit ovat kullanruskeita, nosta ne talouspaperin päälle valumaan. Laita valutetut pihvit uuniin lautaselle tai uunivuokaan kypsymään loppuun samalla kun paistat loput kroketit. Laita lopuksi viimeisetkin kroketit uuniin vielä muutamaksi minuutiksi.
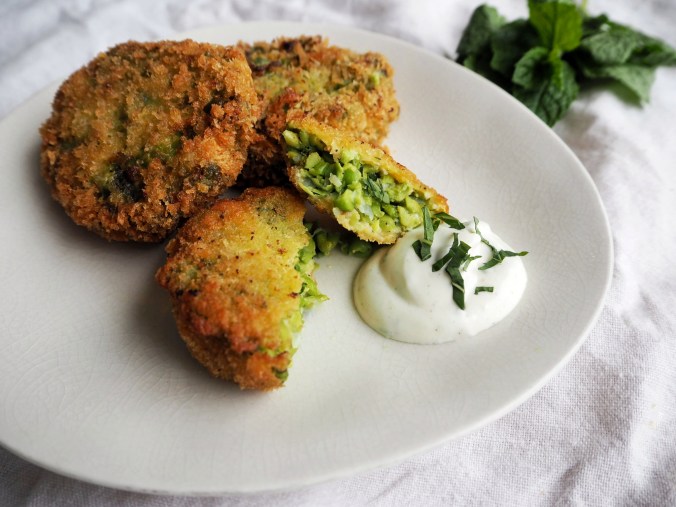
- Tarjoa kroketit kastikkeen ja halutessasi lisäkkeen, esimerkiksi pitaleivän tai kuskusin kanssa.
Huom! Öljyn voi säästää ja käyttää ainakin vielä toisen kerran uudestaan. Säilytä käytetty öljy jääkaapissa. Älä kaada öljyä viemäriin, vaan kaada jäähtynyt öljy takaisin pulloonsa ja laita energiajätteeseen muovipussissa.


—
The summer is finally reaching the North (some days more than others), which made me want to eat all the wonderful summer vegetables. In these situations, I pick out Ottolenghi’s ‘Plenty More’ from the bookshelf. To me Plenty More is one of the quintessential modern vegetarian cook books that has a unique perspective on meat-free cooking. Ottolenghi doesn’t really substitute meat with anything but creates gorgeous Mediterranean inspired dishes that just don’t happen to include meat. I have previously shared with you a couple of the recipes from Plenty More: Thai Red Curry Soup and Broad Bean Stew. Ottolenghi’s recipes are not the simplest or the quickest, but the effort is rewarded with wonderfully sensory experience in the Mediterranean style.
I have made these pea croquettes a couple of times and they have always turned out perfect. The fresh combination of peas and mint balances the rich flavour of the deep frying nicely, so you don’t have to worry about feeling greasy after eating these. I have used deep frying quite a lot on this blog, but I like it as a method because it maximises flavour and keeps the food from drying out. You just have to make sure the oil is hot enough to make sure you don’t end up with greasy croquettes, as hot oil doesn’t absorb into the food. Also, make sure to drain the croquettes on some tissue paper to drain the excess oil.
The odd thing about this recipe is that there’s only one egg to bind the mass. Therefore, the filling will be very loose but the trick is to form the patties and put them in the freezer to become solid. Freezing is a super handy method for handling these kind of ingredients, but it takes some time to freeze the patties. However, you can make these croquettes ready for frying and store them in the freezer for days before cooking.
I made the croquettes with good-quality frozen peas. You can, of course, use fresh peas but they are not yet available here in Finland and they would be way too expensive since you need quite a lot. Also, the peeling takes a while too. I prefer to use strong mint for this recipe to really give the recipe the freshness it needs. The mint varieties with thick stalks are usually the strongest in flavour.
Pea and mint croquettes
10-12 croquettes
Ingredients
400 g frozen peas or fresh shelled peas
2 shallots
1 garlic clove
1 tbsp. white wine vinegar
a small bunch of strong mint
1 egg
salt and pepper
Coating and deep frying
2 eggs
flour
panko breadcrumbs
1 litre vegetable oil
Sauce
200 g sour cream
2 tbsp. Turkish yoghurt
1 tbsp. olive oil
2 tsp. lime juice
salt and pepper
mint
- Make the croquettes first. Peel and mince the onions and garlic. Put a frying pan on medium heat and add some oil and minced onion and garlic. Cook the onions and garlic for about five minutes until translucent but not browned. Add a tablespoon of vinegar and stew for a minute, then set aside.
- Thaw the peas. Place the peas into a food processor and blitz a couple of seconds just to break them down. Do not grind into paste. You can also lightly mash the peas in a bowl with a potato masher. Add the onions and a small bunch of minced mint. Season to taste with salt and pepper. Add the egg and mix.
- Take out a cutting board or other tray that fits into your freezer, and line it with parchment paper. Spoon the pea mixture into 10 to 12 evenly sized dollops onto the board. Use wet fingers to pat them down to round croquettes, or patties, about 3cm thick. Put the croquettes into the freezer for at least on hour, or until firm.
- Take the frozen croquettes out of the freezer. You’ll need three bowls for the coating: flour into one, break two eggs into the second, and a nice pile of breadcrumbs in the third. Coat the croquettes individually: first dip the croquette in flour, them dip it in the egg and make sure the egg covers the croquette, then roll the croquette in the breadcrumbs. Press the breadcrumbs tightly to the croquette so they stick nicely. Do the rest of the croquettes the same way.
- If you are cooking the croquettes now, leave them to thaw in room temperature for about an hour. You can also put them back in the freezer and use later.
- Make the sauce: mince some mint and mix with the rest of the ingredients in a small bowl. Season to taste with salt and pepper. Put the sauce in the fridge until needed.
- Now for the cooking. Pre-heat your oven to 200 degrees Celsius. Pour the oil into a pan and place on medium-high heat. Wait until the oil is hot enough. You can test the oil with a piece of bread: drop the piece of bread in the oil. If the oil starts to bubble right away and the bread turns into nicely golden brown in about 30 seconds, the oil is hot enough.
- Deep fry a couple croquettes at a time. Put them into the oil with a slotted spoon and fry for a couple of minutes before turning. Fry the other side for a couple of minutes too. The croquette should now be nicely golden brown. If the frying happens too fast, lower the temperature of the oil. If the croquettes don’t seem brown, crank up the heat. Take the cooked croquettes out of the oil with a slotted spoon and place on a plate with tissue paper to drain the excess fat. Then transfer the croquettes into the oven on a plate to keep warm while you cook the rest of the croquettes. Finally, put the last croquettes into the oven for a couple of minutes, then serve with the sauce and perhaps some pita bread or couscous. Enjoy!
NB! You can use the oil at least once for frying. Store the used oil in the fridge. When it’s time to dispose of the oil, do not pour it down the drain. Put it back into its bottle and dispose of according to local instruction.